
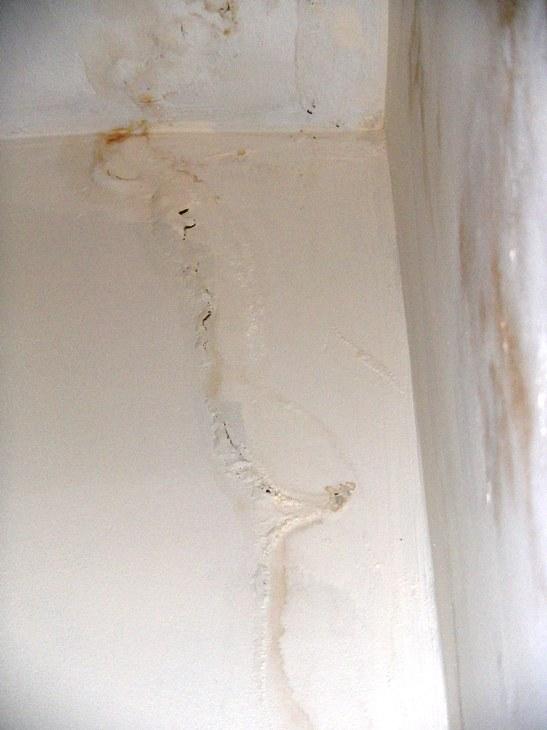
A homeowner in a wet, windy part of Scotland has a 1965-built house with a chimney that used to serve a coal fire, then a gas fire, and has been out of use since a gas leak was found. The stack was repaired, the bricks sealed with a waterproof coating, a new cowl fitted, and the flashings tidied up. Despite all that, damp patches have started showing on the upstairs chimney breast, a crack has opened in the plaster next to it, and the damp is now creeping onto the ceiling. It gets worse after wet, windy weather. The loft is dry, the felt is dry, the tiles look sound and the gutters are clear. They want to know where the water is coming from before spending any more money.
This is a common one in UK houses, especially with older stacks that have been part-decommissioned. Before you start spending money, do a couple of simple checks so you're fixing the cause, not the symptom. I'll run through what's likely happening, what you can safely check yourself, what a proper fix looks like, and the usual bodges that don't last.
What's likely going on
Nine times out of ten with a disused chimney showing damp near the top of the breast, you're dealing with one (or a combination) of three things: condensation inside the flue, trapped moisture in the brickwork, and rainwater getting in via the stack or flashings. In this case the story points strongly at the first two.
Here's the chain of events. The flue is cold because there's no fire warming it. Warm, moist air from the house still finds its way up the chimney (the fireplace isn't sealed at the bottom), hits the cold brickwork inside the stack, and condenses. That water then soaks into the porous brick from the inside. On top of that, when the stack was 'sealed' externally with a waterproof coating, any moisture already in the bricks, and any new moisture arriving from inside the flue, now has nowhere to go. Water always finds a way out somewhere, and it tends to show up on the warm side, which is your plaster. Add in years of coal-fire use and you've got hygroscopic salts in the brick and plaster that actively pull moisture out of the air, which is why damp patches can appear even in summer.
The wet-and-windy correlation is a red herring on its own. Driven rain will make any porous wall damper, but if the roof, flashings and cowl are genuinely sound, the main driver here is what's happening inside the flue, not outside it.
Simple checks first
Don't guess, prove it. Work through these before calling anyone back out:
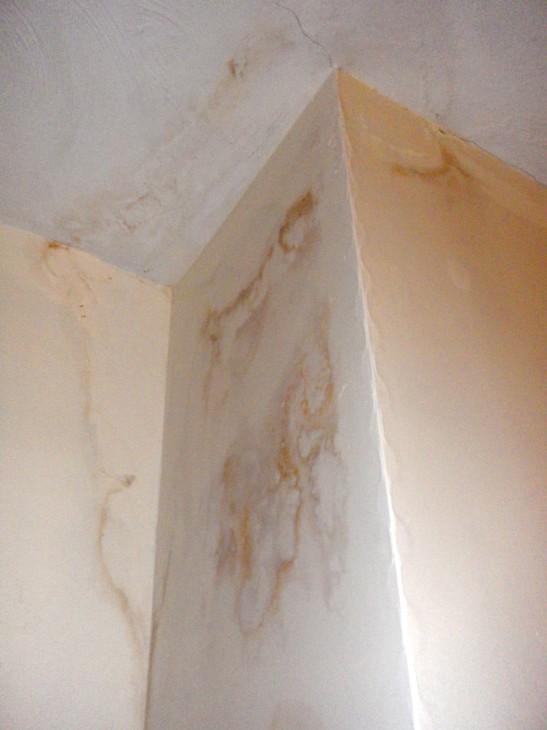
- Look at where the damp is worst. If it's highest up the breast and on the ceiling near the stack, that points to the flue itself (condensation or rain down the pot). If it's low down or in a band, think bridged DPC or penetrating damp lower down.
- Check the cowl. On a disused flue, the cowl should be a purpose-made vented cap that keeps rain out while allowing airflow. Have a look with binoculars from the ground. Is it intact, sitting square, and is there any staining running down the stack from it? A gas terminal (designed for active gas appliances) fitted to a disused flue can restrict ventilation and allow rain ingress, so check what type has been fitted.
- Feel the chimney breast in the loft again after a spell of wet weather. Cold is normal. Actually damp to the touch is not. If it's dry in the loft but wet in the room below, the moisture is arriving inside the flue or through the breast itself, not through the roof.
- Check the flashings properly. Lead should be dressed neatly, tucked into a chase and pointed, with no lifting edges. Bitumen slapped onto lead is a warning sign, it usually means someone was chasing a leak and didn't fix the cause. Bitumen also cracks and traps water underneath.
- Look at the fireplace opening downstairs. Is there any airflow at all? Hold a bit of tissue near it. No movement means the flue isn't ventilating, which is exactly the condition condensation loves.
- Salts test: if the damp patches feel slightly furry, fluffy or leave a white bloom when they dry, you've got hygroscopic salts pulling moisture from the air. That confirms historic contamination from the old coal fire.
- Check inside the pot if you can get a look. A capped or restricted pot with no ventilation will guarantee condensation problems in a disused flue.
Proper fix: good, better, best
Good: ventilate the flue properly
The cheapest and often most effective fix is to make sure the flue can breathe. That means an air path in at the bottom (an airbrick or a vented cover in the fireplace opening) and an air path out at the top (a proper vented cowl, not just a gas terminal). Air moves through, the flue stays dry, condensation stops forming. If you're going to keep the fire disconnected for a while, this is the minimum you should do. It costs very little and often clears the problem within a few weeks once things dry out.
Better: ventilate, then make good
Once the flue is ventilating and the brick has had a chance to dry out (give it a full season, not a fortnight), deal with the damaged plaster. If the salts are heavy, the affected plaster will keep pulling moisture no matter how many times you paint over it. The honest fix is to hack off the contaminated plaster back to brick, let it dry, and re-plaster using a salt-resistant or renovating plaster system. Then a stain block and redecorate. Skipping the salt-resistant layer is the classic mistake, the stain comes back through emulsion within months.
Best: ventilate, reinstate a working appliance, and address the external coating
If you're planning to reconnect the gas fire anyway, that's actually part of the cure. A working appliance warms the flue and drives moisture out rather than letting it sit and condense. Get that done by a Gas Safe engineer, no shortcuts there. At the same time, get a competent roofer or leadworker to review the flashings properly and strip off any bitumen bodges. Lead should be doing the work, not tar. Longer term, the waterproof coating on the stack is worth a conversation: sealing porous brick externally can trap moisture in the wall, and a breathable masonry treatment is usually kinder to old brickwork than a full waterproof paint.
Bodges and mistakes to avoid
- Slapping bitumen over lead flashings. It hides the problem for a season, then cracks and lets water track underneath where you can't see it.
- Sealing the fireplace opening downstairs to 'stop the draught'. All you're doing is trapping moisture in the flue and guaranteeing the damp gets worse.
- Painting stain block straight over salty plaster. The salts will pull moisture through and the stain will reappear.
- Wrapping the whole stack in more waterproof coating. If moisture is coming from inside, sealing the outside makes it worse, not better.
- Firing up the gas fire before the leaking pipework has been sorted by a Gas Safe engineer. That's not a DIY area, full stop.
When to bring in a specialist
Gas work is Gas Safe, stop there. Get the leaking supply sorted and the appliance recommissioned properly before you rely on the fire to help dry the flue. For the flashings, if there's bitumen on the lead and you've had mixed results from previous contractors, get a proper roofer or leadworker to look at it, not a general handyman with a tub of black goo. If the damp keeps spreading after you've ventilated the flue and given it a season to dry, get a damp surveyor in who isn't tied to a treatment company, so you get an honest opinion.
Reality check
Drying out a chimney that's been sealed up and quietly gathering moisture for a couple of years takes months, not days. Even once you've got the ventilation right, expect the plaster patches to look worse before they look better as the wall gives up its moisture. Don't rush to redecorate. If it were my house, I'd get the ventilation sorted, get the gas side made safe and working, live with it through a wet season, and only then hack off and re-plaster. The prep is what makes it last. Water gets in, then it shows up somewhere else, and with chimneys, giving it a way back out is usually more important than trying to seal it in.