
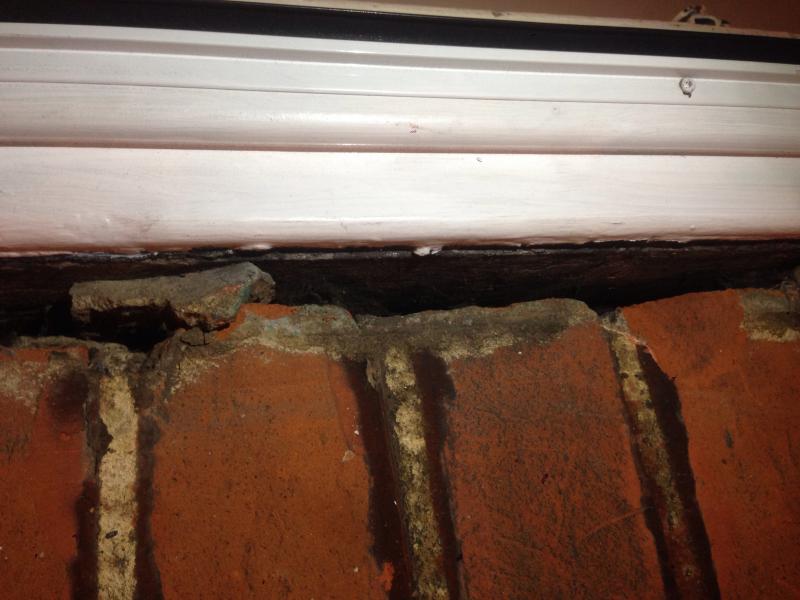
A homeowner has noticed a fairly wide gap – roughly half an inch – running down the side of their front door frame where it meets the brickwork. The original bedding material (looks like a bit of old lime or sand/cement pointing) has crumbled out over the years as the house has moved and the timber frame has expanded and contracted. The door itself feels solid and the wall doesn't shake when it's closed. They want to know how best to fill the void, whether expanding foam is the right call, and what the finishing material should be.
This is a common one in UK houses, especially older stock where timber frames have been jammed into brick openings and pointed up with whatever was to hand. Before you start spending money, it's worth understanding what's actually going on so you fix the cause, not just the symptom.
What's likely going on
When a door frame is fitted into a masonry opening, there's almost always a gap left around the frame for tolerance. That gap gets packed with something – traditionally mortar, sometimes just plaster, and on newer jobs expanding foam. Over years of the timber swelling in winter, shrinking in summer, and the door being slammed a few thousand times, a rigid mortar fill cracks and eventually drops out. That's exactly what you're looking at.
The good news: on the side of a door frame, that fill isn't structural. The frame is held in place by its fixings into the brickwork (screws, frame fixings or older cut nails into plugs). The material in the gap is really there to close the gap against draughts, weather and insects, and to tidy it up visually. So you don't need something ferociously strong – you need something that seals, tolerates a bit of movement, and looks tidy.
Simple checks first
Before you fill anything, run through these:
- Push firmly on the frame from inside and out. If it flexes or moves independently of the wall, the fixings have failed or were never adequate. Filling the gap won't fix that – you'll need to add proper frame fixings through the jamb into the brick first.
- Close the door with a bit of force. If the surrounding wall or plaster judders, again the frame is loose.
- Look at the top of the gap where it meets the lintel or soffit. If you can see daylight or feel a draught, the void goes all the way through and needs filling properly rather than just skinned over.
- Check the bottom of the frame and the threshold for any sign of rot, dark staining or soft timber. Water gets in, then it shows up somewhere else – often at the base of the jamb where you can't see it.
- Poke the remaining old fill with a screwdriver. If big chunks come away easily, rake it all out back to sound material before you start.
If the frame is solid and the gap is just cosmetic weatherproofing, you're in easy territory. If it moves, sort the fixings first.
The proper fix – good, better, best
Good – foam and cover trim
Rake out the loose material, vacuum the dust, and fill the void with a low-expansion polyurethane foam made for door and window frames. The low-expansion type matters – standard gap-filling foam can push a frame out of square as it cures. Let it go off fully (usually a few hours, follow the tin), then trim it back flush with a sharp knife.
Because cured foam looks awful and degrades in UV, cover it. A slim timber architrave or a strip of planed softwood (something like 30mm x 10mm) pinned to the frame and lapped over the gap does the job neatly. Mitre the corners at the head, prime and paint, and run a bead of good-quality exterior-grade silicone or polyurethane sealant between the timber and the brickwork to close it off against weather. That flexible joint is what lets the door and wall move slightly without cracking the finish.
Better – foam backing with a mortar face
Same prep, same low-expansion foam – but only fill the gap to within about 15-20mm of the outside face. Once cured and trimmed back, point the outer face with a sand and cement mortar (a 4:1 mix with a bit of plasticiser is fine for most situations, or use a lime mortar on older solid-wall properties where cement is too hard and will damage soft bricks).
The foam behind takes up the movement and insulates; the mortar face gives you a traditional look that matches the rest of the pointing. Finish with a thin bead of low-modulus silicone right in the angle between the mortar and the timber frame – that's your movement joint and it stops the mortar cracking away again in a year or two.
Best – proper reseat and weather detail
If you're already doing the work and the frame has been suspect, this is when you'd pull the architrave (if any), check and add frame fixings, replace any rotten timber at the base, pack the void with foam, point the outer face in matching mortar, and finish with a neat sealant joint. On an exposed elevation you might also fit a small drip or weather bar detail at the head to stop water tracking down the reveal into the gap in the first place.
For most homeowners with a solid frame and a tidy-looking house, the middle option is the sweet spot – long-lasting, looks right on a brick property, and within the reach of a careful DIYer.
Bodges and mistakes to avoid
- Filling the gap with straight silicone or decorator's caulk. It'll sag out of a gap that wide, look terrible, and split within a year.
- Using high-expansion foam. It can bow the frame and you'll be chasing sticking doors for months.
- Ramming in fresh mortar with no backing and no movement joint. It cracks and falls out again – which is exactly why you're doing the job now.
- Painting over cured foam and calling it done. UV eats it, water gets behind it, and the whole lot crumbles.
- Ignoring a wobbly frame. No filler in the world will hold if the frame is moving every time the door shuts.
When to bring in a specialist
If you find the frame is loose, the timber is rotten at the base, or the brickwork above the door (the lintel area) is cracked or sagging, stop and get someone to look at it properly. A cracked lintel is a different job entirely and not one to hide behind a bit of foam and paint. Likewise if the door is a fire door in a flat or HMO – the fill around it has to meet specific requirements and it's not a freestyle job.
Reality check
Set aside half a day for the prep, filling and first cover. The foam wants a few hours to cure before you trim it, and any mortar or sealant wants 24 hours or more before it sees proper weather – so pick a dry, mild day, ideally with another dry day to follow. Keep the door shut and locked while the foam cures so nothing shifts. Cover the threshold and the door face with masking tape and a dust sheet – cured foam on a painted door is a nightmare to get off cleanly.
One last thing: when you rake out the old fill, you may find the void is deeper or wider than it looked, or that there's daylight through to the inside. That's normal on older houses. Deal with what you find – foam is very forgiving of odd-shaped voids – and take your time on the finish. The prep is what makes it last.