

Help avoid another diy disaster - please! 
I'm belatedly seeking help with applying lime putty which I've been using for patching on old lime-rendered walls (tenement flat in Scotland) but have not managed to avoid cracking in the finish.
The latest attempt is a fire opening which I'm getting ready to have a stove fitted. A first coat, with hair, went on and dried fine but the finish coat is showing cracks as in the pic. I'm using pre-mixed bagged 'rendering stuff'.
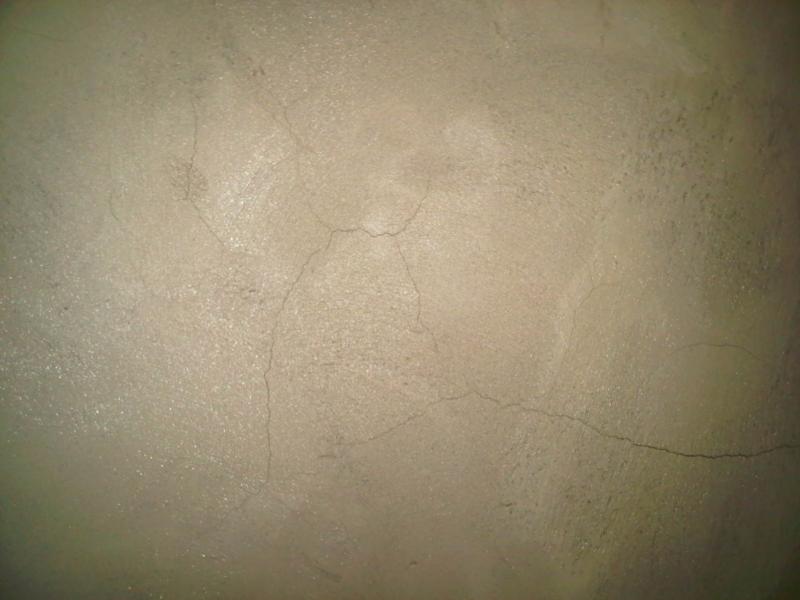
I thought I had it sussed when I realised that you're supposed to keep the putty damp as it dries but some cracks appeared after a couple of days. The wall didn't get it's usual soaking yesterday and lots more cracks are appearing - five days since the finish coat went on.
I did the sides of the opening with hydrolic lime render a couple of days ago (stove was due to be fitted this week - now postponed) and they look fine at the moment but is there any hope for the back wall or will I have to knock it all off?
The stove being fitted is convector sides and back, radiant at the front.
I'm belatedly seeking help with applying lime putty which I've been using for patching on old lime-rendered walls (tenement flat in Scotland) but have not managed to avoid cracking in the finish.
The latest attempt is a fire opening which I'm getting ready to have a stove fitted. A first coat, with hair, went on and dried fine but the finish coat is showing cracks as in the pic. I'm using pre-mixed bagged 'rendering stuff'.
I thought I had it sussed when I realised that you're supposed to keep the putty damp as it dries but some cracks appeared after a couple of days. The wall didn't get it's usual soaking yesterday and lots more cracks are appearing - five days since the finish coat went on.
I did the sides of the opening with hydrolic lime render a couple of days ago (stove was due to be fitted this week - now postponed) and they look fine at the moment but is there any hope for the back wall or will I have to knock it all off?
The stove being fitted is convector sides and back, radiant at the front.

")