DIY Two Storey Extension

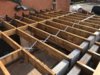
That groundwork must have cost you dear

Yes, that's where I made the biggest cost blunder! It cost me £2000 to get rid of the garage (£2000 to de-value my house!). The man with digger and three grab trucks cost £2200, then £4800 for the pilings and concrete! None of which anyone will see!

he's approaching 40 skips for his works!

Wow! Has he not been using grab trucks, a lot more cost efficient for the general dig as I'm sure you'd agree!

to sit there and constantly shout out "you're losing your bond" - sort of helped!

I've got the wife who often comes out to inspect, although she only says, "is that all you've done"! :LOL:
 
Sponsored Links
Wow! Has he not been using grab trucks, a lot more cost efficient for the general dig as I'm sure you'd agree!
We have a council owned flagged verge between us and the road so access is a problem and the drives are narrow. I only got the lorry up because I have a widened drive and I was prepared to put my fingers in my ears as all the council's flags snapped in half!
 
The man with digger and three grab trucks cost £2200, then £4800 for the pilings and concrete! None of which anyone will see!
Can you brake down how much was the pilling, and the concrete? How many cubic meters you got in?
 
In awe... inspirational stuff! Our ground is full of bricks, old milk bottles, bones, concrete but yours' really is next level.

So difficult to sit down and cost something like this on your own so hope the costs start to stay steady. Looking great so far.
 
Sponsored Links
Can you brake down how much was the pilling, and the concrete? How many cubic meters you got in?

The company gave me a quote based on sending the piles down to 4m and then mine was £20 per pile per metre after that. I think three piles went to about 6m, the others were within the 4m.

They quoted the concrete in metres based on the concrete pour being 450mm width x 350mm depth and mine was for 21m length. They quoted £60 (inc vat) per metre for this so £1260 for the concrete. About the same for the re-inforced cages that ran the length of the trenches. The piles were about £1200, some site setup costs, engineer drawings etc... here was my quote ex vat.

Piling Quote PNG.png
 
I thought so at the time, all we had to do was excavate the trenches. We are North West too, not sure if that makes a difference!

Well I did a piling job in Sussex for a 6m x 6m extension. The driven piles plus filling the tubes in concrete and leaving rebar poking out cost £5k +vat. (Quotes ranged £4k to £9k).

The cost to do the reinforcing metalwork and cast the concrete ringbeam was about another £4k.

Pricing is significantly higher in this area (Sussex, Surrey, Kent).
 
Demolition of the Small Extension

The small extension was next. I didn't want to just rip this down with machinery, so I took it down slowly from the roof down.


The wall where the previous extension butted up to. The building inspector has said this needs opening up for a vertical DPC so i'll have to rebuild this section of wall under the lintels.

View attachment 164023
Hello,
im a first time poster (long term lurker) but the beam lintel through the original extension looks extremely ropey to me. Its not sitting on enough of a bearing length on the top course of bricks and then because of the brick bond underneath where there are 1/4 or 1/5th bricks where the brickwork was cut out. Its then sheared through at least one of the full bricks (3 courses down).

You can see the beam has consequently dropped on the left hand side, hence the cracking in the brickwork on top of the lintel.

It really doesnt look to clever at all. Could only recommend getting in a structural engineer and get a good few acrow props under it for the time being.

Hi

Yep, it was noticed when I took the old extension down. The movement has been like that a while from what i understand (I believe the extension was done in the late 1980's. I have had a structural engineer visit and confirm the lintel is adequate to take the weight of the new extension floor, and that the bearing was okay (although they didn't see the side you're seeing now as it wasn't exposed). When I removed the plasterboard from the wall this is what i found...

thumb_IMG_7553_1024.jpg
thumb_IMG_7556_1024.jpg
thumb_IMG_7563_1024.jpg


I'm going to prop the lintel and rebuild the bearing wall as I have to cut the wall end to open the cavity for the new extension.
 
Bloody brilliant. I think your brickwork looks great. This takes me back. Need to build something.

Keep up the sterling work and keep posting pics.
 
Rebuild Lintel Bearing Wall

I had to prop the already in-situ lintels with props and then remove the "rubble/makeshift wall".

thumb_IMG_7563_1024.jpg


Most of the wall under lintel pulled away without much effort.

thumb_IMG_7566_1024.jpg


Started building that side of the wall.

thumb_IMG_7575_1024.jpg


Built the block wall under the lintels and then the new extension block wall. I installed a concrete lintel under the lintels and packed any gaps with slate.

thumb_IMG_7593_1024.jpg


The extension wall built and joined up with a lintel to the rest of the extension.

thumb_IMG_7634_1024.jpg
 

Attachments

  • thumb_IMG_7613_1024.jpg
    thumb_IMG_7613_1024.jpg
    393.6 KB · Views: 316
Installing the floor joists

I had to find the level of the existing house floor which was perhaps easier due to the already installed lintels which support the current first floor. Even so, I drilled the first hole on the far right to try and see the existing joists. From this I could ensure where the floor level was.

The joists were 400mm centres so I marked out the positions on the existing house wall and stitched drilled the holes, then used an SDS drill and hammer and chisel to out the holes; thirteen in total. I had to make good a few bricks that had crumbled when making the holes.

IMG_7672.jpg


I decided to treat the joists before installing them into the walls.

IMG_7685.jpg


I mortared the gaps around the joists.

IMG_7720.jpg


I installed noggins at the midway point across the floor and herringbone straps at 1/3 and 2/3 positions using a string line to ensure they were in line. Lateral restraint straps were also installed at 1/3, 1/2 and 2/3 positions; perhaps a little overkill!

IMG_7699.jpg


Joists from above.

IMG_7701.jpg


Chipboard floor laid and covered with DPM sheeting to keep the rain off. Of course it lashed down for about two weeks after this! :rolleyes:

IMG_7782.jpg


Block work going a little higher.

IMG_7803.jpg
 

Attachments

  • IMG_7708.jpg
    IMG_7708.jpg
    398 KB · Views: 312
Last edited:

DIYnot Local

Staff member

If you need to find a tradesperson to get your job done, please try our local search below, or if you are doing it yourself you can find suppliers local to you.

Select the supplier or trade you require, enter your location to begin your search.


Are you a trade or supplier? You can create your listing free at DIYnot Local

 
Sponsored Links
Back
Top