Concrete walls

Joined
31 Jan 2009
Messages
280
Reaction score
23
Location
Fife
Country
United Kingdom
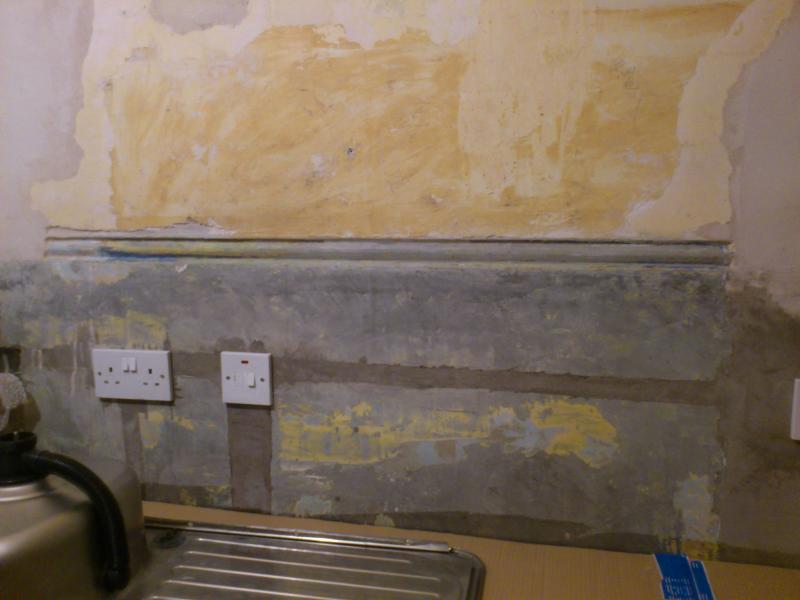
Been stripping my kitchen out for a replacement. Turns out that the bottom half of the walls are what from the hardness must be concrete. However it is very smooth almost polished finish. Then about half way up the wall is run in the same "concrete" finish a dado rail effect. Above this it is plastered as normal.

The house was built in 1950, and joy of joy the bottom half of the wall has several coats of gloss paint under the tile effect wall paper. How common was this as I have never come across it before?
 
Sponsored Links
Sure


Shows a section of the wall with the "concrete" dado rail, with mostly stripped "concrete" wall below. Bit left to do before the tiling starts. The patch of plaster to left is from removal of old central heating controls and the one to the right from bricking up a hatch.

The "concrete" wall nicely shows up the where I have channeled it for electrics. To avoid blowing the plaster on the opposite side of the wall, the channels where cut with an angle grinder and diamond disk. Previous adhoc additions to the electrics had blown the plaster on the opposite side of the wall (wall is internal and built in brick) in the lounge. I had previously put it down to careless workmen, but the surface is so hard using a chisel to break the surface would likely blow the newly plastered lounge wall again.

I back filled the channeling with a 5:1 plastering sand cermet mixture, but it is no where near as smooth as the old "concrete" finish which was the finish of a skimmed plaster wall, it is just way to hard to be plaster. The other thing is that the "concrete" stuff is is way better done than any of the original plastering in the house.

You can also see just above the double socket where the plaster is damaged that the concrete dado rail extends for a bit under the plaster finish.

The one plus point to the "concrete" finish is that it is hard enough to enable the removal of the gloss paint with a shave hook without damage. The scraper comes of worse for wear. I figure the gloss paint needs to come off because tile adhesive won't work on gloss paint, especially as the top coats peal off in large sheets when using a filling knife.
 
A popular thing a few years ago was to render half way up the wall (especially in bathrooms, and out houses and some kitchens) and tile straight on to the render. The tiles really stuck well and years later when I have had to take the tiles off the walls when it has been done like this I found it easier to hack the tiles and the render off together and replaster the whole area again before tiling. It seems like the area you call "concrete" may be just render, and may have been done as a "feature in the room, more so the O G moulding on the top, which would of been run thru like they used to run coving and decorative plaster moulds. That was the times when plasterers made all the decorative work that you see in old houses. Why they did that in your room I cant say , maybe the plasterer wanted to show off his skills and the owner of the house let him....Maybe they were going to tile on top of the render but decided that it may look better or be cheaper to leave it as it was and paint it... ;) Would be nice to know if any houses around you have "similar" features...
 
Sponsored Links
n some houses the hallway was done in a hard render with a dado rail, and often textured with a nap (stipple) finish , or above and below with different surfaces (different naps or one section plain)

The dado was run with a a hand held moulding tool. My old man has a few of them but god knows where they are left. They were wooden, about 4 -6 inches long , but had metal in the surface that made contact with the render, wrapped up around the outside a bit for fixing.

The external corners/arrices were rounded so that they would not be knocked, but had a 'bird's beak' at bottom for skirting and and top for coving/cornice.

The 'bird's beak' is just taking the rounded corner into a square corner an inch or so higher than the skirting line.

THis was an area where the rules about ' not putting stong material onto weaker material, and 'don't use cement on soft bricks' didn't apply
:D
 
Interesting, as I have never seen anything like it before.

What I don't understand is how they got such a smooth finish on the render. It has the surface smoothness of a skimmed plaster wall, where as all the cermet renders I have seen are rather rough to the touch in comparison.

I would imagine the rest of the houses in the street are similar, certainly next doors will be as it is a semi :)
 
The trick (like most plastering) is to catch it at the right time. Too soft and you move the surface about and have to float it again. Too hard and you can't close it in so easily and it looks patchy - flat inplaces and like sandpaer in others, and in iohers with surface sand rubbing off.

You need a 'fatty' mix and sometimes would trowel in a bit of stonger stuff with a sofet sand - but thiis was not the usual.


Probably the reason you don't see much of it is that outside work has a texture to increase the surface area and stand up to weathering more .

I suppose inside we've not seen much because newer houses would not have it, and those that do are painted or papered so how would you know unless you investigated or wondered about a dado that looks like it was run in situ.

If anyone has done grano , another dying aspect of the trade, you will know how to get a rough aggregate totally smooth .
 

DIYnot Local

Staff member

If you need to find a tradesperson to get your job done, please try our local search below, or if you are doing it yourself you can find suppliers local to you.

Select the supplier or trade you require, enter your location to begin your search.


Are you a trade or supplier? You can create your listing free at DIYnot Local

 
Sponsored Links
Back
Top