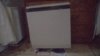
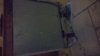
I’ve used storage heaters for close on forty years and have two new and two old storage heaters. I currently power three of them during daylight as we have solar panels. One is a twenty year old (I reckon) Dimplex which I purchased a year ago which I had left in our porch but want to now connect & power. As anyone knows they are not exactly lightweight -") I want to move this to our upstairs which means I need to take the bricks out, move it then reassemble. I don’t know the model’s code. My question is does anyone have any suggestions on the procedure? I've loosened the front and back panels so it should now come apart easily. Cheers BC
I want to move this to our upstairs which means I need to take the bricks out, move it then reassemble. I don’t know the model’s code. My question is does anyone have any suggestions on the procedure? I've loosened the front and back panels so it should now come apart easily. Cheers BC
I want to move this to our upstairs which means I need to take the bricks out, move it then reassemble. I don’t know the model’s code. My question is does anyone have any suggestions on the procedure? I've loosened the front and back panels so it should now come apart easily. Cheers BC