We live and learn...
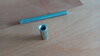
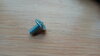
I have only just discovered that a threaded screw driven straight in to a thermolite block provides a stronger fitting than a screw plus regular brown nylon plug.
https://www.wessexfixings.co.uk/news/how-to-fix-to-thermalite-durox-and-aircrete-blocks
I knew that regular brown expansion plugs are pretty useless and that aside from resin there are dedicated fixings for aerated blocks but I was surprised that the thread on a screw was better than a brown plug.
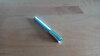