first time coving... adhesive usage & tips please

Joined
28 Jul 2015
Messages
2,404
Reaction score
546
Country
United Kingdom
I've been asked to cove a room, now a wall has been removed... 3 sides to do, around 3.5m each section.

What is the standard amount of coving adhesive to use per section? (5Kg bags) are there any reasons not to use plasterboard adhesive?

What length is suitable for fitting by one person, doubt I can keep a 3m section in place on my own.

TIA
 
Sponsored Links
Assuming standard plaster coving i.e. Gyproc
I think I use to work on 1kg/3m but it depends on undulations, if any, in ceiling and how liberal you are with the adhesive but a bit of trial and error required
3m can be fixed by yourself but can be bit unwieldly when lifting into place. I use to place a couple of masonry nails on the bottom line of the coving run to rest it on as I manoeuvred it into position (and hold in position till adhesive had gone off)
I have always used cove adhesive because its cove adhesive
 
How I've done it in the past is to hold the coving in place and mark a line the wall and ceiling. Remove coving and make another line inside those which will be the contact area of the coving. Score the walls and ceiling in a cross hatch pattern to give the adhesive something to key into. Put the adhesive on the coving and squish the coving in place. I normally bang a couple of nails in the wall to support the coving until the adhesive has set. Take care on the corners - its not like mitering skirting boards! You should have a mitre template with the coving - practice on a piece of offcut and remember to reverse it if doing external mitres around a chimney breast for example. You'll have to practice to find the right amount of adhesive but I would start with say, at least couple of mugfulls of adhesive per metre and see how you go from there. Make it slightly on the wet side to give yourself extra time. You will need an assistant for those lengths if its your first time.
 
Sponsored Links
Many thanks Gents.

Some good pointers in the replies.

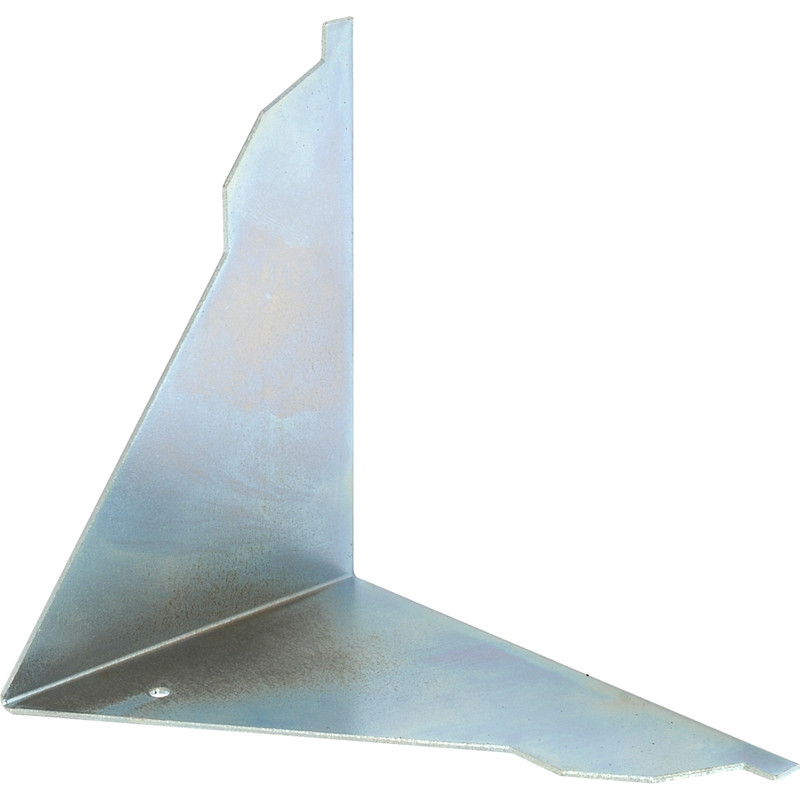
Sorry, final question... Is a mitre box better than the blue mitre thing you can buy or is it much of a muchness?
 
Many thanks Gents.

Some good pointers in the replies.

Sorry, final question... Is a mitre box better than the blue mitre thing you can buy or is it much of a muchness?
I used this recently for my first time doing coving -

I found it to work perfectly, but I am a dab hand with hand tools etc so if you are not certain then maybe something that gives a bit more support might be better.

I also used the tubes of pre-mixed. I know the mix yourself can be better and cheaper but I didnt have too much to do and it just meant a lot quicker and less mess / mixing etc.
 
Many thanks Gents.

Some good pointers in the replies.

Sorry, final question... Is a mitre box better than the blue mitre thing you can buy or is it much of a muchness?
If you use a standard mitre box make sure its deep enough to take the coving, I used one of these that lays the coving flat
Use a couple of small pieces of coving to cut sample corners so you get your head around things otherwise you end up with all sorts of weird and wonderful joints
 
Last edited:
I don't do a lot of coving but I use my Nobex Champion frame saw when working with plaster of paris cornices.

As others have suggested, you need to remember that you are working upside down when using a mitre box etc. By that I mean that the first cut should 45 degrees as you look down at the coving, the lower part of the cut should be at 90 degrees.

I tend to work on my own, so I too use supporting nails, top and lower. I also strike 2 lines to make sure that that I am not going to twist off too much.

In the past, I have allowed the coving to follow the ceiling, bad move if you have a significant bow. The next length doesn't line up. The pencil lines just above and below help.
 
I use coving adhesive.
5kg will be ok for about 20/25 metres.
Don't go crazy, that adhesive is very strong and if you don't believe me try removing coving.
If you mix it nicely and the ceilings/walls are reasonably straight, you won't need any nails.
Vacuum effect takes care of things.
 
Skill builder on youtube has a great coving how to.
Also only use gyproc powder cove adhesive. Just that one. Don't bother with any other as it sticks. Others fail, trust me I've tried them all. I only use mastic over tiles as not so easy to stick cove with.
Seal the cut dry joints with Pva as you go and put adhesive in joint at you fit so mixed adhesive squeeze out. Stops the joint cracks that are so common. Keep the bottom level as you fit.
Finish on a long length so you can twist a tad vs short lengths which you can't. This matches up.
That cove adhesive dries hard so sponge clean as you go or you will give yourself more work.
Buy bigger bag as you will be throwing plenty as it sets faster than a diy can fix plus you will probably mix more than you need in each batch

Put pictures up if stuck. I'll try help. Remember there are only 4 mitres. I've struggled to teach some though while others just get it
 
Last edited:

DIYnot Local

Staff member

If you need to find a tradesperson to get your job done, please try our local search below, or if you are doing it yourself you can find suppliers local to you.

Select the supplier or trade you require, enter your location to begin your search.


Are you a trade or supplier? You can create your listing free at DIYnot Local

 
Sponsored Links
Back
Top