How to finish exposed alcove wall bottom?

Joined
5 Feb 2014
Messages
62
Reaction score
0
Country
United Kingdom
IMG_1225.JPG


In my house, previous owned renovated without plastering the bottom of walls inside alcove cabinets.

It would have been just like these cowboys to just put skirting board over the unfilled bottom - but they didn't even do that.

Brickwork is exposed.

How should I go about making this good? What products, tools and techniques?

(I'm a newbie to plastering).

IMG_1226.JPG
 
Sponsored Links
It's pretty normal to not plaster all the way to the bottom of walls, if it's touching the ground you can get issues with damp

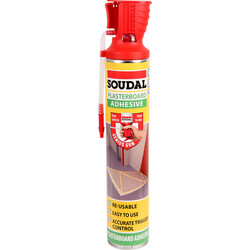
Skirting round the bottom can be fitted using expanding foam easy enough
 
It's pretty normal to not plaster all the way to the bottom of walls, if it's touching the ground you can get issues with damp
I already have issues with damp in and near that alcove/breast (and elsewhere) - https://www.diynot.com/diy/threads/discolouration-damp-on-chimney-breast-alcove.600014/ This morning, I removed from this alcove cabinet two board games that were full of furry stuff.

Skirting round the bottom can be fitted using expanding foam easy enough
So, you mean you wouldn't in-fill with plaster/whatever but, rather, you'd use expanding foam, maybe skim it off flat and add the skirting over that? Like, maybe glue it onto the dry foam, rather than nail it?
 
No I'd use the below, few decent squirts into hole, give it a few minutes then hold skirting in place for another few minutes or wedge with something heavy

 
Sponsored Links
Decide on a style and height of skirting board and cut it to length/shape. Make sure it fits together inside the cupboard before doing anything else. Once you are happy it will fit then use the foam thomp 1983 has suggested and in the manner he has suggested. You don't need to completely cover the brickwork with it, (the skirting board will do that), just put a blob at each end of the brickwork and one in the middle.
Do one wall at a time and hold the skirting in place, (making sure it is correctly positioned), until it has gripped then do the next one.
If you have scribed the sides to fit the rear profile, or cut the corners at 45 degrees, you will need to fit the rear piece first so you can 'pivot/swing the side pieces into place.
 
Maybe fix battens with strips of damp course on the back if damp, flush with wall surface to screw or nail the skirting to.
 

DIYnot Local

Staff member

If you need to find a tradesperson to get your job done, please try our local search below, or if you are doing it yourself you can find suppliers local to you.

Select the supplier or trade you require, enter your location to begin your search.


Are you a trade or supplier? You can create your listing free at DIYnot Local

 
Back
Top