Level my subfloor

Joined
30 Oct 2008
Messages
114
Reaction score
0
Location
Berkshire
Country
United Kingdom
Hi people,

I plan to lay a solid floor into two adjoining rooms. They are only connected by a doorway. The rear of the house appears to have sunk by about 1" relative to the front and about 1" at the sides relative to itself. In other words there is a crown in the rear floor - or more of a fold, and another fold near to the transition between the two rooms.

I have taken a very amateurish survey of the floor using a piece of 4m CLS, which is how my measurements above were derived.

I have considered various options to remedy, but most of them will cause additional problems with things like cupboards and other transitions.

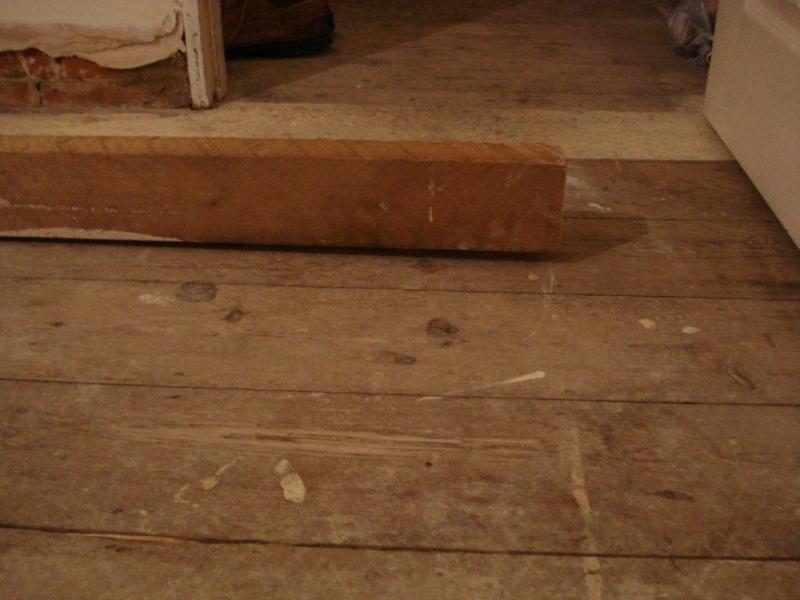
There's a few pictures taken with a 2m piece of timer over the crown.


I think, since the problem is more serious than I thought, I would like views of how to tackle this in the best - as opposed to the easiest way.
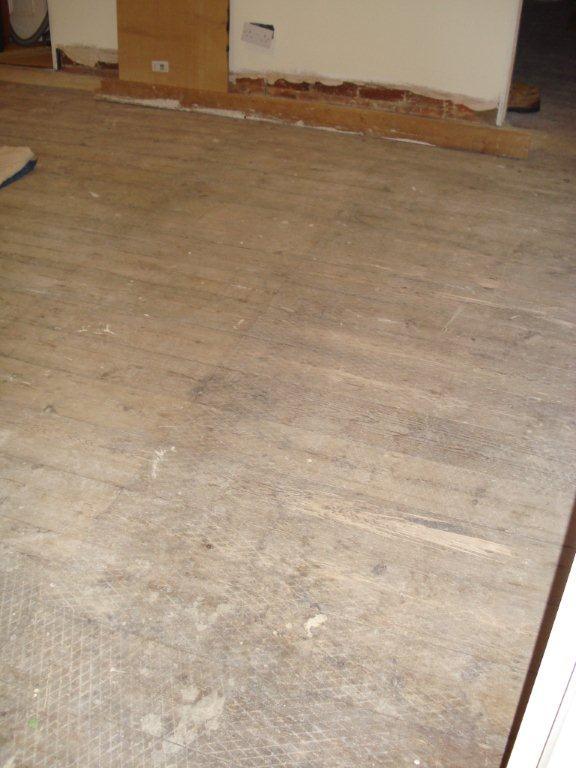
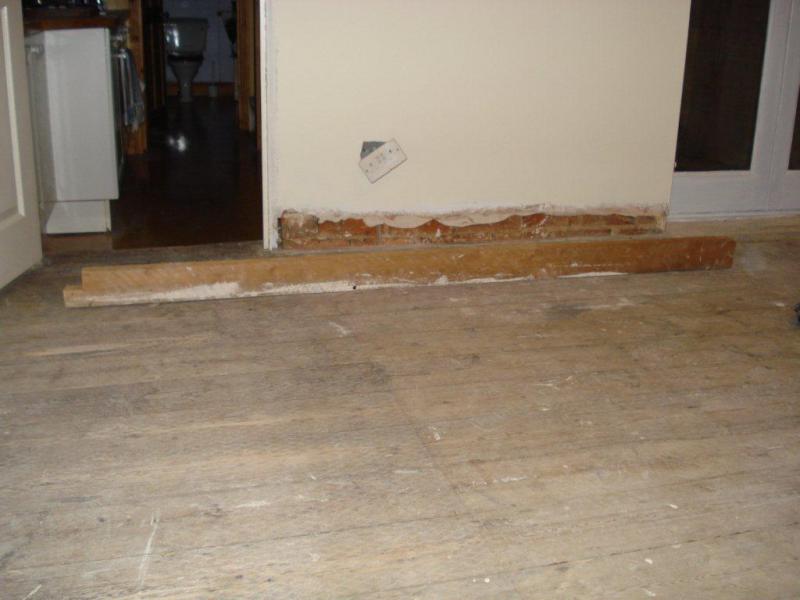
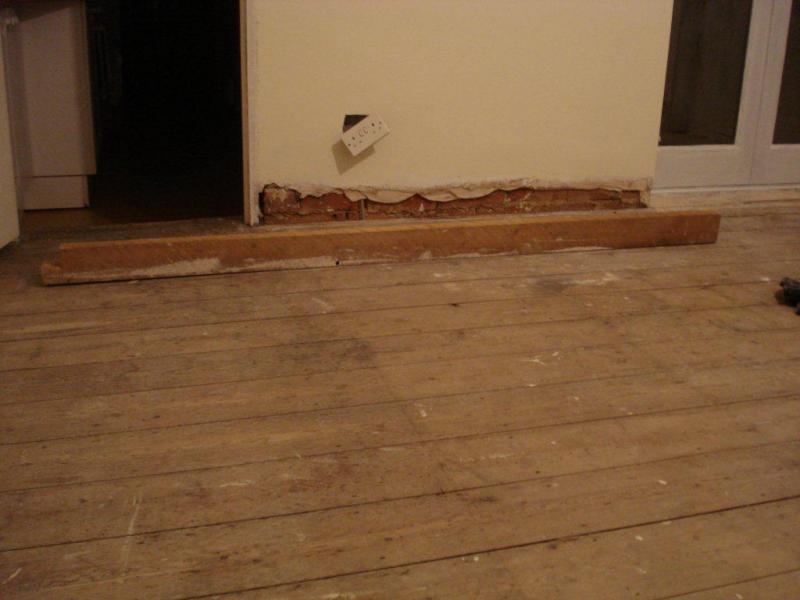
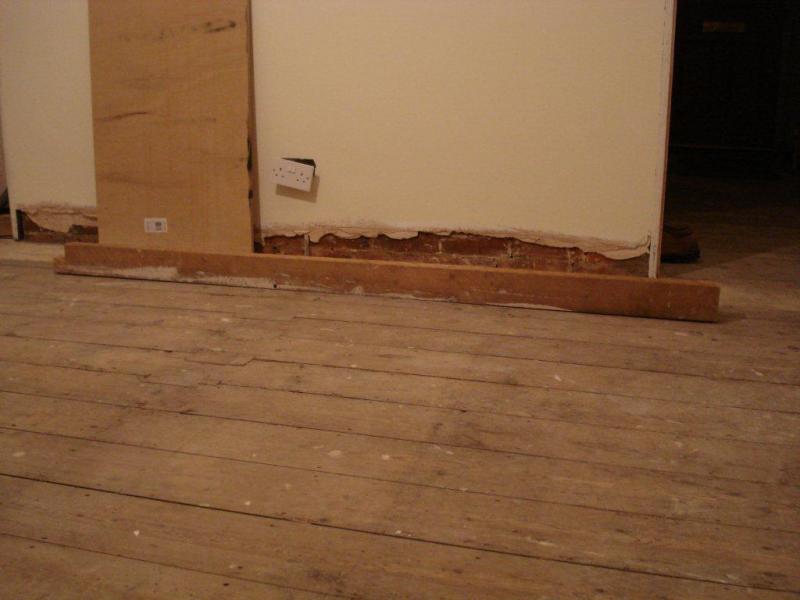
 
Sponsored Links
Sunk? Why has this happened? Rotting joists? (Blocked airbricks?) Subsidence? methinks a lookie under the floorboards is in order.
 
There is a cellar under this floor so access is about as good as gets. All the timber is perfect. This leads me to believe it's the whole house. However I've been here eight years and there are no signs (cracks in plaster) of any current movement.

The house is on a hill and was built over 120 years ago. 1" over that sort of time span, I would think is not uncommon?
 
Considering the house is 120 years old your sub-floor doesn't look too bad, i've seen much worse!!

On the plus side, the joists seem to have settled on the gables of the house, which may point to early settlement, hence no existing cracks in walls etc. plus this is ideal for a nail down installation at 90 degrees to existing floorboards.

You could remove a few floorboards along 1 gable end to reveal the joists and see their condition, you can have a look by cutting just 2or3 boards from the second joist in. if they're rotten, your next few sundays are booked up !! If they're not, you could attempt packing them, there should only be 3 or 5 packing places (front wall, rear wall, dividing wall and maybe 2 joist supporting walls inbetween.. Sounds a nightmare, which it can be but if you're lucky you could pack these with slate in an hour or 2.
 
Sponsored Links
Hi Mac - your view echos the view of others that I have spoken to.

My neighbour is an engineer and he thinks it's settlement along the gables as you say. The neighbour (since the properties are joined) also has no cracks in his walls.

There is NO need to remove any boards to inspect the condition. All that is required is to go down stairs turn on the light and look up from the cellar. :) The joists and boards are sound as I say.

Since as you can see from the photo's all the skirting is off and the carpet removed. I can just lift all the boards with a crowbar and remedy.

attempt packing them, there should only be 3 or 5 packing places - "with slate"

I can't quite translate your advice into an image of what I need to do, could you possibly give a little more detail?

Thanks, very much.
 
Sorry, forgot you had a cellar !!!

If you can see your joists then you can pack them with slate quite easily. Well, if you're lucky!!

Firstly, you want to check that the last floorboard either side (against the gables) is free and not going to catch on any brickwork, plaster etc as you lift it. The joists will be supported at the front, middle and back of the house so there should only be 3 points to pack.

You have the benefit of being able to use an acro prop to gently lift the joist to make for easy packing, having that cellar.

If they are out of level by 25mm i would do this gradually at each point and prolly wouldn't do the full 25mm as those timbers have taken years to settle and are now (naturally curved) if you like. Anything over 10mm will improve the situation.. so start at the front, lift a few mm and insert a couple of slate packers, then the middle, then the back or any way round you choose but do it gradually.
 
I get it now - that's much clearer.
The front and rear floors are separate items. The front floor is 4" joists on 4" wall plates and is flat, with the exception of one corner which can be easily sorted with the method you describe.

The rear floor 4.2m x 3.2m is onto a wallplate one end - the low end (yey) and the other embedded into the internal wall which separates the two rooms. In fact it's two walls that separate the rooms, with the stair case running up between them. Anyroad. The rear joists are 7" with the boards straight on top. Under them in the middle of the floor, is a long piece of timber right across with a post under it - I know (since I cut it out tonight) that this was to stop the spring in the floor. (Floor now springs).

I realise now... silly me - that since this was resting onto a large retaining wall (in the bottom of the cellar) that the floor has bowed round this post, hence the fold in the floor!

When I removed the post and lowered the acro props, the floor moved, not one iota. I suspect since it's been in that position for years it's taken a permanent set. Therefore if I were to use an acro and raise the joists as you suggest I suspect the floor might try to retain it's "bananna'd set".

Currently I am thinking of soaking the floor, buying a ton of bricks and drying it out again! (joking)

Other option is to lift the boards and bolt on some new timbers at the correct hight and then refit the boards.

Any thoughts?

Should say 3.2 is the joist length which slopes down. 4.2 is joists at 300mm centres which has the bananna.
 
Well i should put that post back, maybe after chopping 5 or 10mm off it and secure the bottom with anchor bolts to the floor. Your floor with a bit of gentle persuasion, may come to rest on it.

I'd still do the same as suggested earlier, remember you might have to remove a part of the brickworck above the joists to raise them..
 
This saga ended recently... and for others who might need in the information here is what I did.

I tried to pull the post down as per the previous post, but that failed.
Then I put the post back and remade the brickwork under it. So back to square one.

I had decided the sisters was the way to go. So I took up the old floor boards. This took two days to lift 21 boards, without damaging them. Main problem is the cut nails expand in the joist and don't want to come out. A mate lent me his Fein Multimaster, which was invaluable for cutting out slots round pipes, and trimming off some of the nails where it was impossible to lift the board vertically.

Once the joists were all exposed. I bought a laser level £75 self leveling jobbie made by stanley. Then I was able to set that on a fixed point and survey the floor properly and record all the measurements.

It turned out that the floor had only dropped 10mm front to rear but the joists themselves had bowed upward due to the reasons previously written about. So in my case packing the wall plate with slate would not have worked because the bow would have travelled. Also would have messed up all the thresholds.

I then set about finding a dead straight 3.5m guide to clamp to each joist. Set each end of the guide to the average of all the measurements (at each of each joist respectively) and then used a power planer to trim off the excess. What, I hear you cry! remove timber from joists?? Yes, about 15mm in some cases. However the floor luckily for me is over engineered. Even if it wasn't I would have had to do this and then re-beef with sisters.

The power planer won't go to the end, so there I used a small plane and finally a chisel to get the surface uniform. This part took about two days, mostly allot of head scratching and thinking; and not falling through the floor 10ft into the cellar.

The two outer joists on one side had dropped so these were sistered using timber drive screws. Apart from that I installed an extra sets of noggins to take the twist out of some of the joists. (In addition to the set I removed to attach the planing guide plate).

Finally used 630 screws to re-attach all the old boards.

The floor is now within 5mm all over which is good enough for me.

Total cost (including new tools to do the job) £450 + 5 days labour.
The cheapest quote I got was £3500 to have a chap do it for me.

Just waiting for the floor to be delivered now. Luckily a problem with the timber delayed it's arrival.
 
Nice one user, sounds like a good job done, but still 5mm out ?? i'd start again if i were you........ :p

Just kiddin.... Thanks for letting us know mate..
 

DIYnot Local

Staff member

If you need to find a tradesperson to get your job done, please try our local search below, or if you are doing it yourself you can find suppliers local to you.

Select the supplier or trade you require, enter your location to begin your search.


Are you a trade or supplier? You can create your listing free at DIYnot Local

 
Sponsored Links
Back
Top