
You are using an out of date browser. It may not display this or other websites correctly.
You should upgrade or use an alternative browser.
You should upgrade or use an alternative browser.
Miele tumble dryer GALA T 495 C
- Thread starter mdrum
- Start date

I only went as far as cleaning the condenser and of course we clean the filters after every use.Have you done any maintenance in the last year of use?
1 thermostat and cut out fitted near/on heating element and another stat fitted somewhere around the front drum housing or inside the fluff filter housing.
The 2 stats cut in and out according to temp but the cut out is most likely a one trip device i.e does not reset in the event of over-heating.
I'm thinking it might be best if I could test the cut out first, seeing some vids on how to test continuity made me confident that I can do it myself : )
I just don't know where to find the cut out, but since this dryer has a ring heater element I'm afraid I will need to remove the drum to get to the cut out? Is this correct? If so, what are the steps of removing the drum? I don't know where to start.
No fluff build up noticed yet.Overheating could be caused by fluff build up inside ducting etc, or overloading drum and laundry blocking fluff filter/air flow.
Water collection tray is at the top, I can't see if I can get to the float switch, since I have no clue what to look for ; )Is the water collection tray at the bottom or at the top? If at the top there must be a pump that pumps water up a tube into the water tank. Is the pump functioning? Regardless of where the empty water collection tank is located there will also be a float switch at the bottom in the water reservoir, if the float is stuck in the up position the heating element will remain switched off!


I tried to make usefull pictures, but am not sure what's truly important, so let me know if some other detail is needed, I'll try to photograph it.
Thanks beforehand!
Mdrum
Check the pump is in fact pumping water up to the collection tank. There should be an overflow return pipe, fill the bottom chamber via this return pipe then check that water is being pumped back up the filling pipe.
If the pump is working check the float switch on the bottom water chamber is operating, when full with water the switch should be open circuit, when empty the switch should be closed circuit. Usually this switch is connected to the heating circuit, switching off the heat if the water tank is full.
1st photo shows the pump (left rear, 2 red/white wires go into a white connector block) and the float switch (middle rear, 2 red wires go into a black connector block connected to the white water float housing).
You could remove the float switch wiring connector, short the pins with a short length of wire, turn on the dryer to see if heat is produced. If no heat still the switch is probably fine, if heat is produced then the switch is either faulty or gunked up and stuck open.
Last edited:
2nd photo only shows the 8uf capacitor, motor, belt and belt pulley and motor fan housing.
I am not familiar with this specific tumble dryer so more photos will be needed to identify other components. I.e heater, thermostats.
Also note that there may also be a heater relay on your model, a red squarish block located near the rear of the front fascia panel.
Checking the heating element and the cut out stat first is probably better before checking too many other things.
Last edited:


I doubt anyone knows this particular model to be ableto give specific instructions.
Photo from the front?
If the front panel is already removed the drum should slide out towards the front, you will need to manouvre the belt as you do it, a bit at a time. On the rear panel are 4 screws(located in the middle of the panel in a diamond pattern) , these also need to be removed to release the drum rear bearing plate/heating assembly. Also note that immediately above the top screw is a 'locating hook', this will need to be unhooked to release the assembly.
Last edited:
It is worth noting where cables are connected in the event you accidentally pull any off whilst pulling out the drum.
Just a thought, look inside the drum (from the front) at the back, are there any screws or are there rivets. If screws its possible this will separate the drum from the rear bearing assembly.
Take a peek at this youtube video, slightly different model but sure it will look similar inside And will give you an idea of whats where.
Last edited:
R
RichardMNZ
I have a t494c and to get it to look like the video still you remove the 4 screws around the opening and there are 3 behind the part that collects the water.
There is a clip at the bottom that holds it shut that can be quite tricky to overcome.
To remove the back silver panel of the drum to access the heater bank you can remove the outer hex bolts and you have to reach through to undo two more that hold the rear bearing to the dryer back wall.
You will need a torch to shine though to line them up.
The photo is 90 degrees out.
There is a clip at the bottom that holds it shut that can be quite tricky to overcome.
To remove the back silver panel of the drum to access the heater bank you can remove the outer hex bolts and you have to reach through to undo two more that hold the rear bearing to the dryer back wall.
You will need a torch to shine though to line them up.
Untitled
- RichardMNZ
- 2
The photo is 90 degrees out.
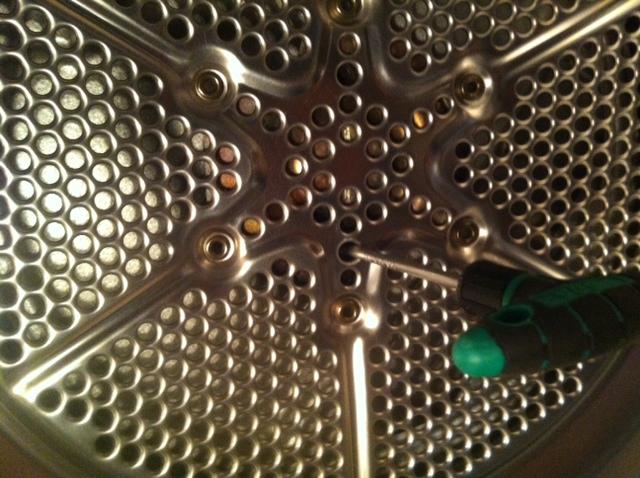
I finally had some time to take the drum out, and to my surprise the heater isn't a ring heater.
I marked the cables.

Behold the inside of the back panel of the Miele T495C Gala.


Then I removed the next plate, and the heater element. Now I can check the continuity.
I marked the cables.
Behold the inside of the back panel of the Miele T495C Gala.
Then I removed the next plate, and the heater element. Now I can check the continuity.
Definately time to clean out the ducting, rear panel where heater sits, seals (replace if necessary), water pump.
Pointless not too really!
That particular type of heating element are very well made and seem to last forever, never come across a broken one yet, not that I've seen hundreds of them.
May as well check switches, contacts, pump, stats etc..
Be sure to have dmm on highest ohms setting when testing switches in open position, should be no continuity and on lowest setting when switch closed, testing in both positions a few times, not just once.
DIYnot Local
Staff member
If you need to find a tradesperson to get your job done, please try our local search below, or if you are doing it yourself you can find suppliers local to you.
Select the supplier or trade you require, enter your location to begin your search.
Please select a service and enter a location to continue...
Are you a trade or supplier? You can create your listing free at DIYnot Local
Similar threads
- Replies
- 1
- Views
- 3K