My Extension

Joined
4 Apr 2008
Messages
2,161
Reaction score
375
Location
Hertfordshire
Country
United Kingdom
Hi all. So I actually completed this a couple of years ago now, and never got around to uploading the details. As well as being a (sometimes) regular contributor on here, I also benefitted from a lot of advice during the construction phase.

I designed the extension myself (architectural and structural), I did every drawing and detail for submission to building control, and carried out nearly all of the construction work myself, other than the plumbing, electrics, rendering, and some of the plastering.

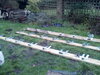
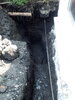
I’ll start here with before and after photos. More to come!

upload_2021-11-28_12-0-13.png


upload_2021-11-28_12-0-43.png
 
Sponsored Links
Will look forward to reading this post
Looks top notch.
 
Sponsored Links
First jobs were to move the oil tank and part of the conservatory (wife wanted me to build around the conservatory without taking it down!), and take down the wall between the store cupboard and the downstairs toilet (this area was to become the wetroom).

upload_2021-11-29_10-11-47.jpeg


upload_2021-11-29_10-14-50.jpeg


upload_2021-11-29_10-15-20.jpeg
 
Next was the drainage. This was the one other job I didn't fancy doing myself, not because I don't like getting my hands dirty, but because I had concerns about how long I would be leaving a public sewer pipe open, when working in my spare time. So I called in labour for this one.

upload_2021-11-29_10-20-19.jpeg
 
Next I put the hangers on the ledger board and fixed it up to the wall using resin anchors:

upload_2021-11-29_10-31-34.jpeg


upload_2021-11-29_10-31-49.jpeg
 

Attachments

  • upload_2021-11-29_10-30-50.jpeg
    upload_2021-11-29_10-30-50.jpeg
    498.2 KB · Views: 60
Then it was time to start digging the foundations. This was a hand dig because, well, the budget was tight and I quite enjoy a bit of hard work! That said, I wasn't enjoying it quite so much five days later!
It was a fairly straightforward dig though, except for the issue of the soakaway in the one corner, causing the trench to collapse and also meaning I needed to go down 1.6m in this location.
Elsewhere it was 1.2m, the same as the rest of the house and the same as the next door neighbour's extension. However, I never actually hit natural ground. At 1.2m I was still in fill material with bits of glass and broken plates and cups mixed in with the soil. I wasn't worried about bearing capacity though, as the extension is a very lightweight timber frame meaning the bearing pressure is a maximum of around 25kN/m2, and the soil at that level was very well consolidated over many years. Building control agreed with that assessment.

As most of the soil was top soil I didn't even need a skip and just raised the level slightly at the bottom of the garden.

upload_2021-11-29_10-56-58.jpeg
 
Last edited:
First DPM, insulation, and slab - the pipe you can see sticking through the concrete on the last photo is for the island electrics:

upload_2021-11-29_11-19-16.jpeg


upload_2021-11-29_11-19-48.jpeg


upload_2021-11-29_11-20-37.jpeg
 
Time to start building the timber frame. There were several reasons I did a timber frame.
  1. I'm much better at carpentry than I am at laying bricks and blocks.
  2. I needed much less timber than brick / block and as it's a terraced house with no access to the rear, it's much easier to carry a few lengths of 4x2 through the garage than thousands of bricks and blocks.
  3. I didn't have to worry about coursing dimensions in the design.
  4. I could have thinner walls meaning more internal space for the same external area.
  5. I could fit in more insulation giving the walls a much better U-value
  6. Cost? I reckon it must've worked out cheaper, as I didn't have a masonry outer skin (no need).
It was a bit complicated though. As the next door neighbour on the one side already had an extension, there was no way I could get the side wall rendered once it was in position. I thought long and hard about this, I wondered whether I actually needed to render it as it was never going to see any weather, but it would still be impossible to fit the renderboard, battens, etc once the wall was in position.

The solution? Construct the side wall panels and render them before moving them into position. This was easier said than done though. It involved leaning the panels against the rear wall of the house with the corners more or less in position. The top corners were tied to joist hangers to stabilise them and the lower corner lifted on a pallet truck. The panels was then rotated through 90 deg and carefully moved into position atop the DPC. Two front panels were then quickly moved into position and screwed to the side panels. It was a bit hairy with each side panel weighing around 360kg, but it worked without any damage to the panels or the render.

upload_2021-11-29_11-38-31.jpeg


upload_2021-11-29_11-39-10.jpeg


upload_2021-11-29_11-39-47.jpeg


upload_2021-11-29_11-40-38.jpeg


upload_2021-11-29_11-41-12.jpeg


upload_2021-11-29_11-41-47.jpeg


upload_2021-11-29_11-42-59.jpeg


upload_2021-11-29_11-43-30.jpeg


upload_2021-11-29_11-44-20.jpeg
 

DIYnot Local

Staff member

If you need to find a tradesperson to get your job done, please try our local search below, or if you are doing it yourself you can find suppliers local to you.

Select the supplier or trade you require, enter your location to begin your search.


Are you a trade or supplier? You can create your listing free at DIYnot Local

 
Sponsored Links
Back
Top