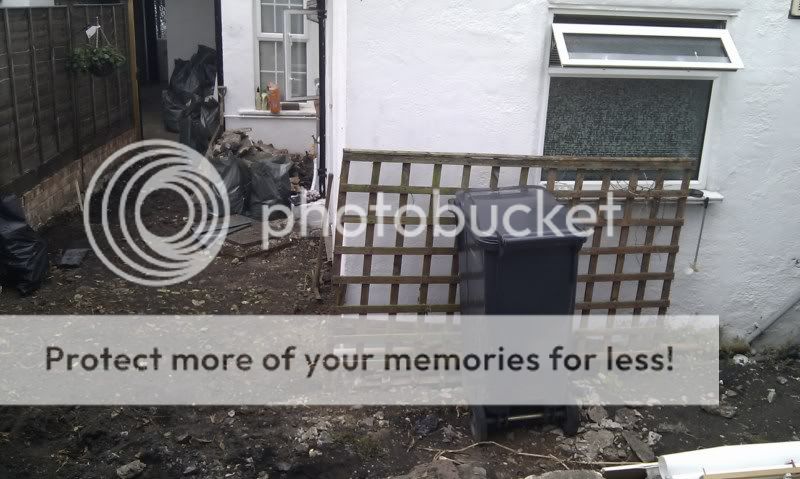
Patio project (a long time in the process!)

Joined
20 Nov 2010
Messages
33
Reaction score
0
Location
Surrey
Country
United Kingdom
Been taking snaps as i go along so thought i might as well put them up.

When we moved in, patio was a concrete base, and floor level was excessively high, so one of my first projects was to lower the ground level and redesign the area.

This is what i came up with for the design...
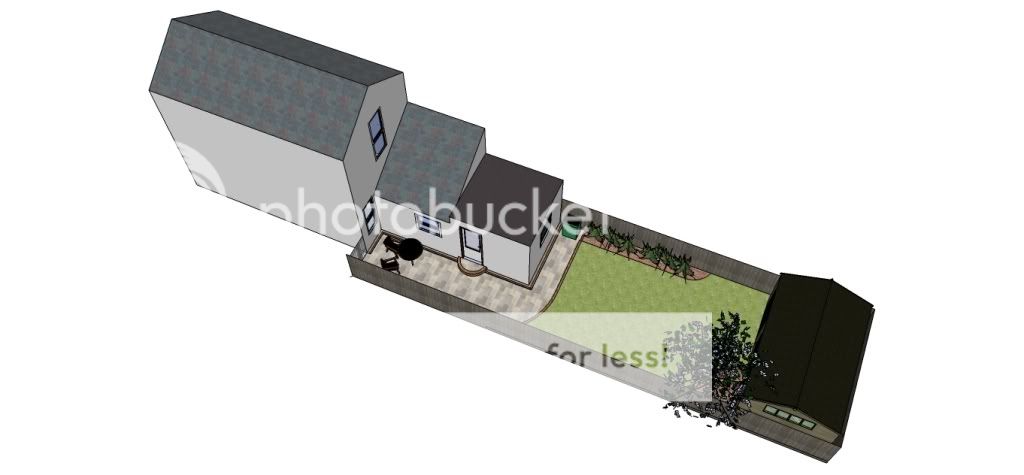
garden2.jpg


This is how it looked after hacking away half of the concrete...
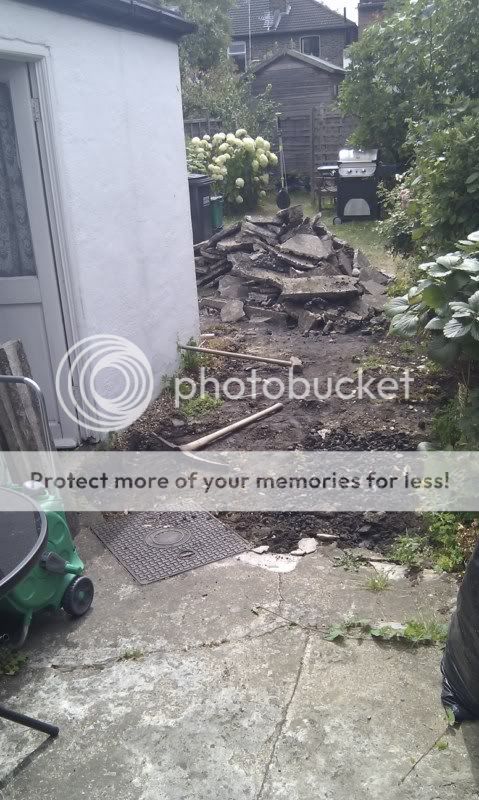
IMAG0032.jpg


After all the concrete had been chipped up i was left with this bomb site...
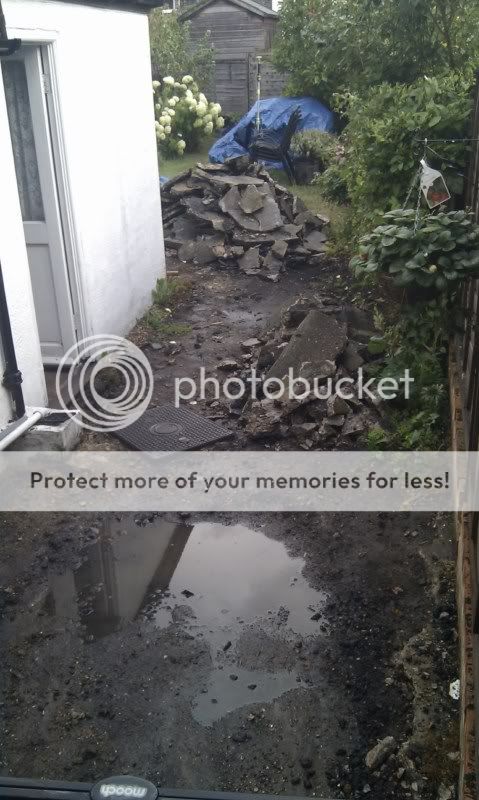
IMAG0033.jpg

IMAG0042.jpg


Next step was to lower the ground level, original patio had a gradient towards the house too. Ended up removing about 4 inches at start of patio, and 10 inches or so by the edge of lawn end. All by hand i hasten to add!! I estimate over 150 bags of rubble, all driven to the skip in my trusty 306 runaround!

You can see here ive worked out my levels and marked with string, with suitable fall incorporated away from house!...
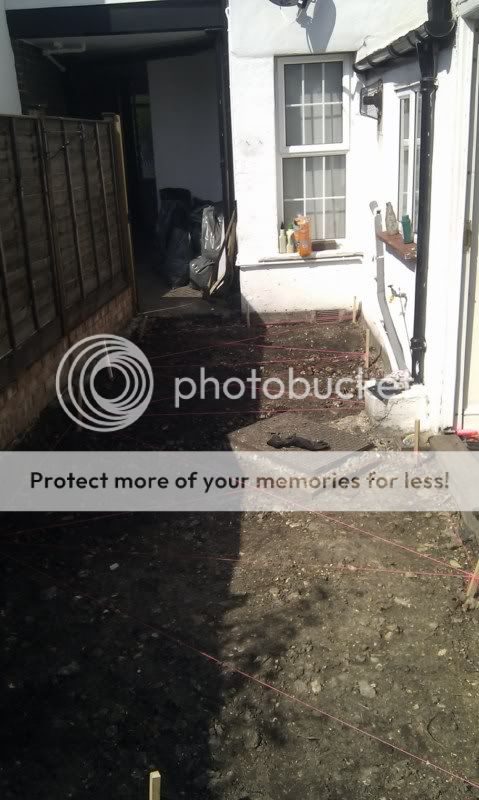
IMAG0054.jpg
 
Sponsored Links
Next step was to sort out the drainage. Previous patio had a high brick gulley for the dishwasher and sink water, and two external pipes at rear of property for bath and sink water from the downstairs bathroom.

It was decided to replace both of these with osma bottle gullys with incorporated water traps...
prodDetail57299.jpg


The front gulley involved re-modelling the inspection pit to fit the lower design of the osma pipework...
IMAG0055.jpg


The original inspection cover also had to be lowered, and a new recessed tray was used to incorporate the flagstones. The inspection pit was flaunched nicely with prompt cement but didnt get a shot...
IMAG0057.jpg

IMAG0058.jpg

IMAG0060.jpg


The rear gully involved relocating the gully to the other end of the wall, and extending the 4" underground piping. The original gully was removed and cut from the clay piping, and new osma 4" piping laid. The pipe was joined to the clay with an osma drain adapter and plenty of prompt cement!...
IMAG0063.jpg
 
With the drainage sorted, it was time to get some supplies...
IMAG0059.jpg


Point of note: Its not a great idea to get 1 tonne of sand and cement into a lowered Honda Integra...
IMAG0024.jpg

IMAG0027.jpg


I got a bit hasty and spread the sub-base before doing any edging, leaving me with moving it away the edges to work, never mind, it needed to get off the drive anyway!...
IMAG0061.jpg
 
It was time to start the edging and decide on any lighting we wanted. We decided on decking uplighters on a 12v system, specifically we went for the B&Q Select a Light system.

5011274800406_001c_v001_zp


6 of the house edging bricks will have holes cut for the recessed deck lights, and the retaining wall/fence will have 2/3 wall mounted lights also. Drilling the holes was pretty tricky! Required a ~65mm stone hole cutter on each brick, needless to say the majority split in the middle, but when mortared in place its hardly noticeable...
IMG_20100831_173552.jpg


As the ground level is lowered, a retaining wall was required between the lawn and other edges of the patio. A trench was dug and filled with concrete for footings for the wall...
IMG_20100930_180057.jpg


My first try at bricklaying turned out quite well i think...
IMG_20101015_152921.jpg

IMG_20101015_152942.jpg


[/url]
 
Sponsored Links
Which brings us to where we are today, some 6 months or so after starting (in my defence i travel out of the country a lot, and ive not had a jot of help from anyone other than my dad with the drainage!).

We decided to add a large step onto the lawn, so more digging and foundations, and some more bricklaying and im up to the start of the curved section...

DSC_2969.jpg

DSC_2968.jpg


More to follow as its done!

Thanks for looking so far...
 
That preparation work you've done is very impressive and was backbreaking I suppose. Will watch you topic to see the finished patio. Good luck!
 
Superb job. Thanks for posting and looking forward to seeing the rest of your work. :D
 
Great job so far, and an inspiration for when I will look at tackling a very similar job next year!

Good to see you haven't shied away from redoing the drainage properly - will make all the difference.
 
Thanks! It's up for sale soon though, fancy something different.

Finished work for xmas yesterday and need to get the patio finished before the new year, so braved the cold (it actually wasnt that bad today!)...

More bricklaying, finished the curve and step, just need to rebuild the wall/fence and the bricks are done!

DSC_3002.jpg


DSC_3004.jpg
 
Wall and fence removed and trench dug for footings....

DSC_3007800x600.jpg


Im still unsure how to rebuild it though?!

Do i keep it how it was? (Fence posts spiked in floor and single brick wall between). Only problem is new wall will now be 8 courses high, with no pillars.

Or do i build single wall all along with pillars and use bolt downs to attach fence to top of it? Problem with that being pillar at the end will reduce the entrance/gate size.
 
concrete the posts into the footing at the back edge and make it a double brick wall with the fence at the back edge.
 
concrete the posts into the footing at the back edge and make it a double brick wall with the fence at the back edge.

But then the fence would be on neighbours patio, plus i would loose patio space with a double width wall, plus more materials needed.

Ive decided to single brick wall with 2 pillars and fence bolt downs on the pillars, and the last post will be concreted so no pillar at gate entrance.

Some progress from today, laid the footings for the retaining wall....

DSC_3009.jpg


And got the first slabs laid! Have to say its harder than it looks getting them flush and to the correct level without rocking...

DSC_3011.jpg
 
Some more bricklaying! Almost finished with the bricks, just 3 more courses left...

DSC_3036800x600.jpg


DSC_3031800x600.jpg


Rain all day called for drastic measures though...

DSC_3034800x600.jpg


One thing, i bought another batch of 120 bricks to finish today, and they're slightly different in size and colour, bummer.[/img]
 

DIYnot Local

Staff member

If you need to find a tradesperson to get your job done, please try our local search below, or if you are doing it yourself you can find suppliers local to you.

Select the supplier or trade you require, enter your location to begin your search.


Are you a trade or supplier? You can create your listing free at DIYnot Local

 
Sponsored Links
Back
Top