Powerstream mixer shower connection

DJM

Joined
4 Aug 2003
Messages
379
Reaction score
5
Location
Surrey
Country
United Kingdom
I'm having a senior moment and a bit hacked off that the item I ordered is not what arrived, so looking for some help. :oops:

About 10 years ago we fitted a Redring powerstream shower like this
file_11_3.jpg

and over the years it has failed - kids wear and tear etc. So intending to make it simple I ordered exactly the same one to replace it. I did note the statement on the site which said
please note, picture is incorrect, white is now obsolete, only available in chrome (riser rail and hose are chrome)
which was only an improvement in my opinion. But, what turned up was
rm1_mixer_kit.jpg


The key differences are that the distance between centres for the pipes is different, and the connections are female rather than male.

Obviously I now have to do some pipework :( which is a pain but not the end of the world, but I am unclear how to actually connect the shower to the pipes and make it solid to the wall.

On the previous mixer the wall plate elbows do the job of 15mm pipe to shower mixer, and hold it ridgid. I'm obviously being thick, but can somebody spoon feed me the answer please.
 
Sponsored Links
the doglegs go into the backplate elbows, then the mixer screws onto that... not quite sure what the problem is..
 
The shower was already there when we moved in and teh pipework is through a stud wall then elbowed down to the back-plate elbows and shower mixer. Yes I know thats crap, but when I replaced it 10 years ago it really was a like for like replacement and there were other things needing doing more urgently than a few inches of surface pipework. So I just changed teh mixer unit then and left the pipework as is.

On the replacement this time, those doglegs are not remotely offset enough to just fit into the backplate elbows and then fit into the mixer, so I have to do some pipe moving (Old mixer centres 11cm, new 15cm, doglegs add less than 2cm, so still a couple out). And even if they did they would make the mixer stick out from the wall a long way.

So what I intended doing was sorting it out and going back to the pipes in the stud wall and moving them to the correct place so they could run straigh to the mixer. That's the bit I'm struggling with
 
Sponsored Links
So are you having the pipework internal to mixer or internal then exposed to mixer as they are now ?

ie are you altering pipes in the stud wall or altering them external ?
 
So are you having the pipework internal to mixer or internal then exposed to mixer as they are now ?

ie are you altering pipes in the stud wall or altering them external ?
I could do either, though obviously it would look better to change the pipes within the stud wall
 
Then you can use the doglegs fittings supplied, if have internal pipework.
 
I'm probably being very slow, but I still dont see how the dog legs help really. I could use a straight connector from pipe work in the wall which would be easier, bit that still wont fix the mixer to the wall physically. Surely the shower isnt just using the pipework and any pipe supports as the anchor point?
 
A straight coupler won't give you the length.

If your using the doglegs they will screw into a wall plate.
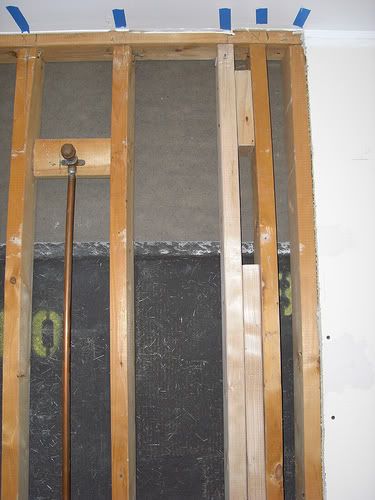
Ie use your existing wall plates in the stud wall screwed to say a 4x2 battern/noggin.
Thats enough to surport the bar mixer.

This is the basic idea.


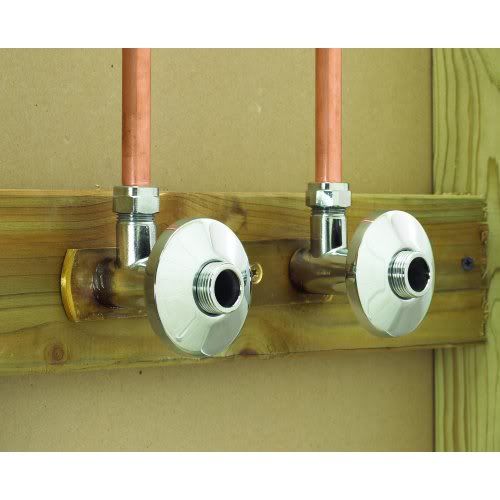
Or you can buy and use these saves the measuring of 150mm centres.


Or the easiest way is these just fit your 2 15mm pipes at 150mm centres
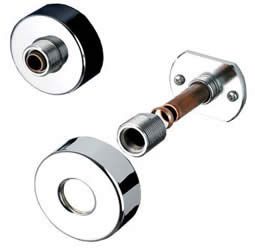
refit stud wall, tile then fit these.


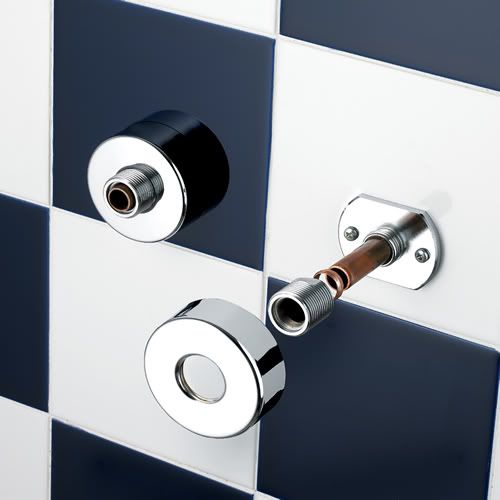
Or if you want external pipework use these.

 
  • Thanks
Reactions: DJM
Thanks that's really helpful. :D
Just need to decide which and get to a plumbers merchants.

Is there a specific name for those items to stop me looking any more stupid than I already do :LOL:

Considering the access I will have (from behind rather than from shower side, the cheating 150mm preset centres looks good or the 2nd to last front fitting ones
 
I'd go for these


TOOLSTATION

For ease of fitting, Just fit a 4x2 noggin 2 15mm pipes at 150mm centres through the noggin/studwall, leaving about 50mm exposed pipework through studwall.
Then you have enough pipe to trim up, If i remember you trim the pipes to about 30mm min, and fit your fixing kit to tiled wall and then screw mixer on.
 
  • Thanks
Reactions: DJM
I'd go for these

TOOLSTATION

For ease of fitting, Just fit a 4x2 noggin 2 15mm pipes at 150mm centres through the noggin/studwall, leaving about 50mm exposed pipework through studwall.
Then you have enough pipe to trim up, If i remember you trim the pipes to about 30mm min, and fit your fixing kit to tiled wall and then screw mixer on.
You're a star. That will do the job nicely, and look much better than what's there now. Thanks.
 
Just to finish off this thread and say a further thanks to Seco Services, here's a pic of the finished job
A525BFE1-5FBF-4F8E-B923-CA14EE97FE5F-32717-00000395D7D04EE8_zps739fb149.jpg
 
DJM - how well does that mixer work? I believe it's manual, not thermostatic?
 

DIYnot Local

Staff member

If you need to find a tradesperson to get your job done, please try our local search below, or if you are doing it yourself you can find suppliers local to you.

Select the supplier or trade you require, enter your location to begin your search.


Are you a trade or supplier? You can create your listing free at DIYnot Local

 
Sponsored Links
Back
Top