

Hi All,
Some of you may have read the issues I have had with some plumbing during my renovation of my living room. So I thought I would share with you the better side to my renovation and maybe some of this will help someone out in the future.
This was my front room. We used to have the TV in the corner but wanted it on the chimney breast. Unfortunately it sticks out of the wall quite a lot about 500mm add that to the 500mm hearth and you've lost a lot of floor space.

So 2 weeks ago I decided to remove the fire.
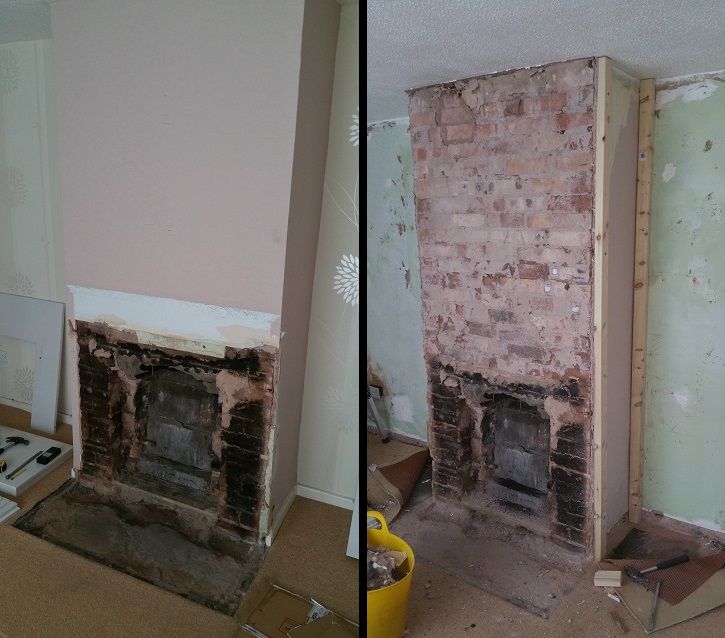
To be honest the fireplace came out pretty easily. On this particular one there were 2 metal lugs at the top of the fireplace surround (one on each side about 3 inchs from the top) which were screwed to the wall and then covered with plaster. I used a stud detector to find them as I was hoping that it had been fitted onto of the existing plasterboard and plaster. So I could just board the hole and then skim over. It wasn't as you can see the plaster had been removed beforehand. I decided as the plaster was in bad condition I would strip the hole front. Sds and chisel and 5 minutes of my time and its done. I then started to fit the new studwork. Original plan was just to skim over but as I was now going to fit a new board I decided to leave a gap between the brick and plasterboard to run the media cables and socket behind where the tv would go.
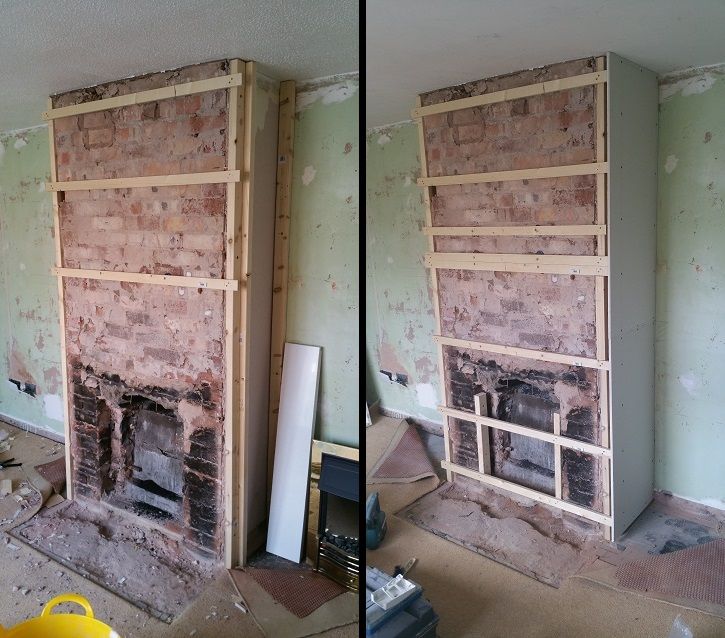
To do this I fitted battens to the front face of the chimney breast as I was limited to the size of plasterboard I could fit in my car I decided to use 1220 x 900 boards and so fitted the battens to 450mm centres. I also added 2 extra battens where I will later mount the TV bracket. I chiselled the corner of one brick so the cables could pass through. I put extra studs inside the the opening to secure the battens firmly. I then fitted the back boxes to the front and left side and fed in my cables, You are just able to fit a HDMI cable head through the hole of the back box and only if you put the grommet on the cable and the fit it to the box after the cable is through (No pics sorry) I then started to board it up.
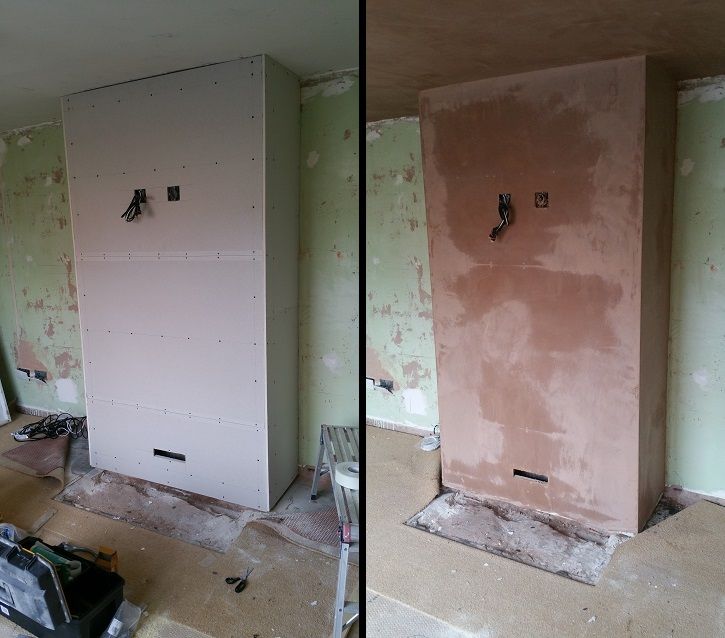
All boarded I cut the hole for the vent and covered it in scrim tape ready for the plasterer. The plasterer came and plastered my chimney breast and ceiling in the living room and hall as it had previously been artexted. He did a really good job and if your anywhere near Telford I would really recommend him. He's really friendly and worked hard and also when I asked him about sciming over the entire room he gave me alternative advice which lost him work but saved me money. His name is Chris Hall and you should be able to find him on Yell.
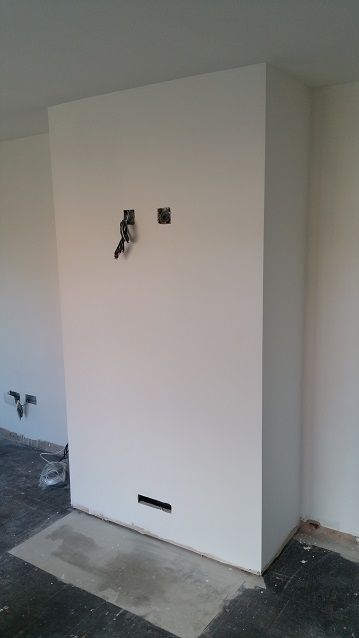
All done, I mist coated it first with white emulsion watered down to about a 3/2 Ratio and then gave the whole room a painting.
As for my doorway
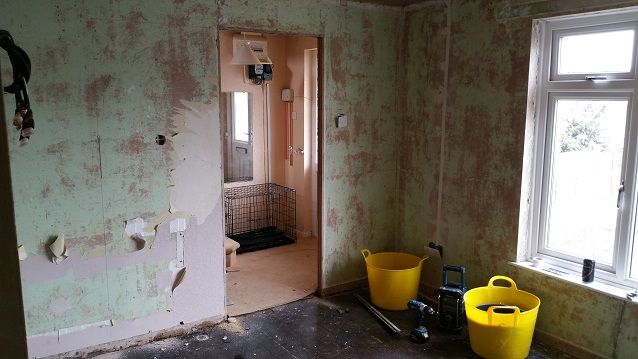
We never close this door and its more of a nuisance than anything so The girlfriend and I decided we would get rid and slightly open the wall up. I went with an opening size for double doors so if in the future we wanted to close it off again it would be easy enough.
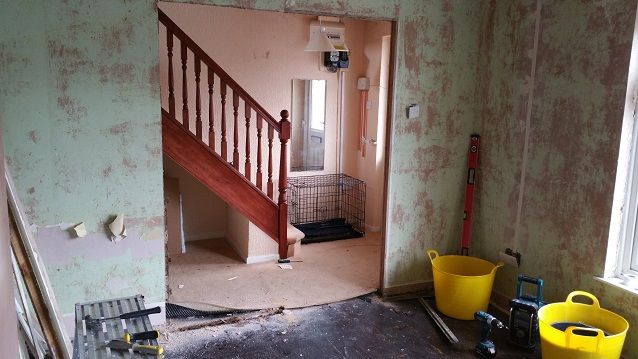
The wall is wooden stud and plasterboard. I cut a circle hole in the wall to inspect inside even though I was highly confident there were no hidden pipes or wires, its still good to check. I removed the door frame. I then marked out where I was going to cut and using a jab saw I cut both sides of the wall. I then finished by sawing through the studs and the wall come away, as easy as that. I removed the studs from the piece I had removed and then knocked it into the void on the left side. I ensured it was level and then screwed into it with drywall screws from both sides. I uesd the stud as a guide and planned the plaster to a nice straight level finish. (Probabaly not highly important as it will be covered by architrave later) I then got some PSE Pine 18 x 69 for the frame and planned it to 63mm (Thickness of the wall) I fitted the frame and it started to look pretty good.
Painted") and a little bit tidier.
and a little bit tidier.
Hopefully I'll get some more done soon and I can post up the progress. This is 2 weeks work so well happy with it, but not as happy as the misses is. We've been in the house 3 years and its taken those 3 years to do 2 bedrooms, ha. This room will have the TV and Xbox in though so need finishing
Matt
Some of you may have read the issues I have had with some plumbing during my renovation of my living room. So I thought I would share with you the better side to my renovation and maybe some of this will help someone out in the future.
This was my front room. We used to have the TV in the corner but wanted it on the chimney breast. Unfortunately it sticks out of the wall quite a lot about 500mm add that to the 500mm hearth and you've lost a lot of floor space.
So 2 weeks ago I decided to remove the fire.
To be honest the fireplace came out pretty easily. On this particular one there were 2 metal lugs at the top of the fireplace surround (one on each side about 3 inchs from the top) which were screwed to the wall and then covered with plaster. I used a stud detector to find them as I was hoping that it had been fitted onto of the existing plasterboard and plaster. So I could just board the hole and then skim over. It wasn't as you can see the plaster had been removed beforehand. I decided as the plaster was in bad condition I would strip the hole front. Sds and chisel and 5 minutes of my time and its done. I then started to fit the new studwork. Original plan was just to skim over but as I was now going to fit a new board I decided to leave a gap between the brick and plasterboard to run the media cables and socket behind where the tv would go.
To do this I fitted battens to the front face of the chimney breast as I was limited to the size of plasterboard I could fit in my car I decided to use 1220 x 900 boards and so fitted the battens to 450mm centres. I also added 2 extra battens where I will later mount the TV bracket. I chiselled the corner of one brick so the cables could pass through. I put extra studs inside the the opening to secure the battens firmly. I then fitted the back boxes to the front and left side and fed in my cables, You are just able to fit a HDMI cable head through the hole of the back box and only if you put the grommet on the cable and the fit it to the box after the cable is through (No pics sorry) I then started to board it up.
All boarded I cut the hole for the vent and covered it in scrim tape ready for the plasterer. The plasterer came and plastered my chimney breast and ceiling in the living room and hall as it had previously been artexted. He did a really good job and if your anywhere near Telford I would really recommend him. He's really friendly and worked hard and also when I asked him about sciming over the entire room he gave me alternative advice which lost him work but saved me money. His name is Chris Hall and you should be able to find him on Yell.
All done, I mist coated it first with white emulsion watered down to about a 3/2 Ratio and then gave the whole room a painting.
As for my doorway
We never close this door and its more of a nuisance than anything so The girlfriend and I decided we would get rid and slightly open the wall up. I went with an opening size for double doors so if in the future we wanted to close it off again it would be easy enough.
The wall is wooden stud and plasterboard. I cut a circle hole in the wall to inspect inside even though I was highly confident there were no hidden pipes or wires, its still good to check. I removed the door frame. I then marked out where I was going to cut and using a jab saw I cut both sides of the wall. I then finished by sawing through the studs and the wall come away, as easy as that. I removed the studs from the piece I had removed and then knocked it into the void on the left side. I ensured it was level and then screwed into it with drywall screws from both sides. I uesd the stud as a guide and planned the plaster to a nice straight level finish. (Probabaly not highly important as it will be covered by architrave later) I then got some PSE Pine 18 x 69 for the frame and planned it to 63mm (Thickness of the wall) I fitted the frame and it started to look pretty good.
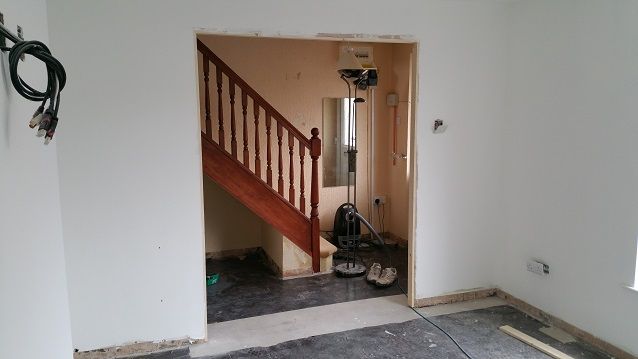
Painted
and a little bit tidier.
Hopefully I'll get some more done soon and I can post up the progress. This is 2 weeks work so well happy with it, but not as happy as the misses is. We've been in the house 3 years and its taken those 3 years to do 2 bedrooms, ha. This room will have the TV and Xbox in though so need finishing
Matt