
You are using an out of date browser. It may not display this or other websites correctly.
You should upgrade or use an alternative browser.
You should upgrade or use an alternative browser.
Render volumes for 2.7sqm walls
- Thread starter virgilns
- Start date

Well...juast stepped off my pedestal!
In daylight and starting to dry it looks nowhere near as good as it did the other night several little imperfections
Not the end of the world as it's only a cupboard (albeit a big one) but will have to try much harder next time...
I think I know where I went wrong (not troweling it enough when still pliable) so will give it more attention sooner...and not polishing it evenly enough
My brother in law says I;m my biggest critic, which is probably true, but that doesn't make it any easier when I'm the plasterer for a week but the 'customer' forever!
In daylight and starting to dry it looks nowhere near as good as it did the other night
several little imperfectionsNot the end of the world as it's only a cupboard (albeit a big one) but will have to try much harder next time...
I think I know where I went wrong (not troweling it enough when still pliable) so will give it more attention sooner...and not polishing it evenly enough
My brother in law says I;m my biggest critic, which is probably true, but that doesn't make it any easier when I'm the plasterer for a week but the 'customer' forever!
well you could make it good with a bit of easifill or joint cement i wouldent over do the troweling if i were you , why dont you upload some pics of the cupboard?Well...juast stepped off my pedestal!
In daylight and starting to dry it looks nowhere near as good as it did the other night
Not the end of the world as it's only a cupboard (albeit a big one) but will have to try much harder next time...
I think I know where I went wrong (not troweling it enough when still pliable) so will give it more attention sooner...and not polishing it evenly enough
My brother in law says I;m my biggest critic, which is probably true, but that doesn't make it any easier when I'm the plasterer for a week but the 'customer' forever!
we wont laugh virgilins i bet its an ok job no ones expecting it to be perfectSorry to have gone quiet...been side tracked with other stuff and forgot where I Was post wise...will post some pics up today...so you can have a laugh...
In daylight and starting to dry it looks nowhere near as good as it did the other night
Once it dries, get your wash coat on.
Will give you a good idea of what the finished wall would look like painted. Some imperfections don't show. After wash coat, can still use easy fill etc and sand before final painting.
Thought your rendering looked good.
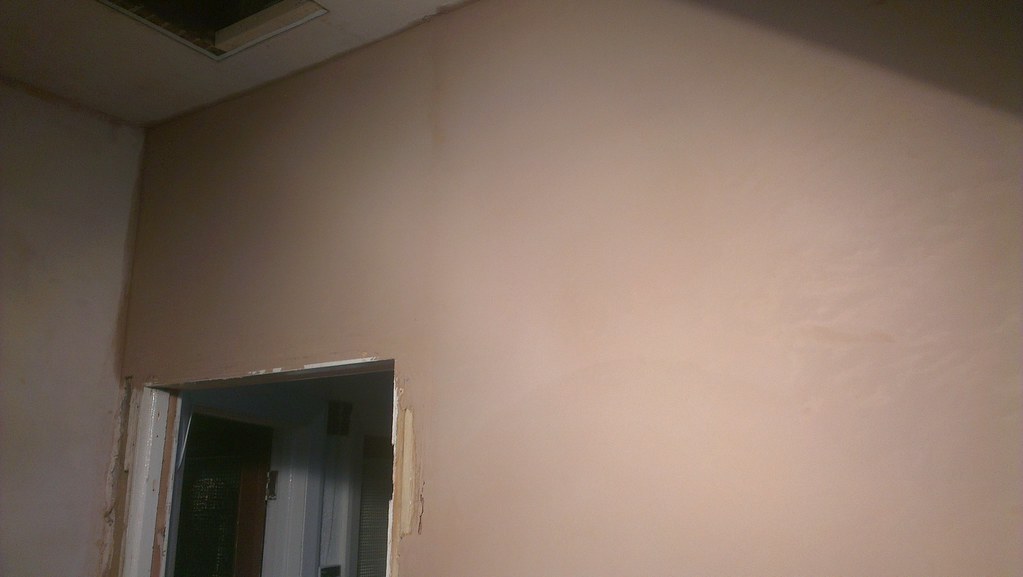
so here's the original wall...have highlighted a few of the issues..also the wall is really not that flat, though I know where that went wrong. Hardwall undercoat was not as flat as it should have been (rushed it) and tried to out the skim on too thick.

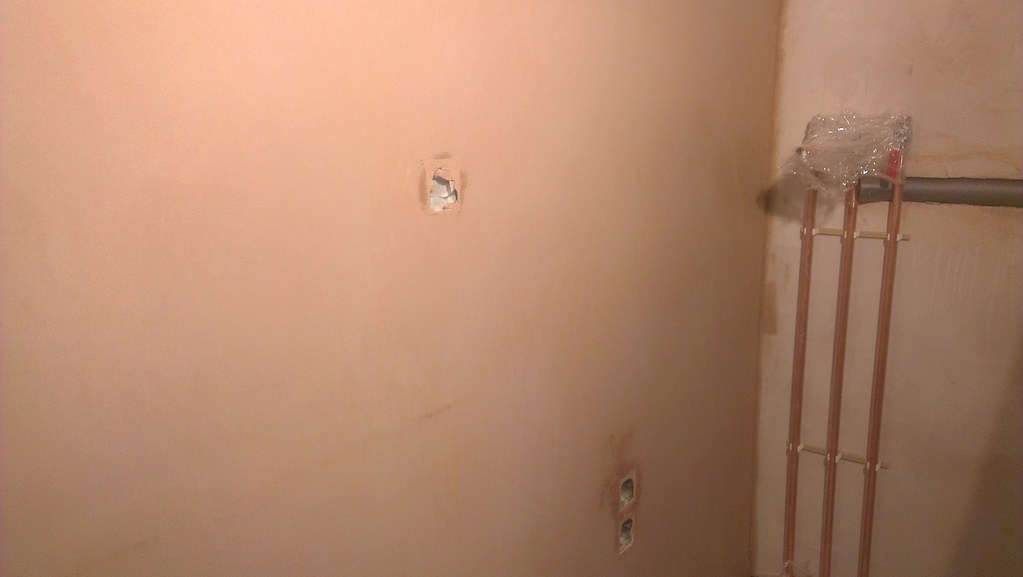
here's the new wall from today. much thinner skim first and second coat and so went on much flatter. Seems to me so far quite smooth...
here's more of the wall...
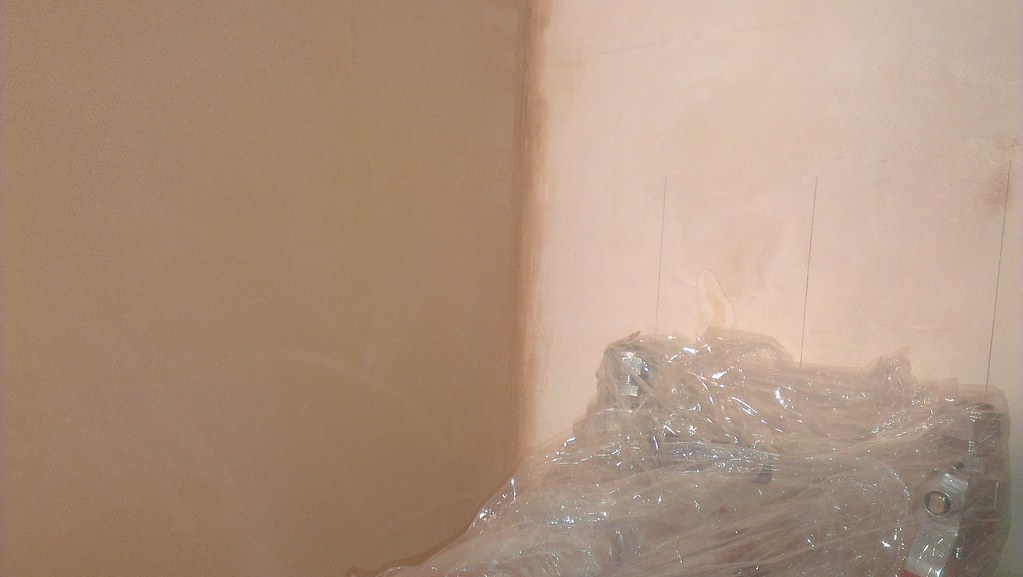
here's the corner closer up...
here's the top of the wall...
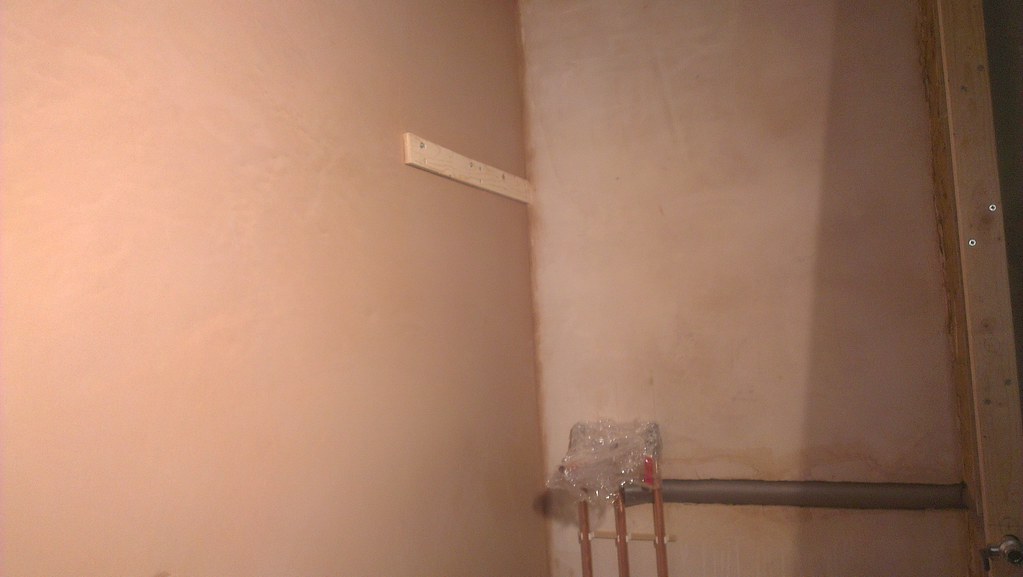
the patch to the left of the wooden batten on the wall looks rippled to me..think it's actually rippled as well,not just teh colour of the plaster as it sometimes goes. Will know for sure tomorrow when I can touch it better.
Will chuck a mist coat up and see what it looks like then.
Still think I;m spending too long trying to get it right before covering the whole wall...probably need to worry less about the initial finish and get the wall covered then work it in to a flat finish then smooth it, then polish it...
does that sound right?
cheers,
Virgil
here's the new wall from today. much thinner skim first and second coat and so went on much flatter. Seems to me so far quite smooth...
here's more of the wall...
here's the corner closer up...
here's the top of the wall...
the patch to the left of the wooden batten on the wall looks rippled to me..think it's actually rippled as well,not just teh colour of the plaster as it sometimes goes. Will know for sure tomorrow when I can touch it better.
Will chuck a mist coat up and see what it looks like then.
Still think I;m spending too long trying to get it right before covering the whole wall...probably need to worry less about the initial finish and get the wall covered then work it in to a flat finish then smooth it, then polish it...
does that sound right?
cheers,
Virgil
i cant see much the pics are pixelated ill look later when im on another pc
ive had a better look but it still dont tell me much , its hard to see where you are going wrong just get it on the wall as flat as you can b4 you start troweling up and worrying about the finish , as you are laying it on just sweep up and down moving across the wall, get it all on and then let it pick up to flatten in if you have to, then give it 1 or 2 wet trowels "what ever it takes theres no set rule every wall is different" and then a hard trowel keep your blade wet all the time
thanks Steve...after a coat of paint I've gt to say it looks bloomin good. There's a couple of bits in the corner that are a little iffy but i didn't spend time on that as I knew it would be behind the water tank. Rest looks good, so confident now to try the rest ")
Thanks for the help over the lst few weeks/months...much appreciated!
Thanks for the help over the lst few weeks/months...much appreciated!
np im glad its all looking goodthanks Steve...after a coat of paint I've gt to say it looks bloomin good. There's a couple of bits in the corner that are a little iffy but i didn't spend time on that as I knew it would be behind the water tank. Rest looks good, so confident now to try the rest
Thanks for the help over the lst few weeks/months...much appreciated!
DIYnot Local
Staff member
If you need to find a tradesperson to get your job done, please try our local search below, or if you are doing it yourself you can find suppliers local to you.
Select the supplier or trade you require, enter your location to begin your search.
Please select a service and enter a location to continue...
Are you a trade or supplier? You can create your listing free at DIYnot Local
Similar threads
- Replies
- 2
- Views
- 3K
- Replies
- 18
- Views
- 9K