I have posted before about my whistling windows and fixed a few through removal and binning the plastic trim, filling, caulking and painting. Looks good and no whistling.
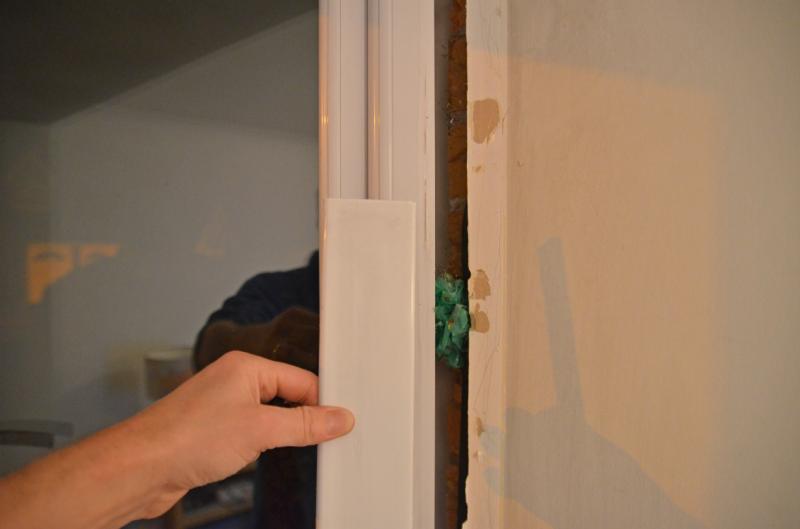
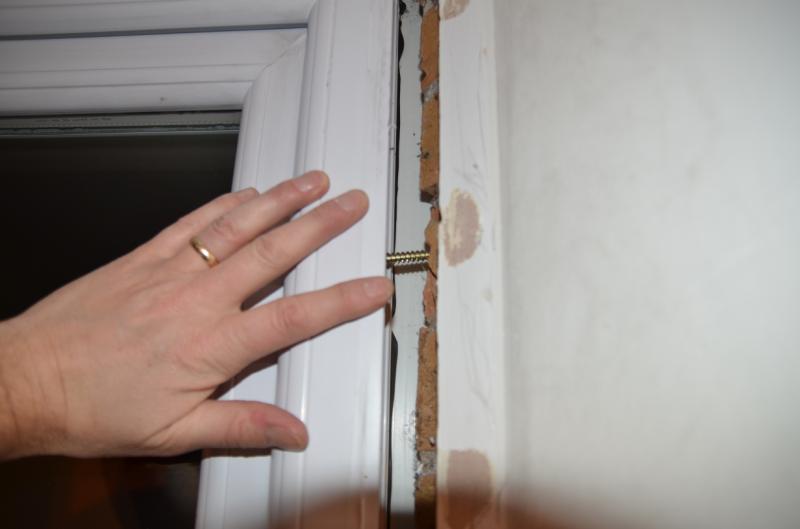
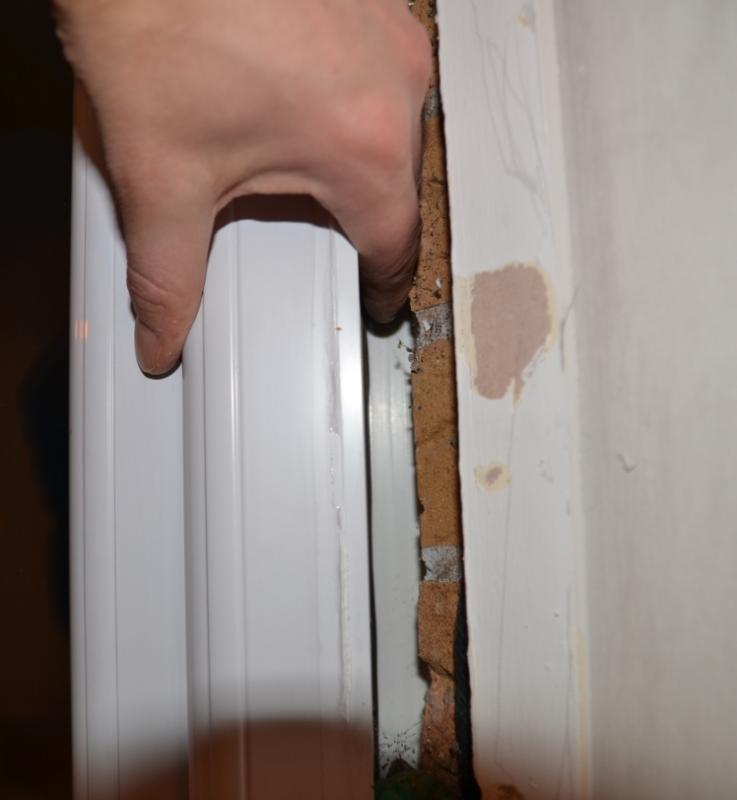
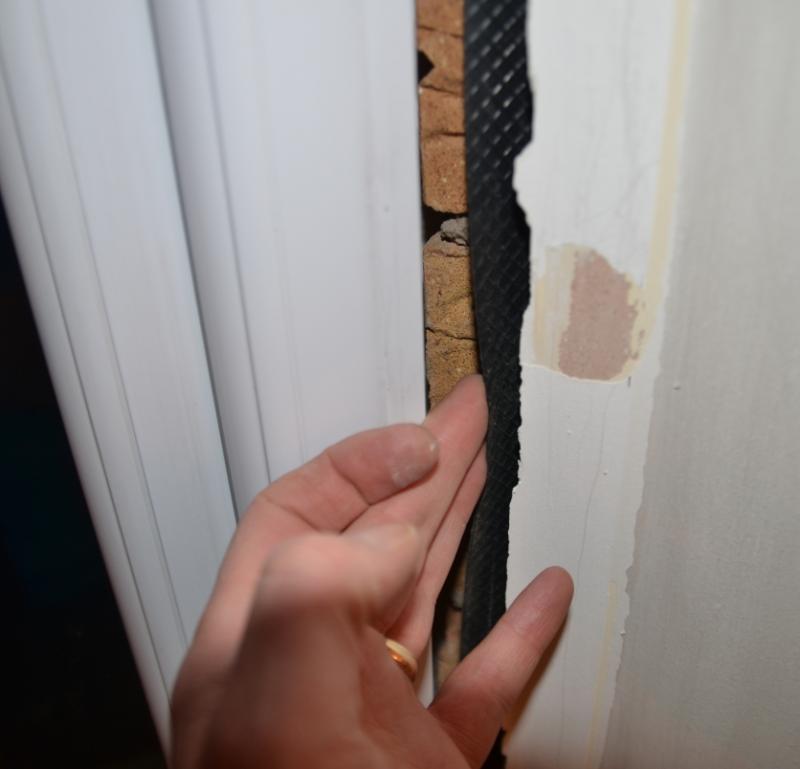
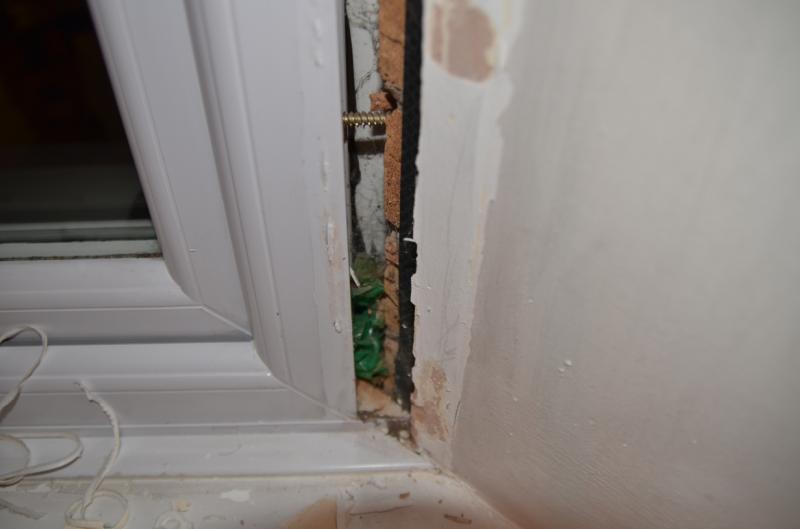
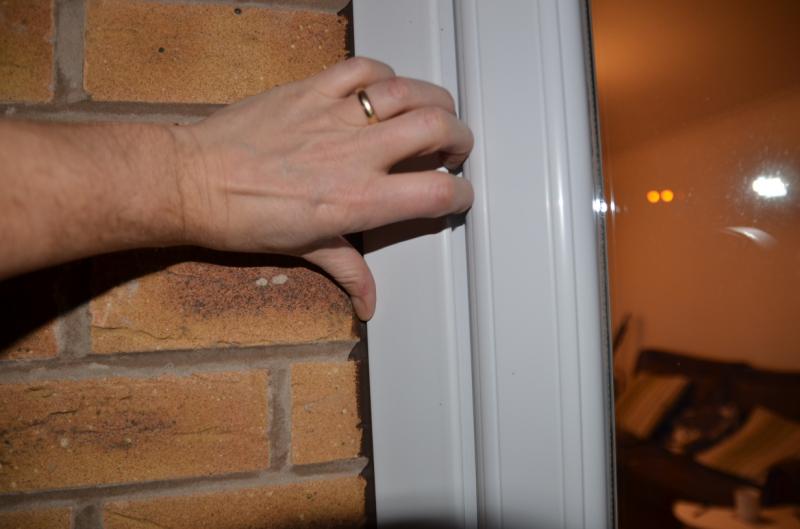
Now I have started on the lounge bay window but the gap is rather huge. I have removed a piece of trim from the front right and the gap is big. I can get my fingers in and push the outside of the house side trim which is not sealed down very well. No wonder the area was cold and whistley!
Should I fill with expanding foam and then seal up with filler and/or do I need to re-use the trim pieces and glue them on properly?
Should the gap be left full of air to stop condensation or something? Does the foam insulate?
Any ideas appreciated.
The photos give you an idea of what I am talking about.
Also if I did use expanding foam how would I stop it coming out the trim on the outside of the house? Can you trim it back when it sets?
If I clean up and reglue the trim on what adhesive do you use?
Cheers
Macker