Tile slithers on a Velux install

Joined
5 Jul 2011
Messages
100
Reaction score
3
Location
Kent
Country
United Kingdom
Hello

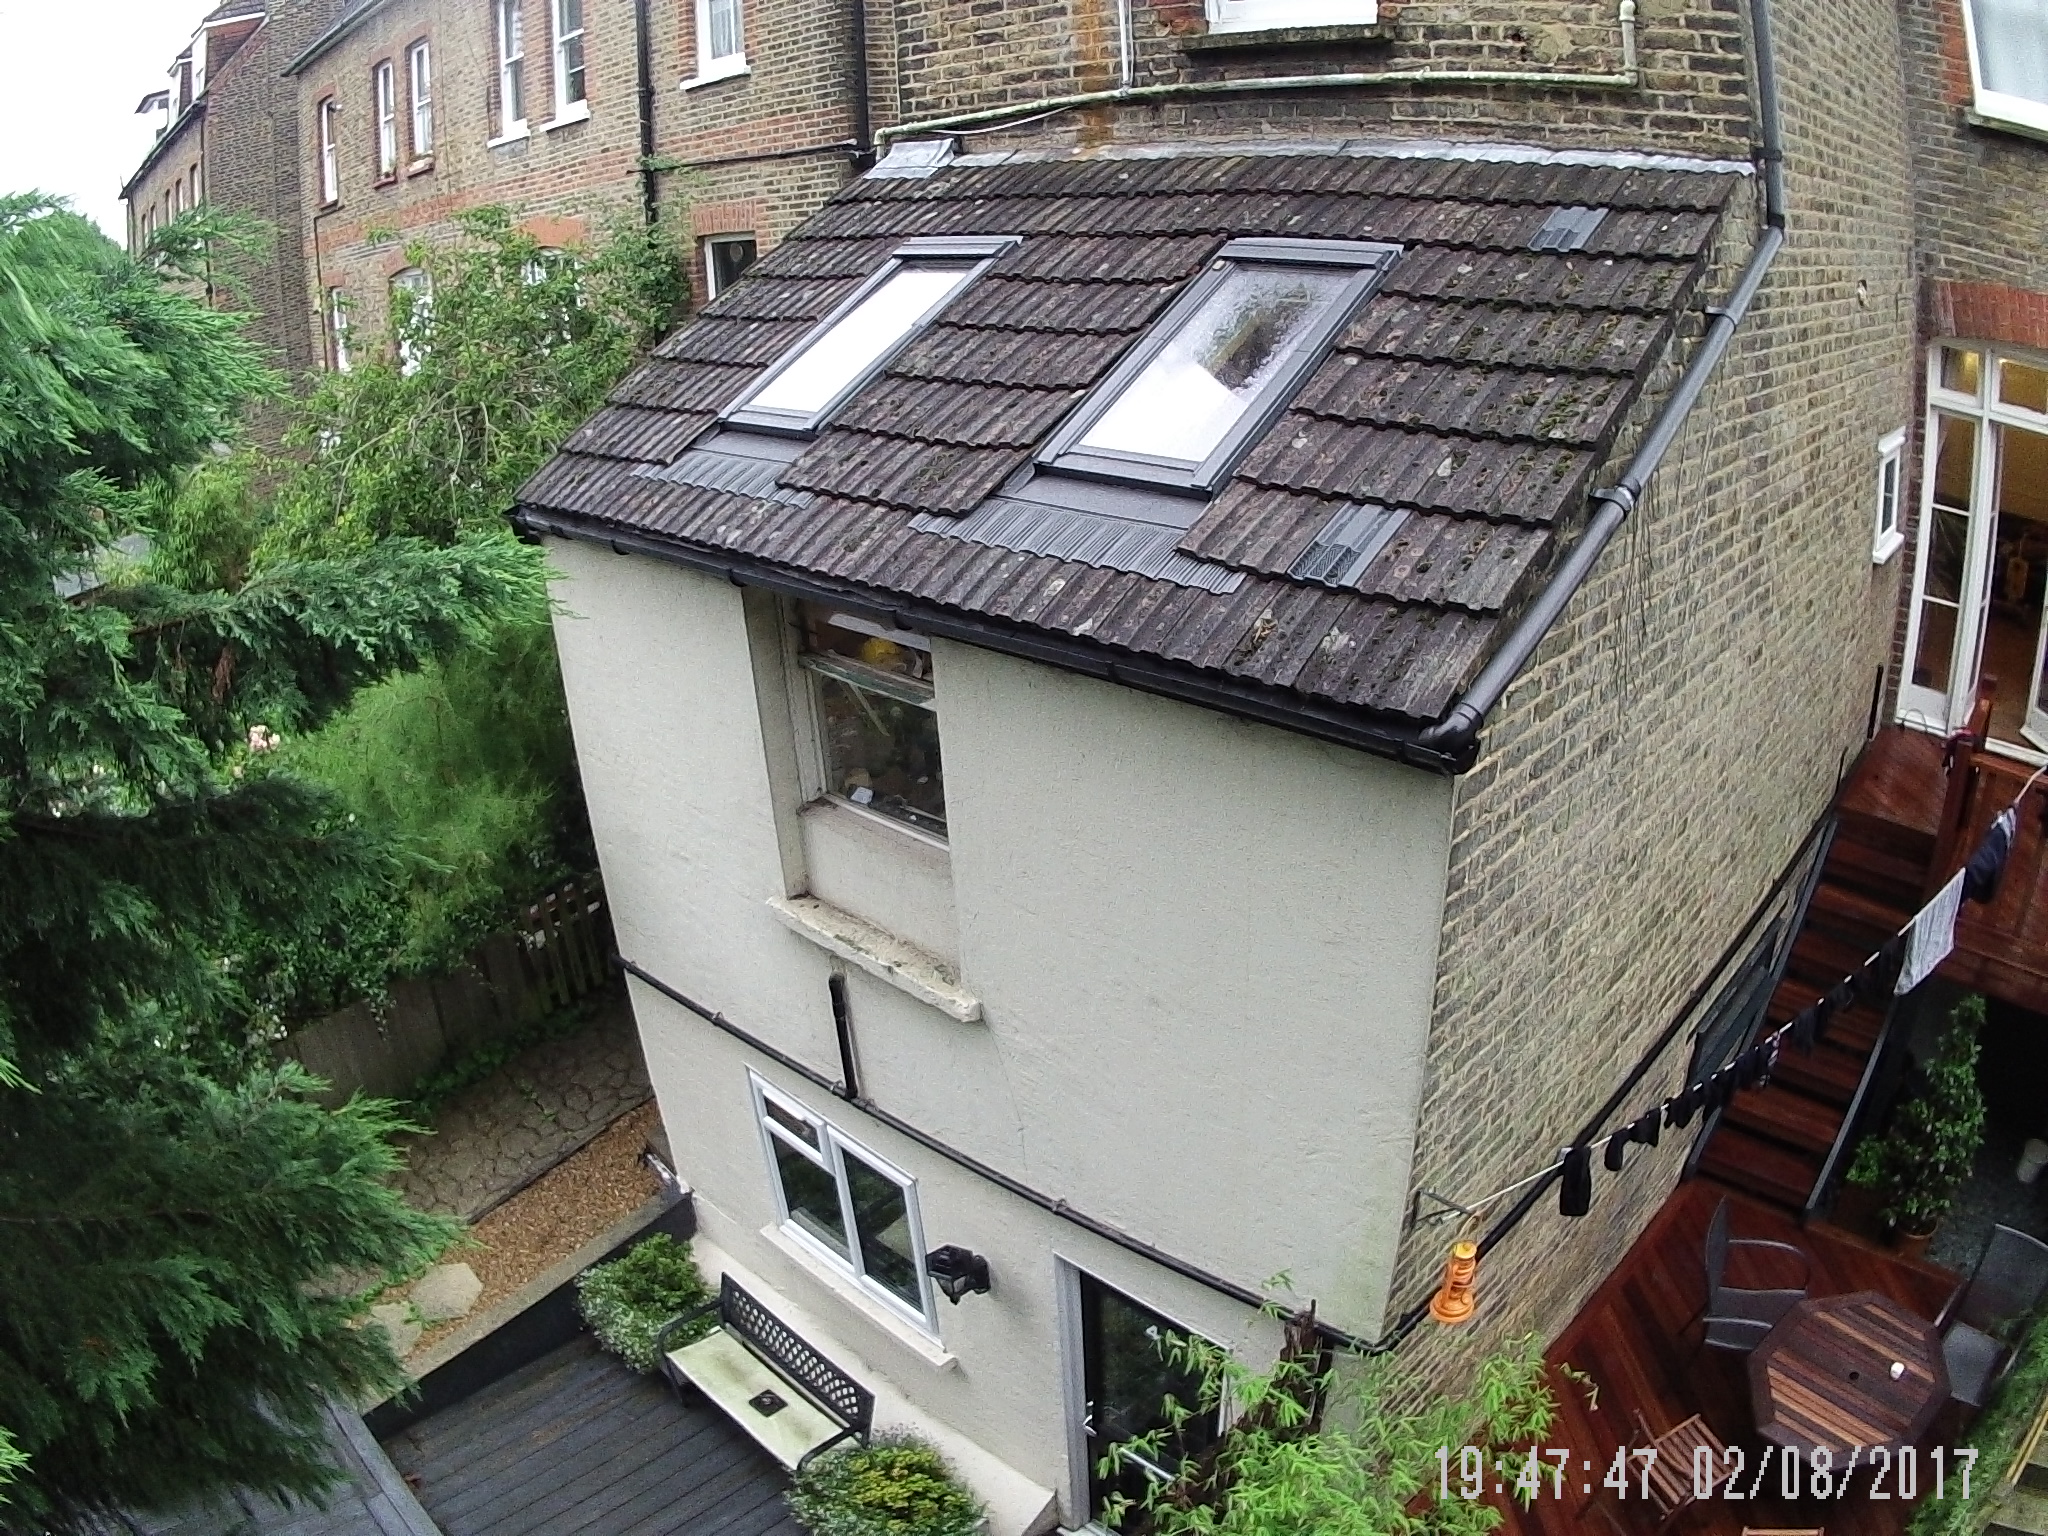
So I helped my friend fit his recessed Velux windows in his sloped roof using the EDJ flashing kit. We started from the inside and decided on the position of the windows based on the ceiling rafter position and how he wanted it to look inside.

Once we'd installed the windows, we ended up with slithers of tiles, when we went to replace them. They are Redland 49s. So as far as I'm aware, you can buy tile and a half in some tiles and slate, but I can't find any for Redland 49. We couldn't figure out how to support a tile slither next to the window, figuring it would eventually come loose, and adhesive was probably not a great choice. Having said that, I recently saw a Velux window install with slithers about 40mm wide of Redland 49s. Not sure how the guy fixed them, but they looked really good.

So my question is, should you start from the outside laying out the window on the tiles to ensure minimum cuts, and deal with the consequences inside i.e. moving rafters about etc, or start from the inside? If you start from the outside, you may end up with the windows not lining up with certain features internally. Or do you do it starting from the inside like we did? Or is it a case by case basis.

And if you end up with slithers, how can you fix them?

Many thanks
 
Sponsored Links
you should try to position the window to get no cuts under and no or reasonable cuts to the side.. cant you move it over so you can drill a cut? do not fix through the flashing
 
We glue our slither tile piece to the neighbouring full tile. (Interlocking tiles only)
 
Sponsored Links
I assume you guys are all roofers or have a lot of experience with roofing. I guess I'm trying to find out "what would an experienced roofer do?"

Here is that roof I was talking about with the tiny slithers:

So Noseall, what adhesive do you use and how long do you reckon on it lasting?

Here is the finished roof:


You might not be able to see, but we didn't end up with tiny slithers because we fudged the middle section of tiles. Over the course of 5 rows of tiles we were able to "lose" half a tile . But basically the bottom row is squashed together and top row spread out. Not ideal, but given that no-one we spoke to was willing to offer a solution, this worked, and with the really heavy downpours we've had, there hasn't been a single leak. The ceiling is exposed so we're certain about that. Plus it was my mate's idea, and it's his roof.

Still, if I have to do this again, I'm still uncertain how to approach it. My guess is that every situation is different right? So ideally you would position the window from the outside to get it to line up with the tiles, and assuming things are symmetrical, should look good inside too. But there must be situations where you just end up with slithers and have to glue them on.

Cheers
 
set the windows to suit the tiles. You only needed maybe 30mm one way and you would have no cut. the other could have been moved a tad to make things look symmetrical I expect.
if things are really really desperate it is possible to jump the bond by half a tile, it is still weather proof.
Maybe this is what you did between the two windows?
of course you would need to cut the verge .. needs must sometimes.
Fascia looks a bit low looking down the slope.
 
So Noseall, what adhesive do you use and how long do you reckon on it lasting?
We use CT1 when we can get it. Otherwise any of the strong polymer type sealant/adhesives.

I'm not sure on the longevity but the bond is still impressive many seasons later.
 
Thanks for all your replies. I knew there was a way, and it will help me going forward. Obviously I will be very cautious to ensure the next one I fit sits well within the tiles first if possible. But at least I have an option if I get stuck.
Yes Datarebal, we jumped half a bond. Glad to know this is also an option.

So finally what I must ask is about the flatness of tiles sitting adjacent to the window on the sides i.e. the slithers or half tiles. We tried to get them sitting with their inner edge in the main channel of the flashing so that any water would fall into the channel. The tiles ride up on the metal ridge that forms the channel. If we'd left it like that, it would have looked awful. Never seen any rooflights with the innermost tiles splayed up. Having spoken to the Velux suppliers, he said you had to bash down the flashing, and logically I couldn't see any way round this. Might not be clear from the photo I posted, but even after this, I felt the tiles were still riding up a bit.

So I just wanted to check if this was normal i.e. to bash it down. I can only imagine the half round mediterranean style tiles might sit neatly on it, but otherwise I think you always get this problem. Many thanks
 
I'm interested to know about what you refer to as jumping the bond by half a tile between the 2 windows. I'm staring at your photo and I can't get my head around what you mean. If one of you guys can explain in more Noddy terms it would satisfy my curiosity.
 
The cuts butt the upstand not go over it.. I think thats what you are asking As for bashing down..no never there is no need

23vc Jump the bond Noddy!
 
So you can slightly adjust the overlap between interlocking tiles next to each other? I can't see how that's possible as they only lock together in one place?
Also doesn't that mean that the velux's aren't square to the tile line for that to be needed?
(Sorry not trying to hijack the thread, just genuinely interested as I've got to do something similar on mine eventually)
 
Redland 49s and similar tiles are usually laid with a straight bond, but can be laid with a staggered bond.
Therefore between windows as in above pictures you can move the tiles across half bond and still marry in above and below.
 
If you fit roof windows without consideration to the tile coursing or bond
then you are almost certainly going to have problems.
slate roofs are easier in my opinion as you can cut the slates
to suit your window.
 

DIYnot Local

Staff member

If you need to find a tradesperson to get your job done, please try our local search below, or if you are doing it yourself you can find suppliers local to you.

Select the supplier or trade you require, enter your location to begin your search.


Are you a trade or supplier? You can create your listing free at DIYnot Local

 
Sponsored Links
Back
Top