Wall Plugs & Heavy Mirrors - Newbie confusion(?)

Joined
27 Jan 2010
Messages
58
Reaction score
6
Country
United Kingdom
Hello,

Thank you very much for reading my post.

This will seem basic to you experts, but I'm not fully comprehending it.

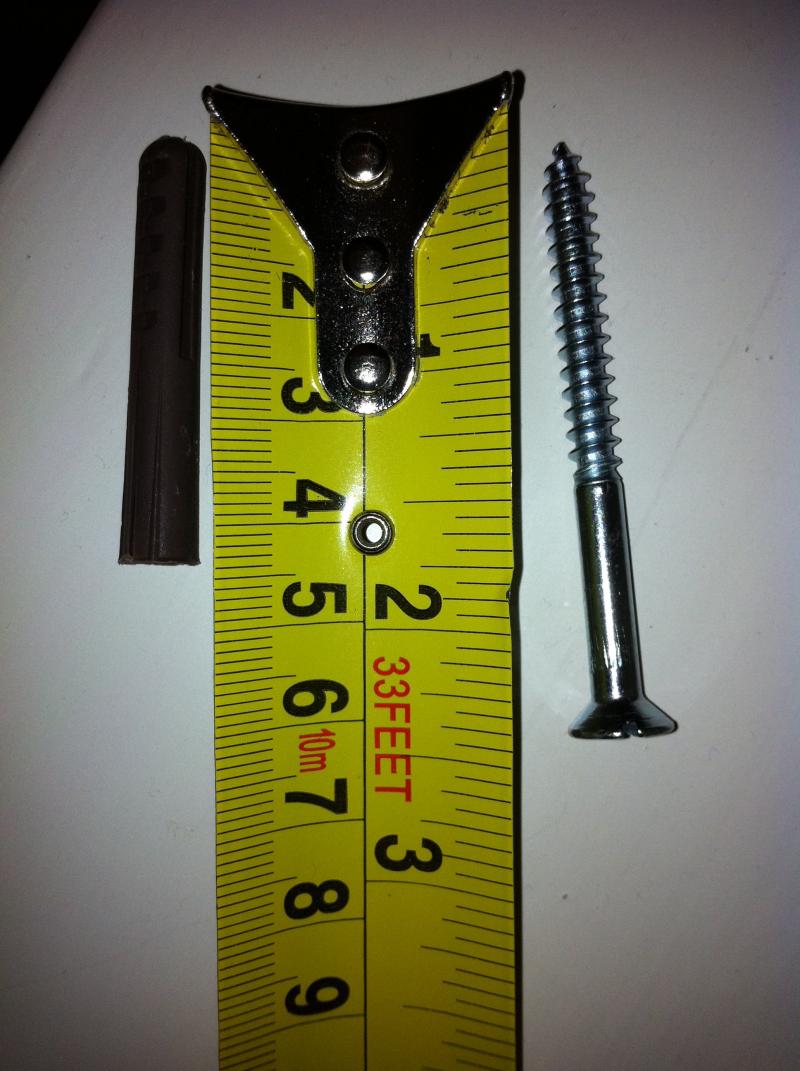
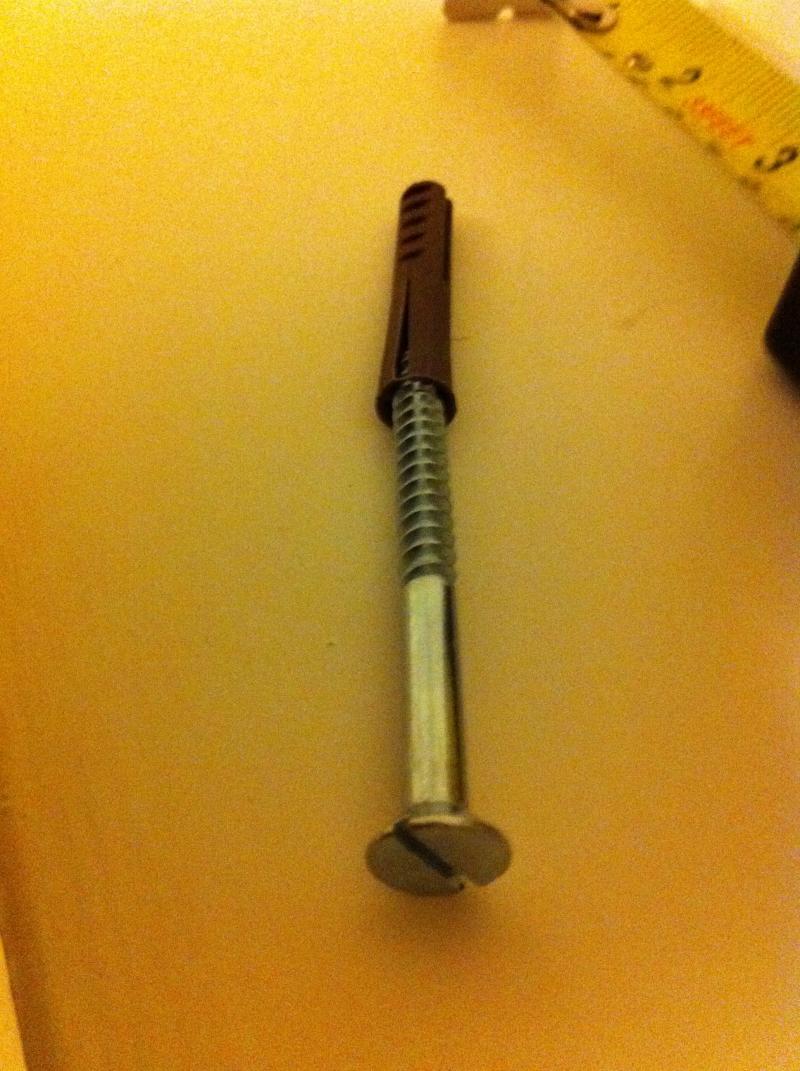
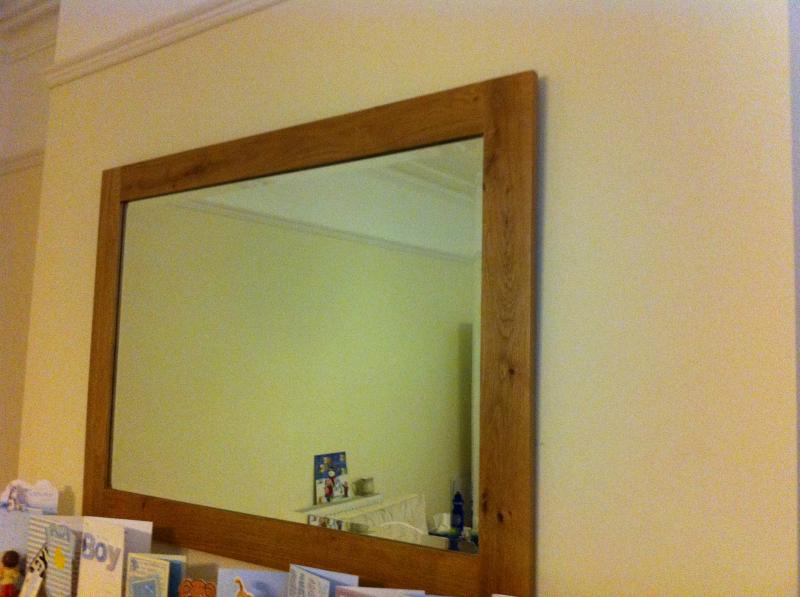
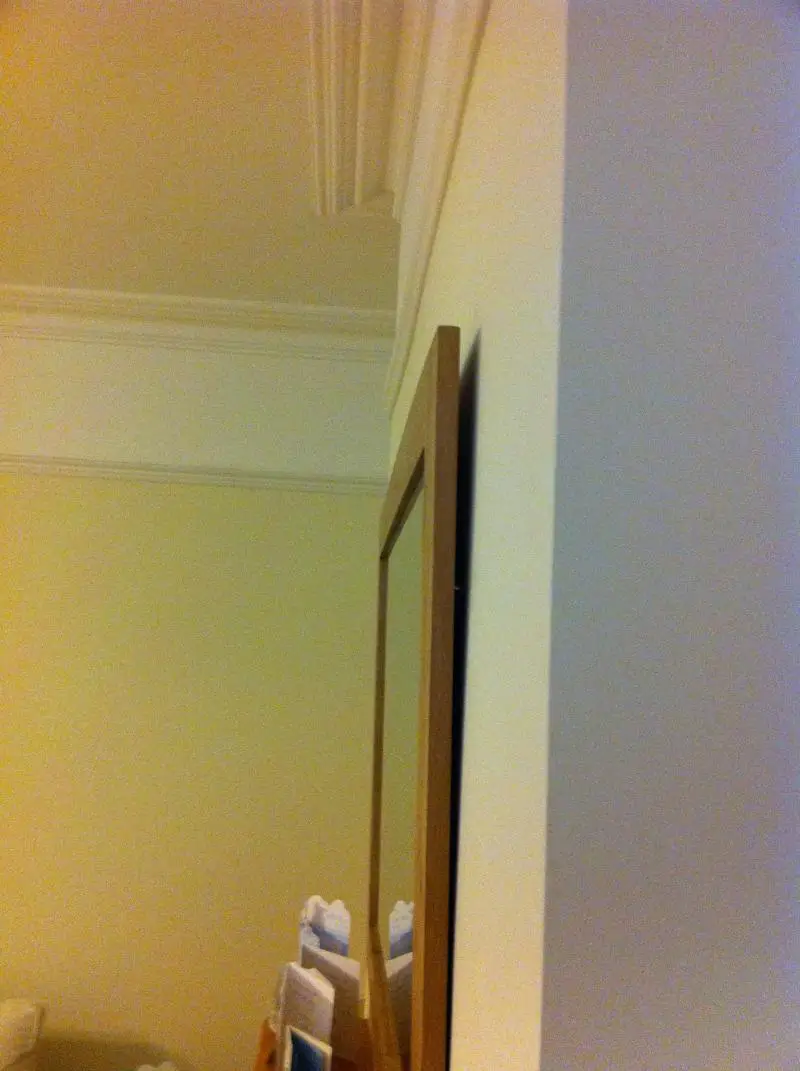
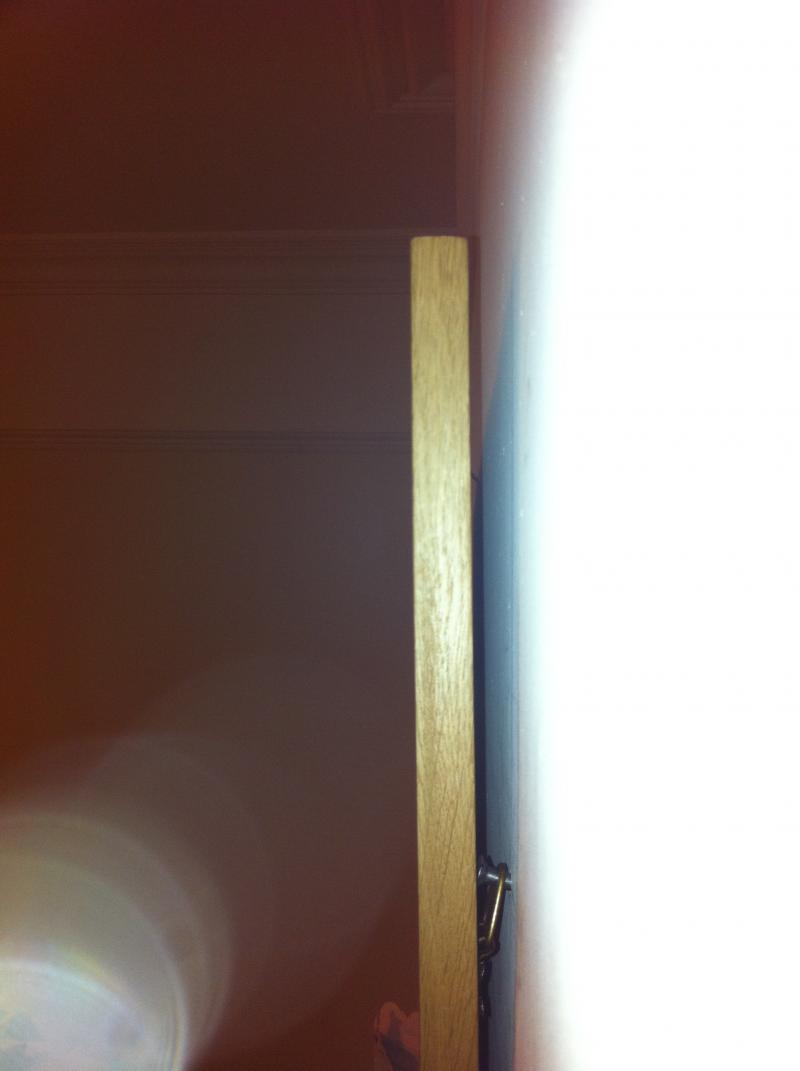
I have a large heavy mirror to hang above a fireplace (plaster then brick in the wall). Most of the posts on this forum recommend brown wall plugs, although some sites have recommend 'anchors'.

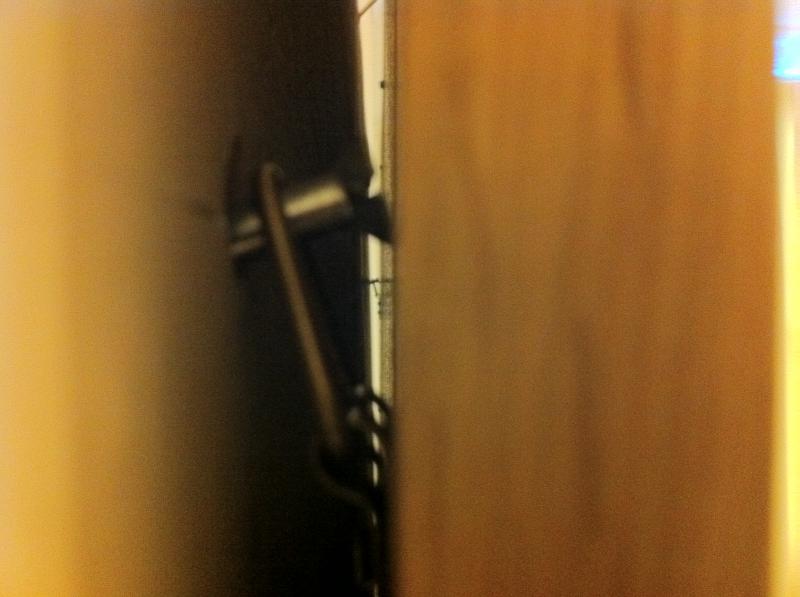
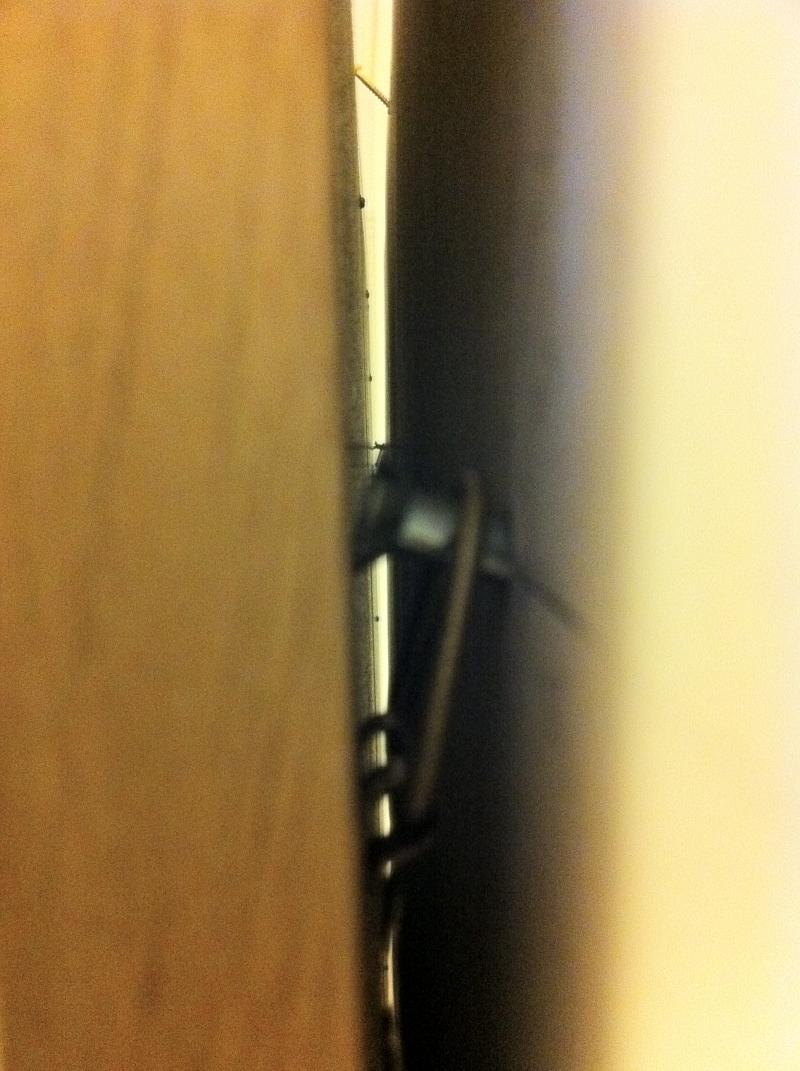
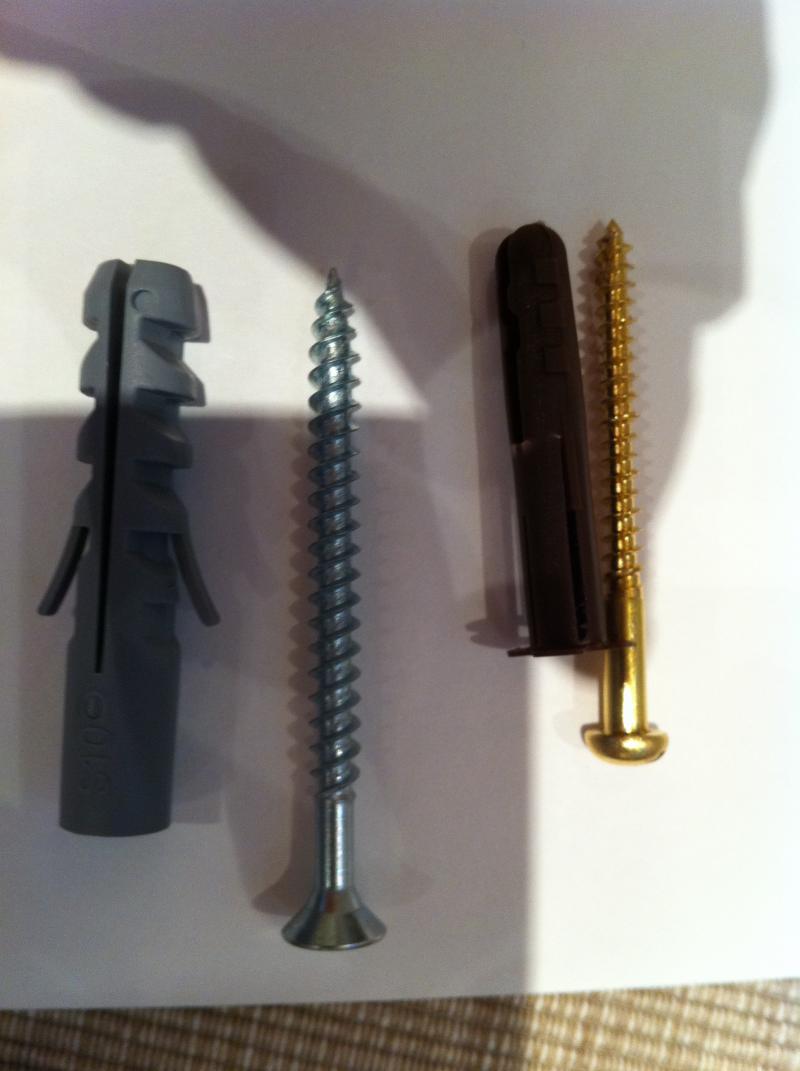
I went to my local hardware store and he sold me these brass/gold screws with the brown wall plug. I quizzed him if it would hold, and he was very confident.

Plug is 40mm and screw is 50mm.

However to me, the gray screw and plug look way more likely to stay in the wall and the brown plug looks pretty wimpy.

I appreciate that both will expand in the wall to apply pressure, but it just doesn't look sufficient to me and I don't want to take any chances.

Why is he so confident? Will this little brown wall plug really hold a big mirror in a solid oak frame (120 x 80)?

Thank you for your guidance and patience,
Matt


p.s. this may be even more newbie, but why do people put them in level? (perpendicular to the wall) If they were on a downward angle, they would have no chance of coming out would they?
 
Sponsored Links
I've been through this a few times as we have a big heavy mirror and have taken it through a few house moves.

Firstly, how much does the mirror weigh? I can't tell you how much ours weighs but it's heavy enough that I can just about hold it up on the wall for a minute or two while Mrs RR marks for the holes.

If you can lift it easily, the grey plugs should do, as long as they holes are not too big and the plugs not a sloppy fit. Start by drilling smaller pilot holes then go for the correct size for the plug. Make sure the tip of the screwdriver is sharp so that you don't ruin the slot in the screw. Put a bit of wax or petroleum jelly on the screw and fit the mirror - presumably you're using mirror plates? If the screw goes in very easily or the plugs don't need tapping in with a light hammer, think again as the mirror could fall off squashing tibbles or fido or whoever is asleep underneath it. I saw this happen many years ago, scared us all to death.

I've considered packing the top plates out a little so that the mirror faces downwards slightly but never done it because I've always wanted to be sure the maximum length of the screw was driven home. Anyway, once the four screws are done up tight the stress on them and the plugs will be almost vertically downwards, whereas if you lean the mirror out at the top you're introducing a whole new element of stress in an outwards direction, which might not be a good idea.
 
By the way those big screws are countersunk head, which is not right. You really need to find some dome headed screws, which is a more correct and elegant solution.
 
The important bits are getting the right size plug for the screw, and the right size hole for the plug. If the plug isn't a snug fit in the hole, it risks pulling out under even a moderate load. Similarly, the wrong size screw won't expand the plug sufficiently to grip the hole.

Don't count on the plaster to contribute much to the fixing - it has little mechanical strength. Sink the plug into the brickwork. Make sure the hole is deep enough for the length of the screw. If the end hits the bottom of the hole before it's tight, it will start pulling the plug back out of the wall , undoing all your good work.

For a good solid fixing many recommend cleaning all the dust from the drilled hole and filling it with 'No Nails' adhesive before pushing the plug in, and leaving it to set overnight before tightening the screw.

Make sure the tip of the screwdriver is sharp so that you don't ruin the slot in the screw.
...Not quite how I would put it.... The screwdriver blade needs to fit the screw head accurately. For a slotted screw that means parallel faces and square corners, not a sharp chisel-like blade, which will always wreck screw heads.That is especially important with brass screws, as the relatively soft metal is easily damaged.

Many will initially fit a steel screw of exactly the same size as the brass screw they intend to use to expand the plug and form a thread in the plastic, then unscrew it and replace it with the more decorative brass screw.
 
Sponsored Links
Wow! Fantastic replies, thank you very much.


Some of your questions:

> How much does the mirror weigh
> Are you using mirror plates

It's very heavy, I can't really hold it up for more than a few seconds. Solid oak frame.

Mirror plates? No. The mirror comes with 2 hooks already.


My questions:

I still don't fully comprehend why these little brown wall plugs are so often recommended - I had assumed something much larger would be required.

I suppose, based on your responses, that the right screw, right plug and right hole, can hold a lot of weight.

I guess the big teeth of the grey one aren't really going to impact the brick anyway, are they?

If brown can hold a heavy mirror, I suppose brown is suitable then for almost all future projects? No need for anchors?


Sorry for all the questions - just really don't want the mirror to fall off and I'd like to make the right choices for future projects. We have a new baby! :)

Thanks again,
Matt
 
Okay, sounds like your mirror is as heavy as ours. In that case you need to get what I call some "eff-off" plugs. Take a look at the blue ones here: http://www.bkservicesonline.co.uk/s...e=product_info&cPath=106_239&products_id=3479

You can get these from a specialised fixings supplier or a good ironmonger. Get them to give you some equally "eff-off" brass dome head screws to go with them. They will be a tight fit so make sure the head of the screwdriver is not dulled and rounded (as someone says above) and try lubricating them lightly, although brass is naturally quite slippery anyway.

Our mirror also has a solid oak frame and must be about 3 ft by 4 ft. There are brass mirror plates at each corner. Once we have screwed it to the wall we usually paint the plates and screws with the same paint as the wall and it looks pretty good. Sounds like you might be using a hanging wire and a couple of screws only so you will need to be extra sure the fixings are secure. The advantage of hanging from a wire is that the measurements don't have to be spot-on whereas using mirror plates you've got to be able to mark the places accurately and dead level on the wall, which means either holding up the mirror with a spirit level while someone else clambers around and marks through the mirror plates, or doing some accurate marking out using ruler and pencil and spirit level.
 
> In that case you need to get what I call some "eff-off" plugs

This was the crux of my original question.

Why doesn't everyone just use large heavy duty wall plugs and play it safe? Or is it simply that the brown ones are genuinely capable of doing the job?

Even better question - what are these anchors people are recommending on other websites? They say industrial use and look very serious.


> http://www.handymanknowhow.co.uk/puttingthingsup/hanging paintings and mirrors.htm

That is a great url, thank you.

It has me thinking about some kind of j-hook, as you get double the holes in each side and therefore double the support. Although I suppose it's harder to hide those hooks behind the mirror.

FYI - here is a picture of the back of the mirror and the hooks that come with it.


Those loops are for wire so you can string with heavy duty brass wire and hand on a screw, if you are hanging this way, two screws spaced 150mm apart and level will provide a stable mount and stop swing on the mirror, though I prefer to mount the loops vertical and hang directly onto two screws installed to match the loop spacing.
Too answer your other question large wall plugs are not any stronger than small they just accept larger screws.
 
I have a builder coming by soon for something else and will ask him before I proceed. With taking care of the baby, it will be that long before I even get started anyway ;) lol!

The main thing I was trying to accomplish here was learning more so i can hang various things myself. In particular, learning about these wallplugs and the unusual advice (or so it seemed to me) of these small'ish brown wall plugs.


I probably wont use the wimpy looking hangers/hooks that came with the mirror and will get either flush plates:

flushplatesx2.250.jpg


as described in these instructions here:

http://www.handymanknowhow.co.uk/puttingthingsup/hanging paintings and mirrors.htm


or


z-bar picture hanger:

562_product_detailed_image_192_107.gif


from this website:

http://www.picturehangers.co.uk/framers-mirror-and-picture-hangers/pb422-18.html


I thought this third item was interesting for beginners and it comes with instructions, but it does cost more:

http://www.picturehangers.co.uk/fra...e-hangers/mirror-picture-hanger-457mm-18.html
 
---------------
:D Final Summary :D
---------------


Hello Everyone,

I've spoken to a professional and I'd like to summarize my findings here for future DIY newbies like myself...


The plugs:

The professional was confident that brown rawl wall plugs would be more than sufficient and that I should simply use two screws to hang the mirror.

When it comes to wall-plugs, two of the big companies are Rawl and Fischer. They both have websites with product details.

Read the screw information on the side of the wall-plug packaging for the right screw and right drill size. Try to use longer screws and longer wall plugs rather than shorter ones and take account of any distance you need the screw to be out from the wall (both for ease of hanging and so that it reflects the room and not the ceiling).

Try to pick screws that fill the wall plug diameter - mine suggested a range of 10 to 14 gauge and I used 12.

The screws and wall plugs I used are:

Screw - No 12 - 2.5 inch, 5.5mm by 65mm

Wall Plug - Brown - 45mm (1.75 inch), accepts screws between 10 and 14

I've been told brown plugs are ample for most things and larger plug diameter isn't necessarily better. Getting the plug completely into the brick and filling the wall plug with a wide screw is more important.

Note the screws don't have thread at the top, but are still wide enough to ensure no movement inside the wall plug. Also, they have a large head to ensure the brackets won't slip off.


One person said, if the screws aren't perfectly level you can adjust the brackets on the back of the mirror to compensate - this is not completely true, as you have to you can't make mm adjustments once you've screwed something into a wood mirror frame. Be sure to measure everything before hand and get everything lined up.


Supplied Items:

The brackets supplied with my mirror were excellent.

However the screws (for fixing the brackets to the mirror) were RUBBISH and spun in the wood. My local shop supplied screws which looked identical in size, but held solid. For £0.30, it's worth getting better screws.


Other options:

Mirror plates are a good alternative if you don't mind the screw being visible, but we're trying to hide ours behind the mirror. Mirror plates ensure the mirror can't come off the wall.

Z-bars look good as you can easily compensate if your screwed holes aren't perfectly level or the perfect distance left or right. However with heavy mirrors, you need the job done right. I'd only use z-bars if I needed to spread out the load.

If you're stuck with a hole to big, resin and other products can be used to fill holes that are crumbly or too big, but they can be quite toxic.

Flush plates look like a more stable way of hanging a picture or mirror, but with 4 screws per plate, I think there is more chance for error and it's a lot of work to get 4 holes exactly right.


Installation:

Some instructions with pictures: http://www.ultimatehandyman.co.uk/F&F_WALL_PLUGS.htm

They only bit I don't agree with completely, is sinking the wall plug level to the brick and not the plaster. I'd rather use longer wall plugs and screws without thread at the top.


A few notes of my own:

Before drilling, mark your spot with complete precision using a sharp pencil. Use your laser level and do your measurements to the mm. Mark the spot using a + mark, not a dot or circle which isn't precise.

Before drilling, I put a screw into the wall a few inches to the side of the mark. It was at the angle I want the wall plugs to go in at. By getting one screw correct each side, I could then line up the drill with it.

When drilling, ensure the drill is exactly where the two lines meet. Being a few mm off can mean you end up with something that is not level.

First drill a hole using a tiny drill bit - this (for me) allowed more precision in drilling into the mark. This small hole provided a guide for the larger drill bit.

When drilling the real hole, use the drill size on the wall-plug packaging or one size smaller and then increase the size if necessary. The hole should be such that you need to lightly hammer in the wall plug.

Vacuum out the holes after you drill them and before you put the wall plugs in.

Drill the length of the wall plug, no deeper. Mark your drill with tape to help.


Post hanging safety:

As an extra precaution, I put a screw in just above the mirror such at the mirror could not be pushed upwards. I did this at a downward angle so the screw would be fairly hidden. No the mirror doesn't move up, down left or right! :) Solid!


I hope this helps :)


DIYnot Local

Staff member

If you need to find a tradesperson to get your job done, please try our local search below, or if you are doing it yourself you can find suppliers local to you.

Select the supplier or trade you require, enter your location to begin your search.


Are you a trade or supplier? You can create your listing free at DIYnot Local

 
Sponsored Links
Back
Top