Hi guys, I wonder if I could trouble you for some help plumbing in my new floating WC.
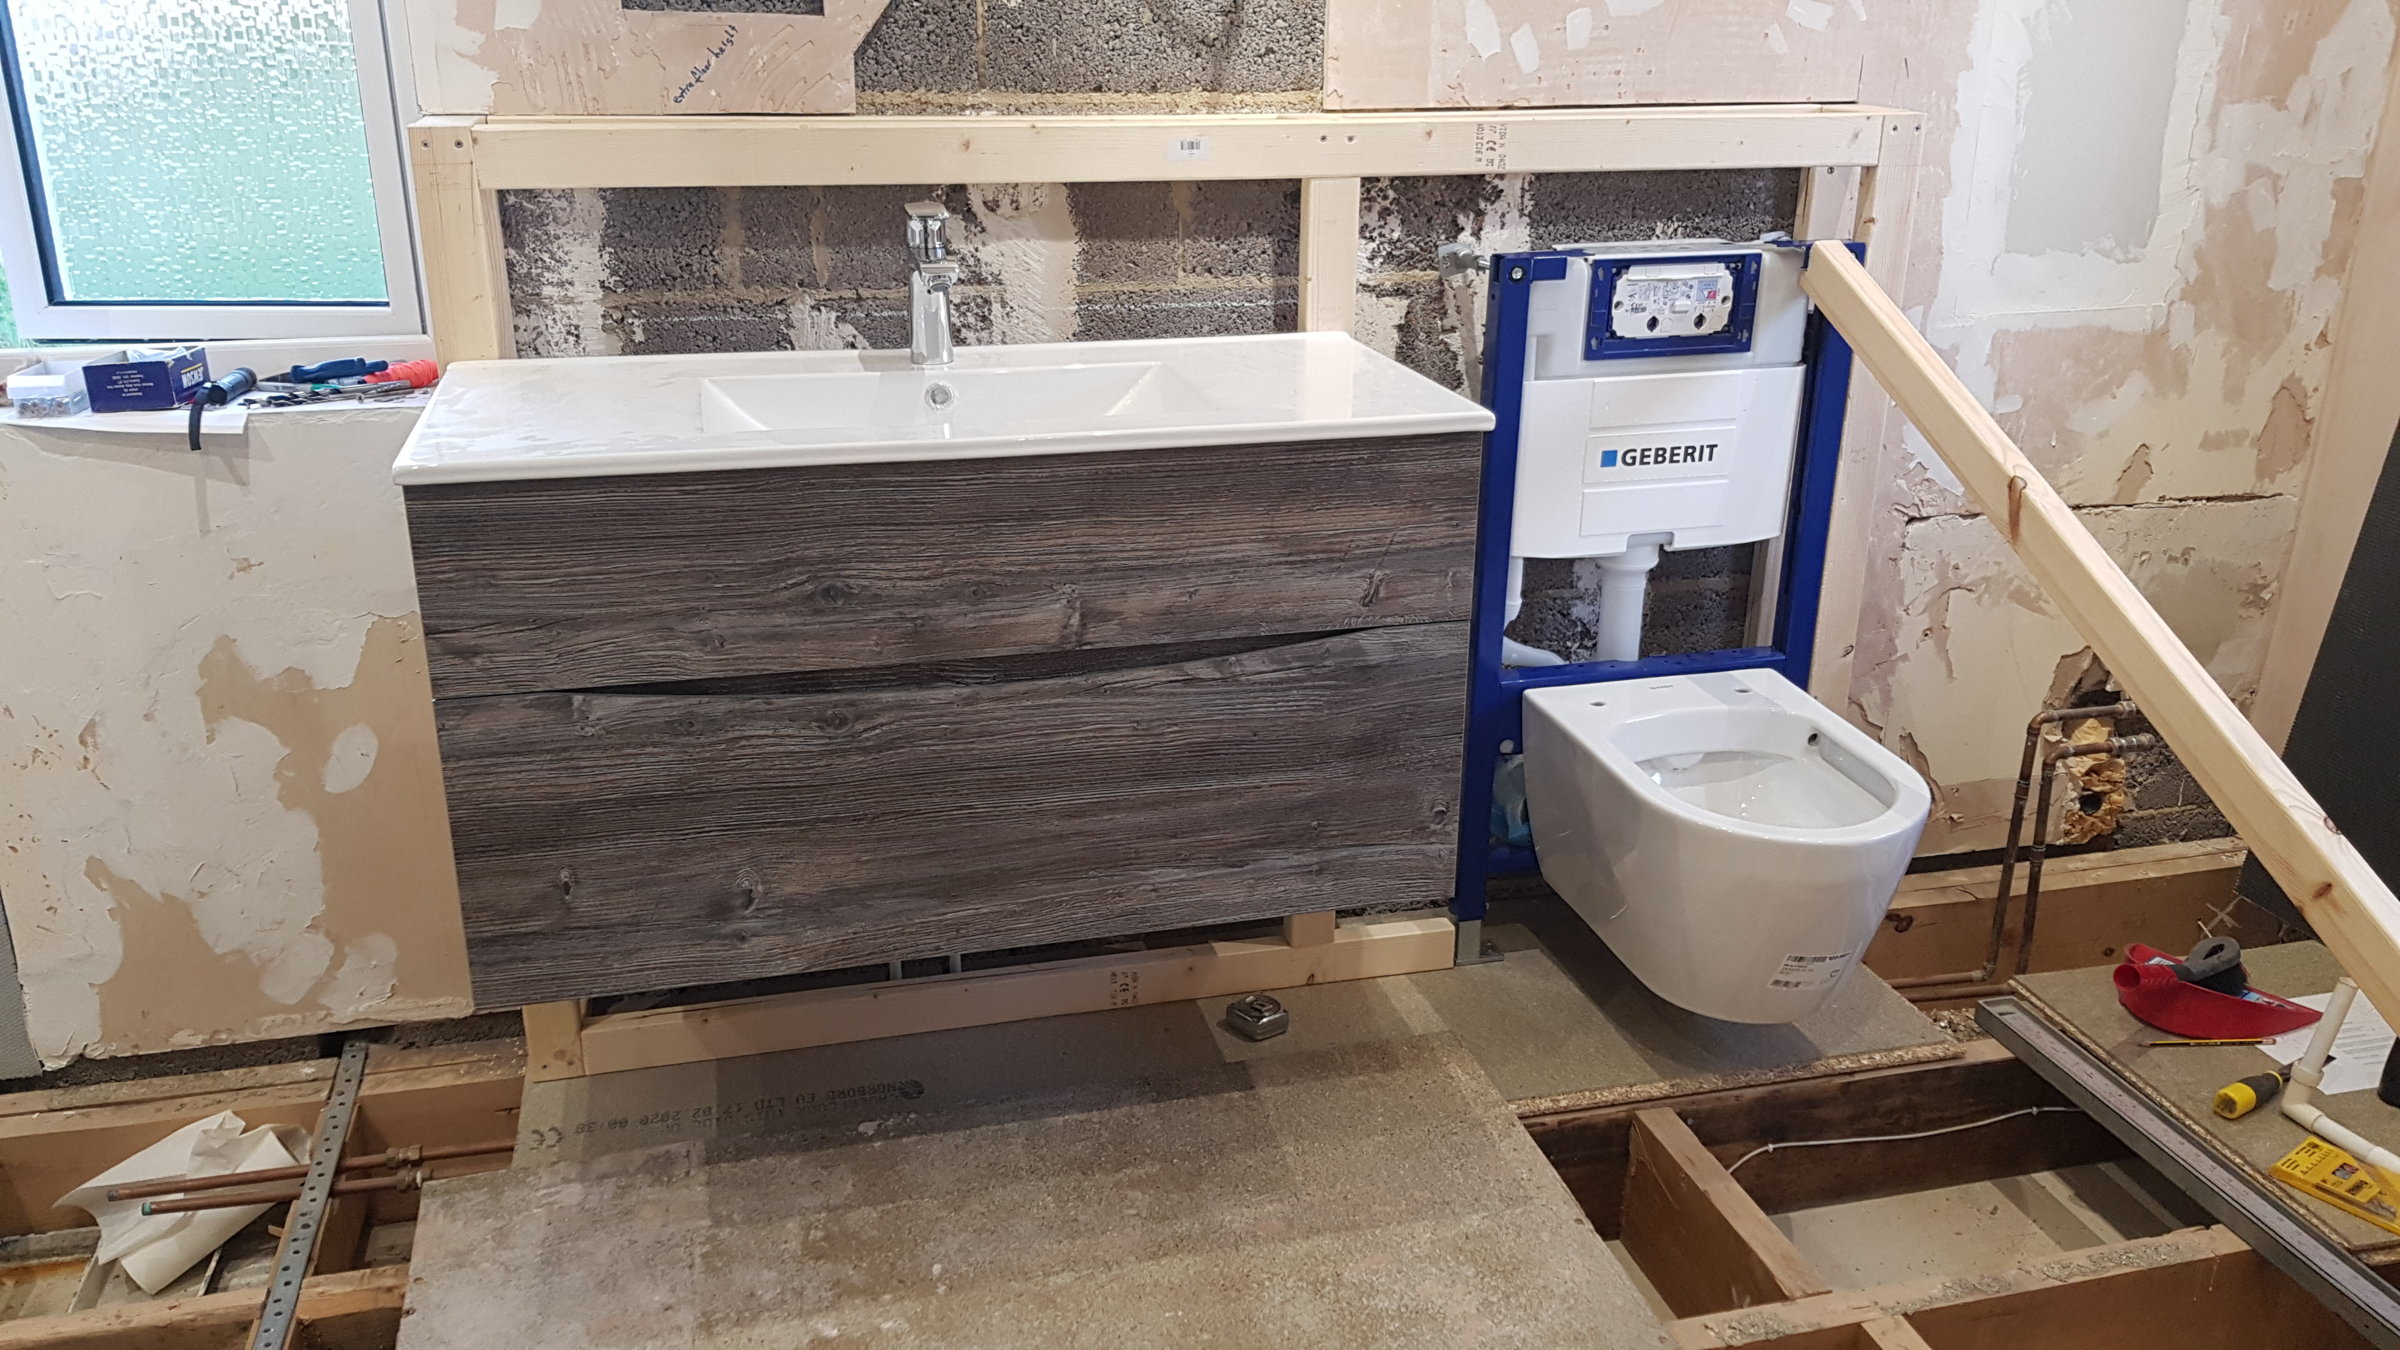
I have a Geberit frame, which will be boxed in and I've set this to the required height to ensure the top of the pan (minus the seat) will be at 42cm above the tiled surface.
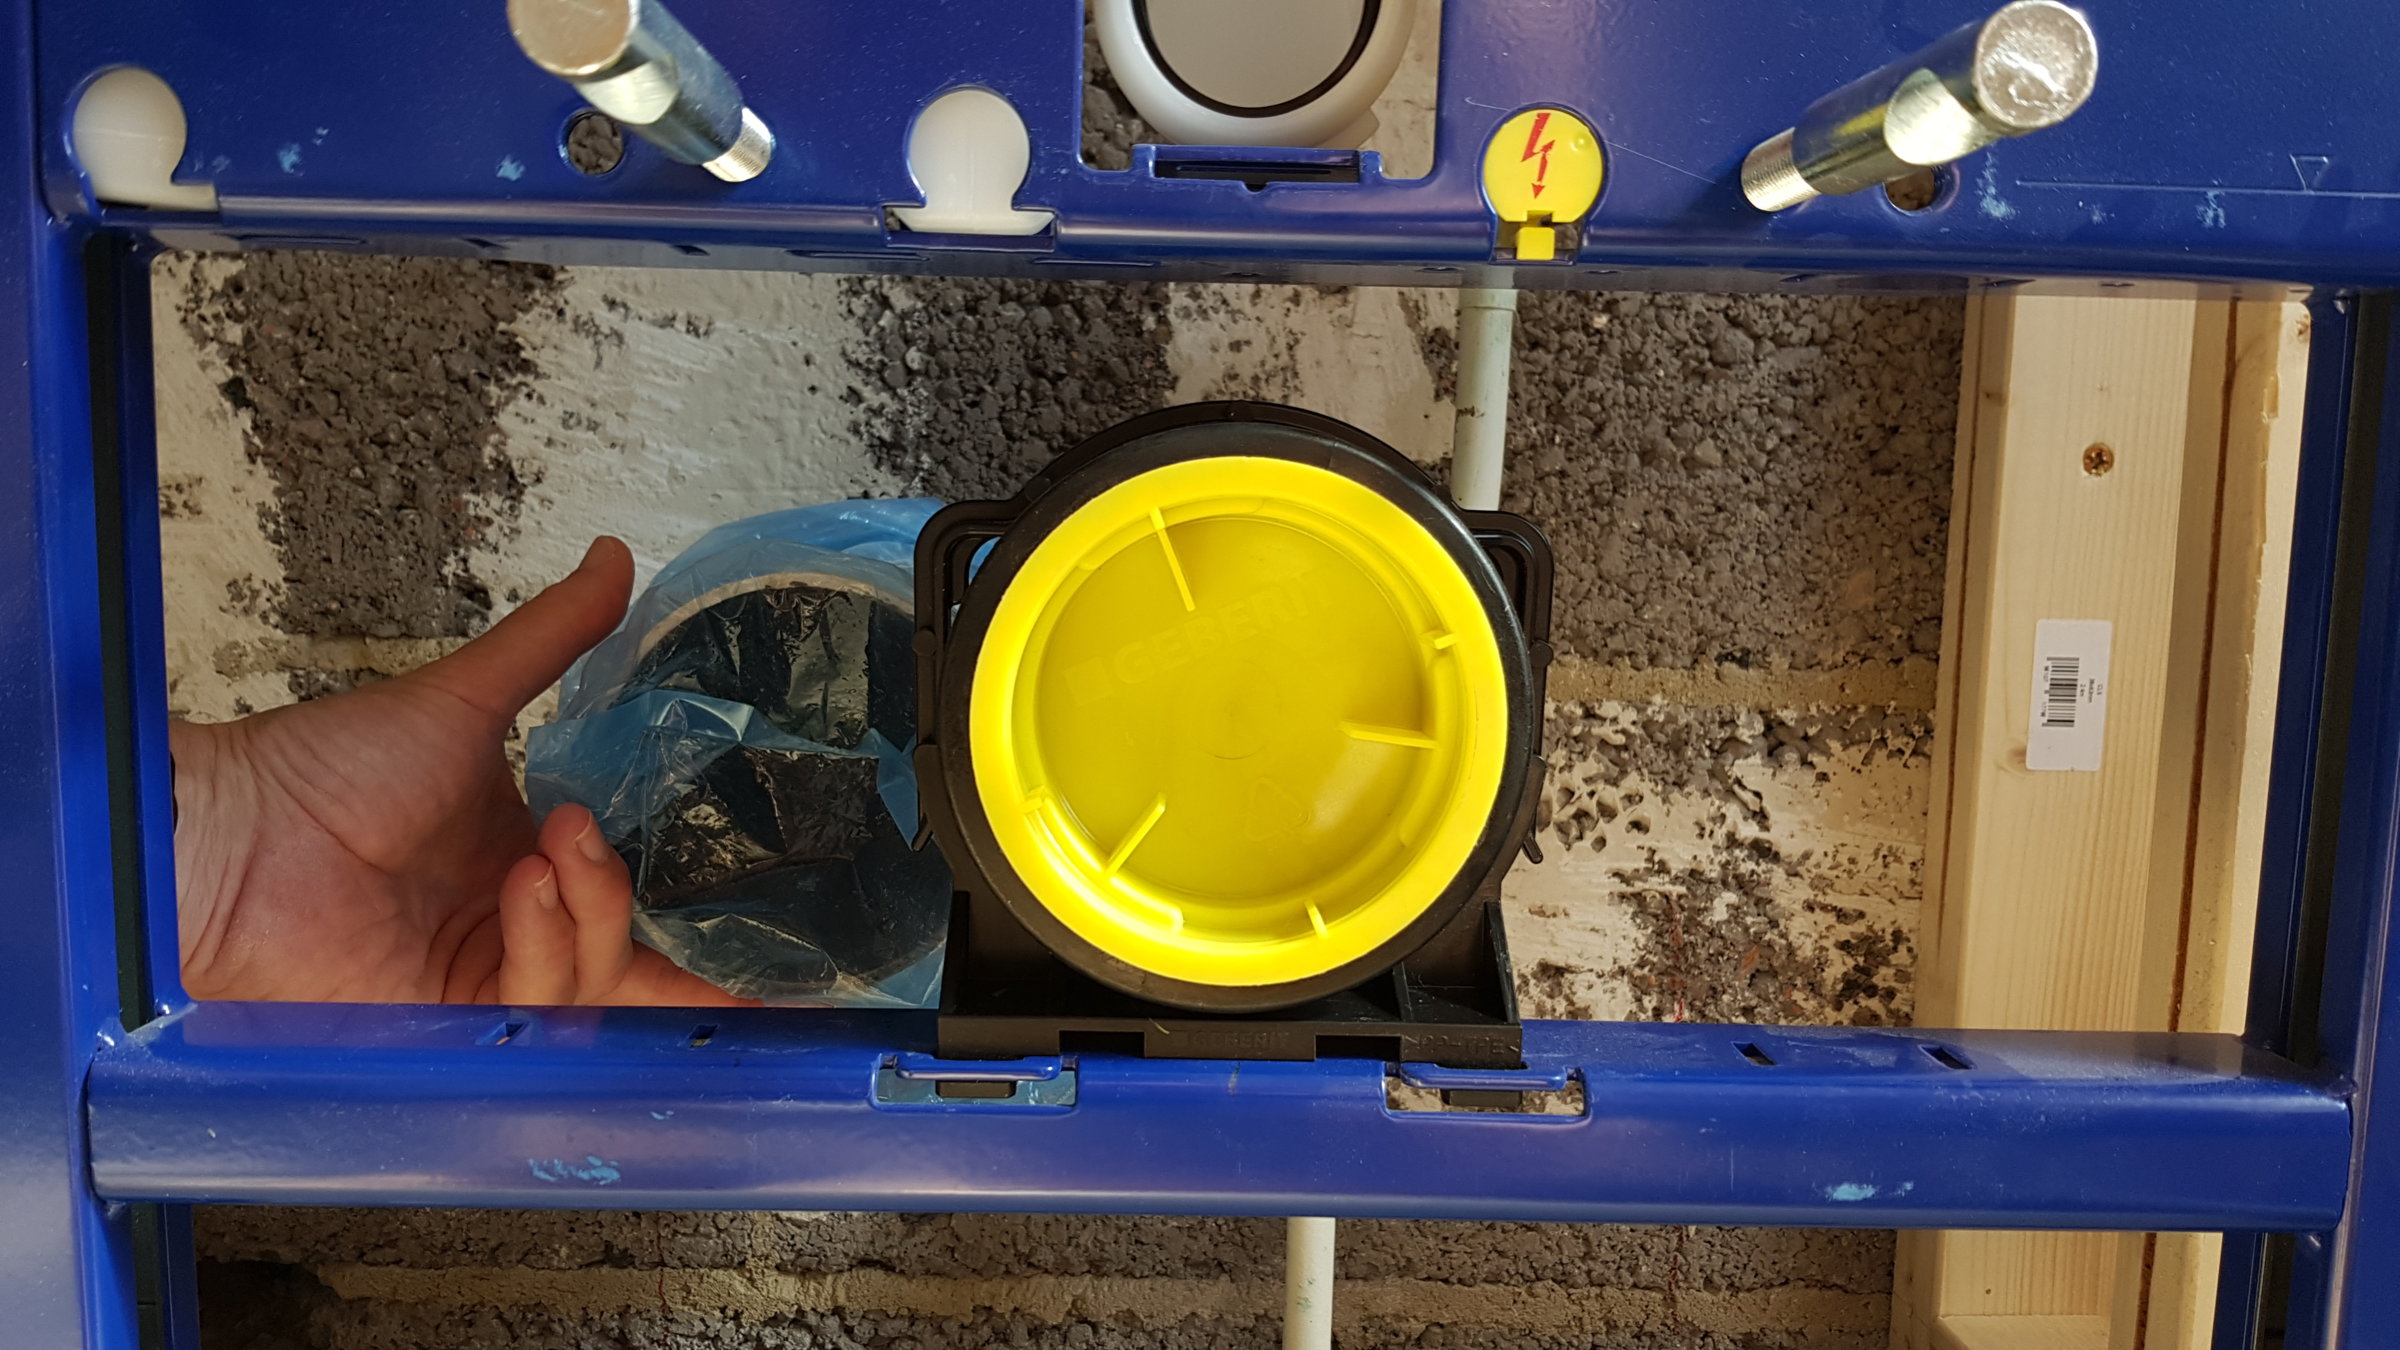
Because we are fitting a new and rather large floating basin unit next to the WC I've had to move the toilet to the right of where the old toilet used to be. This means the 110mm soil pipe is now around 120mm to the left and slightly lower than where I need it to be.
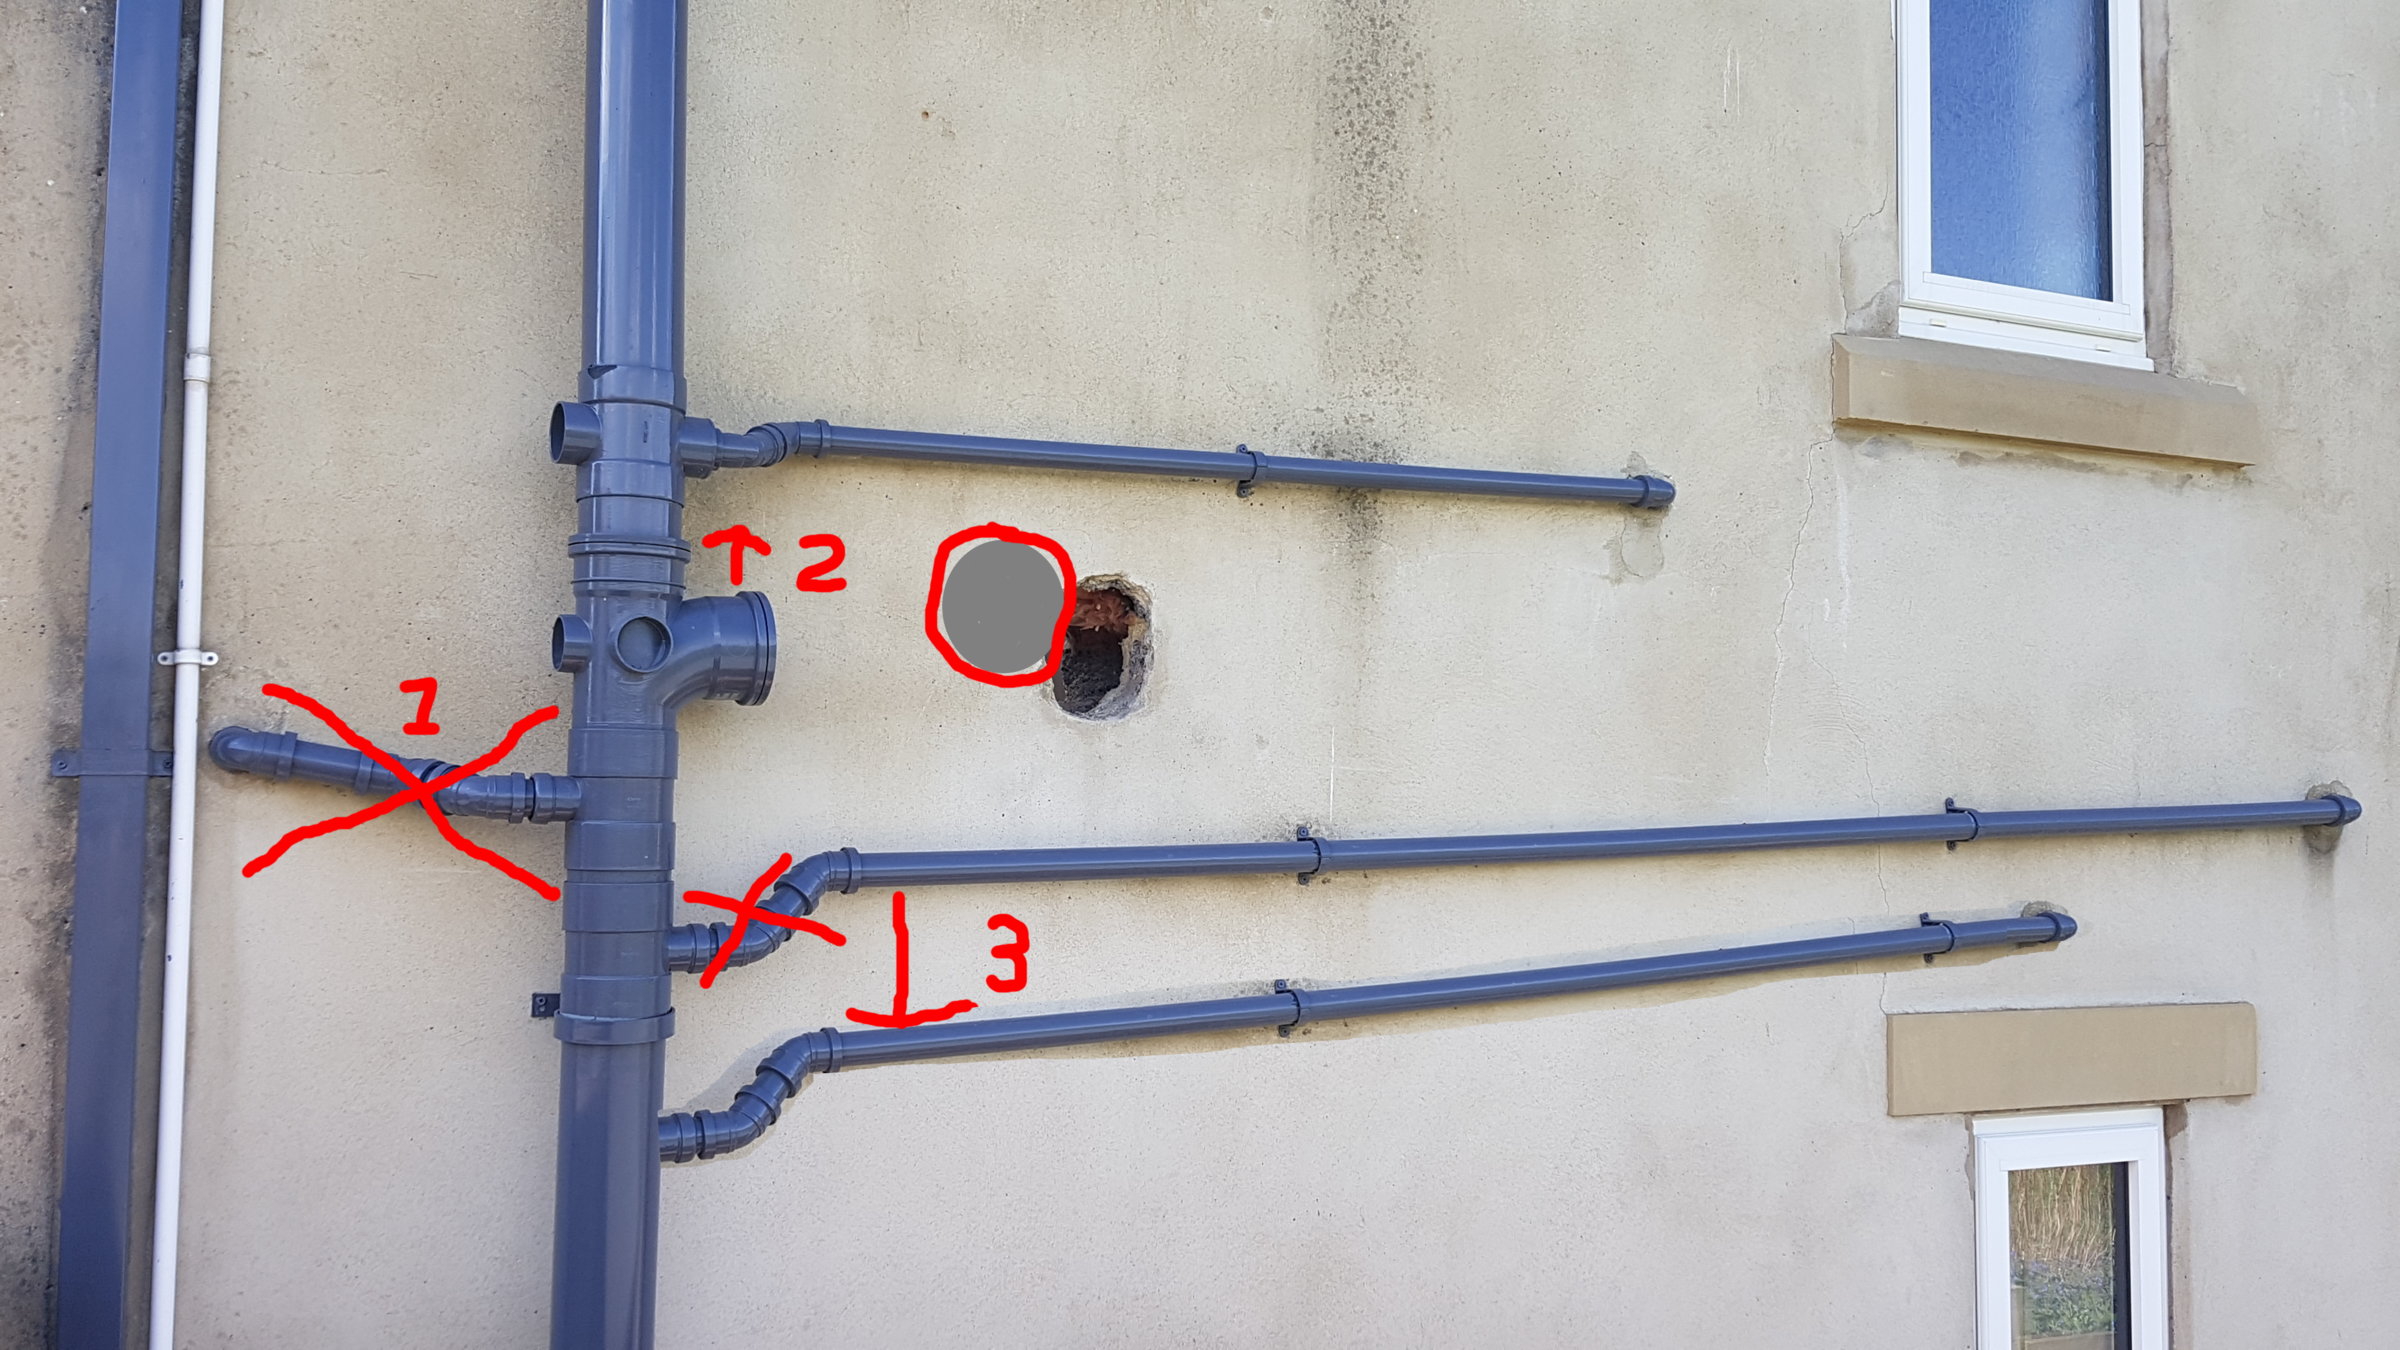
I don't think it is possible to offset the waste by as much as 120mm, so I'm resigned to cutting a new hole through the wall and the hassle of connecting this upto the existing soil pipe, but I think this will give me some issues. Here's a few photos to show what I'm working with.
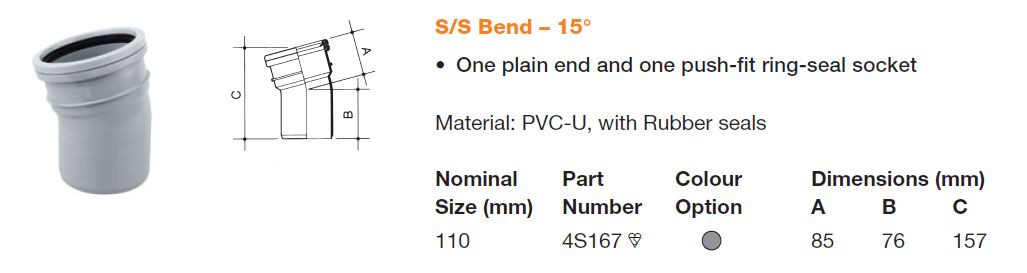
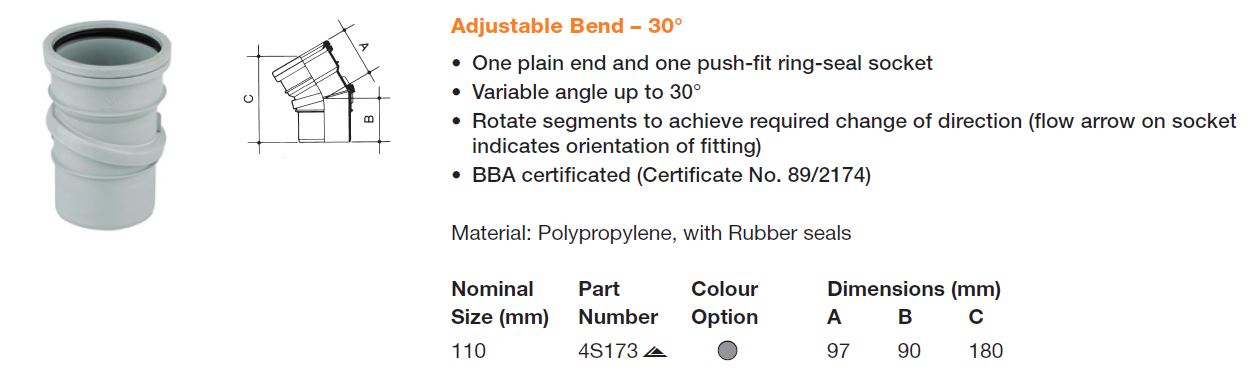
From the outside of the house the pipe run will need to be moved to the left and slightly up. Because the run to the soil stack is so short, I don't think there is any possibility of using bends etc. to change the position, so I'm guessing my only option is to cut into the soil stack and move the branch upwards. I'm struggling to understand what type of fittings have been used, but I think the top part of the branch is push-fit and the bottom part solder? The soil pipe running from the branch into the house looks to be push fit into the branch and a push fit 90 degree elbow attached to the end of the straight and turning the pipe into the wall.
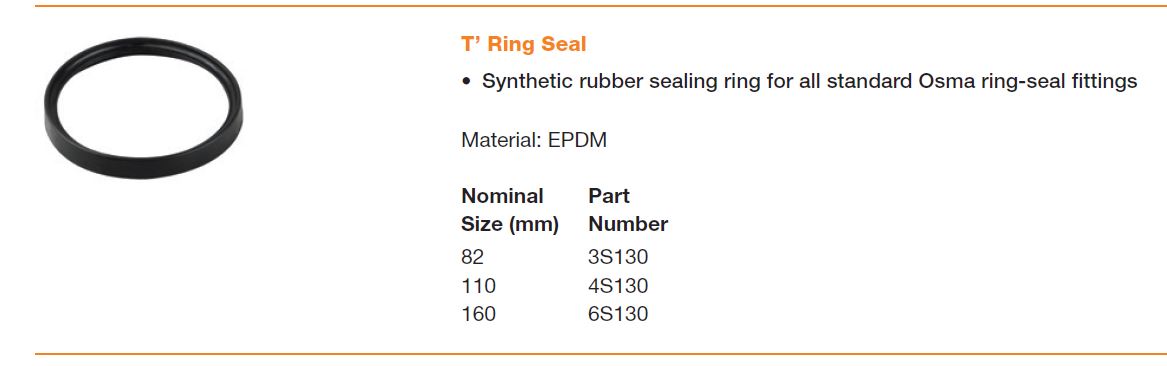
I believe the piping system used is Osma.
Forgive my ignorance in these matters, but this is the first time I've attempted to do any work with soil pipes, so I'm not too familiar with them.
Is there any way I can connect upto the existing soil pipe in the bathroom or do I have to re-run the pipe from the soil stack?
Thanks in advance for you help/advice.
I have a Geberit frame, which will be boxed in and I've set this to the required height to ensure the top of the pan (minus the seat) will be at 42cm above the tiled surface.
Because we are fitting a new and rather large floating basin unit next to the WC I've had to move the toilet to the right of where the old toilet used to be. This means the 110mm soil pipe is now around 120mm to the left and slightly lower than where I need it to be.
I don't think it is possible to offset the waste by as much as 120mm, so I'm resigned to cutting a new hole through the wall and the hassle of connecting this upto the existing soil pipe, but I think this will give me some issues. Here's a few photos to show what I'm working with.
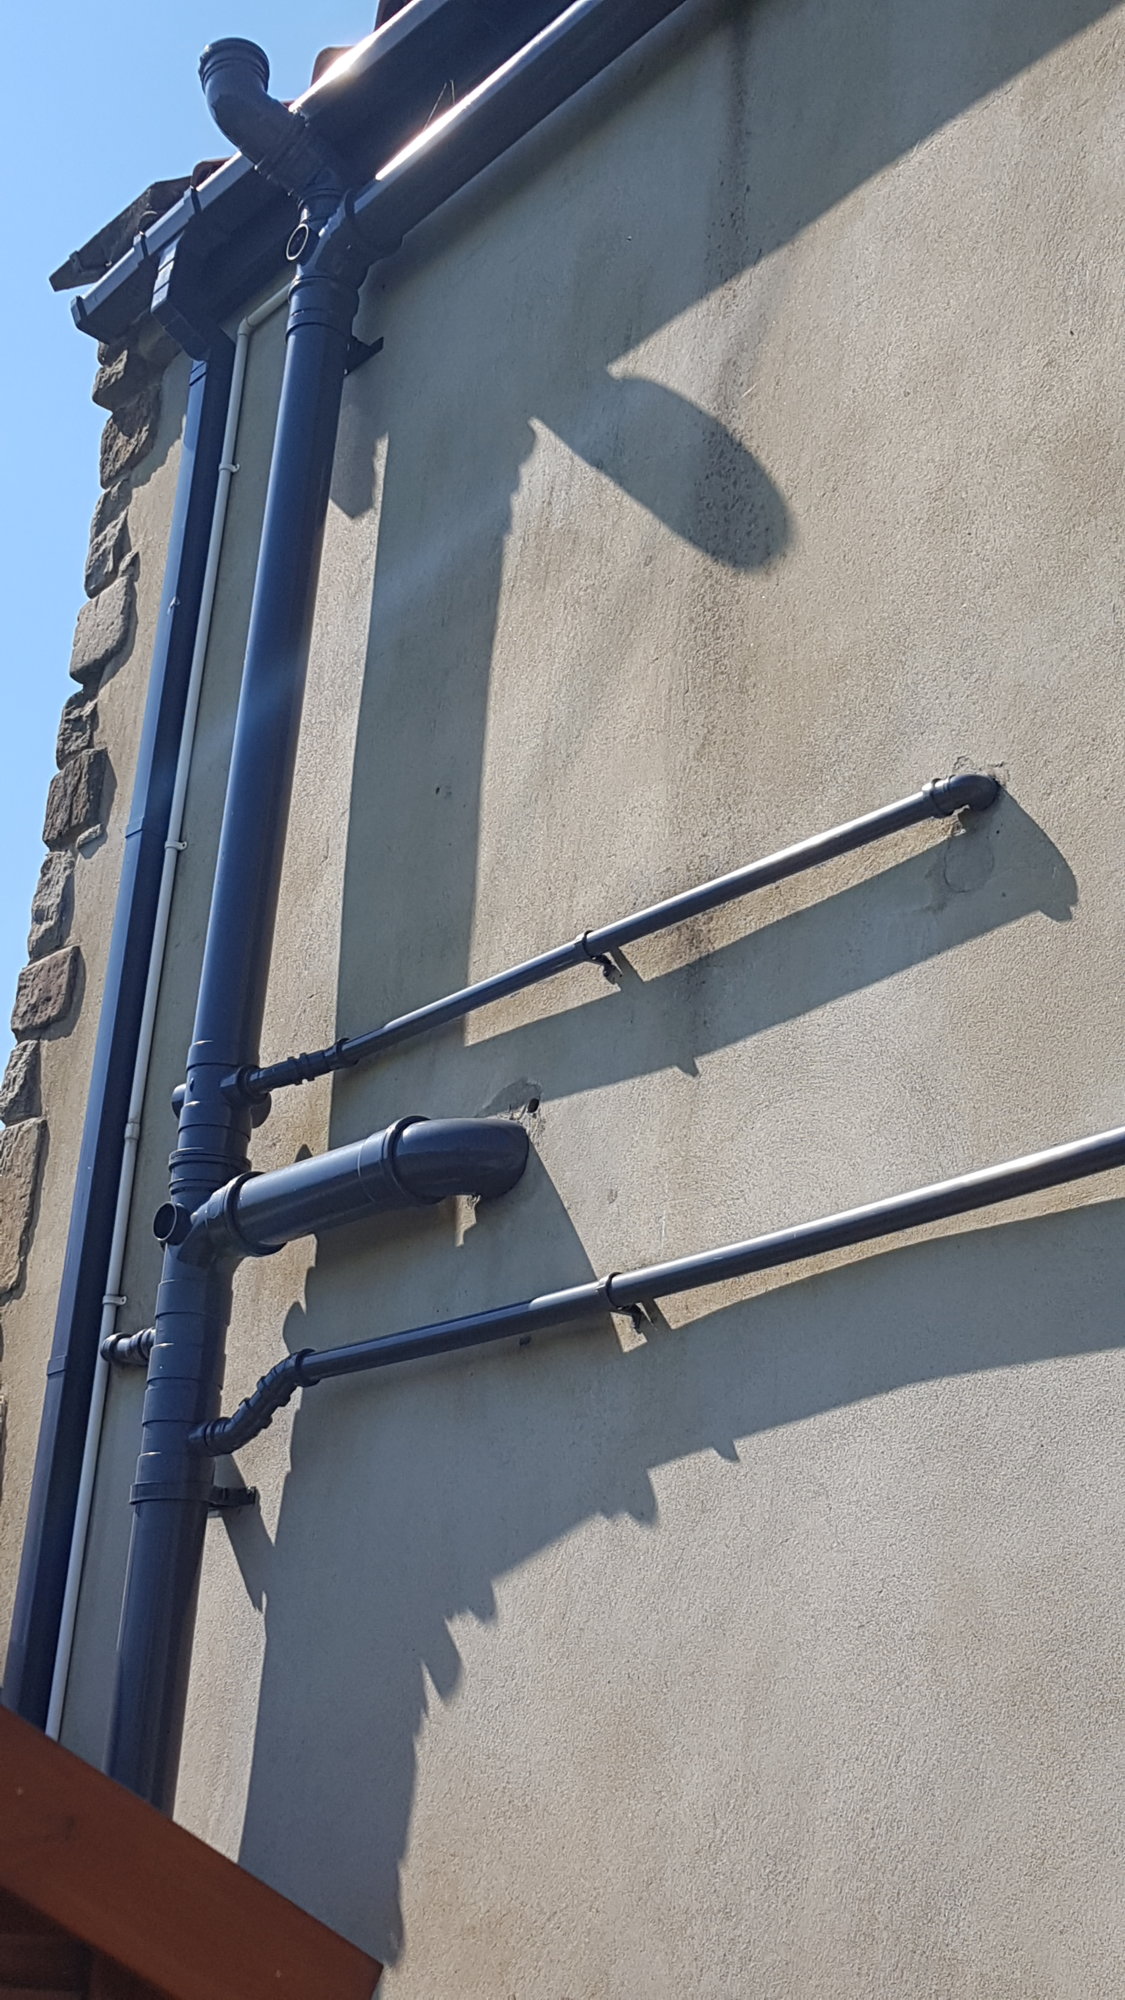

From the outside of the house the pipe run will need to be moved to the left and slightly up. Because the run to the soil stack is so short, I don't think there is any possibility of using bends etc. to change the position, so I'm guessing my only option is to cut into the soil stack and move the branch upwards. I'm struggling to understand what type of fittings have been used, but I think the top part of the branch is push-fit and the bottom part solder? The soil pipe running from the branch into the house looks to be push fit into the branch and a push fit 90 degree elbow attached to the end of the straight and turning the pipe into the wall.
I believe the piping system used is Osma.
Forgive my ignorance in these matters, but this is the first time I've attempted to do any work with soil pipes, so I'm not too familiar with them.
Is there any way I can connect upto the existing soil pipe in the bathroom or do I have to re-run the pipe from the soil stack?
Thanks in advance for you help/advice.
Last edited: