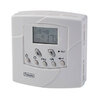
Towerstat RF Issues

Can only be a communication error,or a faulty unit, your settings are all correct, when you took the batteries out to replace them , did the reciver stay on ?

Yes it did.

So if it's communication, I can try changing the 'frequency' using the jumpers, but if that doesn't work, is it more likely it's the transmitter or the receiver or is that impossible to say?
 
Sponsored Links
you can try altering the address code, but both have to be eactly the same, if the receiver stayed on with the batteries out of the thermostat I would say the receiver is faulty
 
you can try altering the address code, but both have to be eactly the same, if the receiver stayed on with the batteries out of the thermostat I would say the receiver is faulty

Damn, I was hoping it would be the thing that isn't wired in...

Thanks for your help all, I will give the address code a go when it's light tomorrow and update.

Claire
 
Sponsored Links
Dont let altering the address code phaze you , extremely easy to do, max time 15 to 30 mins for your first time, we do them all the time so 5-10 mins
 
The dip switches change the code not the frequency, mine was well away from boiler so not interference from boiler, I am a radio ham and have a transceiver that works on same frequency, so hunted for some other unit using the same frequency with no avail, in the end the transmitter and receiver faced each other three foot apart, I returned to using the old non programmable Honeywell thermostat instead, mine had the Name "Horstmann HRFS1" cost around £76 at time, now being sold at £30, it did not re-transmit the info, so if it did not register the change then had to set high and low again. It seems it was sold with many badges. They are simply low quality end of.

It may seem a bit harsh, but I have been there trying to sort it out, don't bother just get new.
 
The dip switches change the code not the frequency, mine was well away from boiler so not interference from boiler, I am a radio ham and have a transceiver that works on same frequency, so hunted for some other unit using the same frequency with no avail, in the end the transmitter and receiver faced each other three foot apart, I returned to using the old non programmable Honeywell thermostat , mine had the name Horstmann HRFS1 cost around £76 at time, now being sold at £30, it did not re-transmit the info, so if it did not register the change then had to set high and low again. It seems it was sold with many badges. They are simply low quality end of.

It may seem a bit harsh, but I have been there trying to sort it out, don't bother just get new.

Hence I used inverted commas on the word frequency. The frequency is 434 MHz and can't be changed, I realise that.

I know you say just get new, but new what? New transmitter? New Receiver? totally new thermostat? Which will need wiring in I assume by a competent person?

Surely it's better to try to fix it myself before shelling out, after all, isn't that the whole point of this forum??
 
Last edited by a moderator:
Dont let altering the address code phaze you , extremely easy to do, max time 15 to 30 mins for your first time, we do them all the time so 5-10 mins

Don't worry, I'm perfectly happy to have a bash at most things, and I've not electrocuted myself once yet :D

Thanks again for your help.

Claire
 
I fiddled trying to get it to work for weeks, it would work for a time after each fiddle, then stop again. Original thermostat was this one, 84067_P.jpg and it was not programmable, although worked very well, and if there was no signal in ½ hour (batteries flat etc) it would auto switch off, however the programmer turned off heating at 10 pm completely, and it could get too cold over night, so I added the programmable thermostat to ensure it did not cool too much. It seemed very good to start with, used it free standing, then found living room at 32°C, cured that by adjusting TRV heads, and fixing the thermostat to wall where I had proved it worked, but it slowly went worse and worse, so I abandoned it, and fitted electronic TRV heads instead.

I had intended to fit Nest, but never got around to it, just moved the Horstmann thermostat onto oven carcase facing the receiver IMGP8037.jpg and it was still working that way when we sold the house, the other house was hard wired with one of these, ae235.jpg that worked far better, and this house has Nest Gen 3 so again hard wired. I tried all the code options and no improvement. But the big problem was no fail safe, if the receiver failed to get the command be it off or on, then it seemed the signal was never resent, so would need to turn up/down or down/up to get the receiver to switch. When I saw with Nest Gen 3 I can manually start it pressing centre of the heat link I thought why don't they all do that? So handy for boiler man, he can test boiler without going to thermostat.

If you can use a hard wired thermostat then likely that is best, but it depends where the base is fitted. In the main the wall thermostat is to stop the boiler cycling in the summer months, yes I use my wall thermostat to control whole house temperature, but using oil not gas, and oil boilers don't modulate. Once I had fitted electronic TRV heads did not really need to wall thermostat in the same way.
 
Last edited:
I fiddled trying to get it to work for weeks, it would work for a time after each fiddle, then stop again. Original thermostat was this one, View attachment 217602 and it was not programmable, although worked very well, and if there was no signal in ½ hour (batteries flat etc) it would auto switch off, however the programmer turned off heating at 10 pm completely, and it could get too cold over night, so I added the programmable thermostat to ensure it did not cool too much. It seemed very good to start with, used it free standing, then found living room at 32°C, cured that by adjusting TRV heads, and fixing the thermostat to wall where I had proved it worked, but it slowly went worse and worse, so I abandoned it, and fitted electronic TRV heads instead.

I had intended to fit Nest, but never got around to it, just moved the Horstmann thermostat onto oven carcase facing the receiver View attachment 217601 and it was still working that way when we sold the house, the other house was hard wired with one of these, View attachment 217603 that worked far better, and this house has Nest Gen 3 so again hard wired. I tried all the code options and no improvement. But the big problem was no fail safe, if the receiver failed to get the command be it off or on, then it seemed the signal was never resent, so would need to turn up/down or down/up to get the receiver to switch. When I saw with Nest Gen 3 I can manually start it pressing centre of the heat link I thought why don't they all do that? So handy for boiler man, he can test boiler without going to thermostat.

So I've changed the address code and I still have the same issue.

Is sounds different to what you had though, because it the transmitter seems to send the 'turn on' command IMMEDIATELY, and I mean it's almost instant, just not the 'turn off' command.

I've worked out a really convoluted way of getting it to turn on in the morning now, buts that's a total workaround and entails me standing on a breakfast bar stool every evening which doesn't seem right.

Grrr, I hate not being able to fix things. And I'm pretty sure the pump going constantly is costing me a fair bit in electricity....

So do I need 'man' to replace a hard wired bit or is that something I could do myself? :eek::LOL:
 
Dont let altering the address code phaze you , extremely easy to do, max time 15 to 30 mins for your first time, we do them all the time so 5-10 mins

Sadly it didn't work. I turned off the 5th DIP and took out the 5th jumper, and once again it turned on the system perfectly. Now the bloody green light is shining down at me again.

I am known for my excellent 'being able to use a hammer for all jobs' and I feel like this might be heading that way....

:(
 
So do I need 'man' to replace a hard wired bit or is that something I could do myself? :eek::LOL:
That’s entirely up to you. You could do it yourself with guidance from us on here. What might be best is if you’re able to prove the electrics are isolated/dead, using a two pole voltage tester/multimeter.
 
Last edited:
That’s entirely up to you. You could do it yourself with guidance from us on here. What might be bet is if you’re able to prove the electrics are isolated/dead, using a two pole voltage tester/multimeter.

So the light going off isn't good enough I take it?
 

DIYnot Local

Staff member

If you need to find a tradesperson to get your job done, please try our local search below, or if you are doing it yourself you can find suppliers local to you.

Select the supplier or trade you require, enter your location to begin your search.


Are you a trade or supplier? You can create your listing free at DIYnot Local

 
Sponsored Links
Back
Top