Coving

Joined
31 Oct 2013
Messages
112
Reaction score
3
Location
Birmingham
Country
United Kingdom
Hi, I’m about to give up on putting some coving up but thought I’d see if there are any pearls of wisdom before I stop.
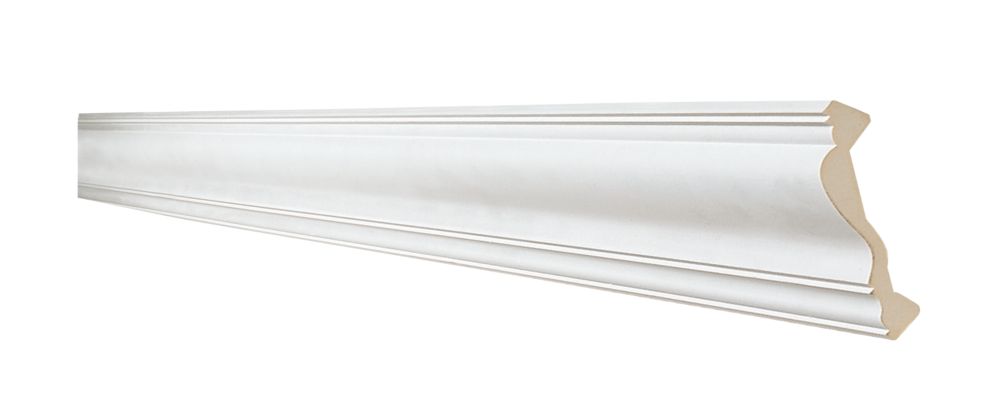
I have bought some polyurethane coving from Screwfix and the adhesive they recommend. I’ve watched a million and one videos to get an idea of what to do.
I’ve got my head around the mitres etc and measuring my corners as the room isn’t perfectly square.
My issue is the slightly uneven ceiling. I’ve found the lowest point and drawn my wall line from there. The issue is that when offered to this line on the wall, there are gaps between the top of the coving and the ceiling, I’d say up to about 10mm in parts. How do I go about fixing the coving when most of the top of it isn’t touching the ceiling so nothing to adhere to? Adhesive along the bottom edge isn’t going to be enough to hold.
It’s a brick/plaster wall if that makes any difference so no studs.

It’s driving me crazy as it would look really nice (far better than me cutting in along the wavy ceiling which I am now dreading as it will look awful.
 
Sponsored Links
How do I go about fixing the coving when most of the top of it isn’t touching the ceiling so nothing to adhere to? Adhesive along the bottom edge isn’t going to be enough to hold.

Add a small series of nails, to help force the coving the edges of the coving tight to the walls and ceiling, to help retain it in place whilst the adhesive sets. Once set, pulls the nails out and make good the small holes.
 
Hi, thanks for your reply. I thought about using nails as a ledge along the wall for it to rest on but my issue is that by following a level line on the wall, the ceiling edge of the coving isn’t making contact with the ceiling on large stretches so no point even adding adhesive.
If I force it to follow the ceiling it might look rubbish and none of the mitres will then line up as it won’t be level. If that makes sense?
 
If I force it to follow the ceiling it might look rubbish and none of the mitres will then line up as it won’t be level. If that makes sense?

Then you have little choice, but to follow the ceiling, or compromise by filling in some of the gap. I had a similar problem, but maybe not so bad - a fairly gentle ripple in the level. It was noticeable close up, but it looks fine when stood on the floor.
 
Sponsored Links
Butt coving in corner. Draw line on wall and ceiling.
Do both sides.
Where lines meet on wall and cross on ceiling offer up cove and mark.
That will help you with saw guide to cut angle.
What I'm saying is drawn line on coving before you cut.
Post picture here and I'll tell you If its correct before you cut.
Keep bottom level when fitting. Top don't matter so much.

I pop a few nails to support the cove at bottom prior to fixing. Cove will be placed on nails to hold until adhesive is dry

Before you mark and cut write top and bottom on the front of coving. Problem is that you cut coving upside down. By writing on coving when you offer up you will see this. It's strange I know but when penny drops your off and running.

The ceiling needs to be the floor when cutting. This stops people getting it correct. It's not skirting. You can't cut it like skirting.
You need to cut on the floor thinking that the floor is the ceiling. So to do that the coving is upside down when you cut.
Oh boy is that hard to grasp and some argue over that.

Lie on your back. Looking up and hold the cove so it the correct angle for the wall and ceiling line and then draw a line where you think the angle should go. That might help you.
Hi, sorry, it’s probably me being silly but not getting what you mean with the first bit?
Just butt an uncut piece up to the corner first or make my mitre cuts first?
I’ve been using a digital angle finder and then a website to work out the bevel and mitre angles for my mitre saw. My drop and projection are 84mm and the spring angle is 45 degrees. Obviously these cuts will only work when the coving it dead level m, which mine won’t be if I’m pushing it slightly to follow the slight contour of the ceiling.

Maybe the simple single curved coving is more forgiving and I should have got that? I’ve bought a more detailed one.
 
Butt coving in corner. Draw line on wall and ceiling.
Do both sides.
Where lines meet on wall and cross on ceiling offer up cove and mark.
That will help you with saw guide to cut angle.
What I'm saying is drawn line on coving before you cut.
Post picture here and I'll tell you If its correct before you cut.
Keep bottom level when fitting. Top don't matter so much.

I pop a few nails to support the cove at bottom prior to fixing. Cove will be placed on nails to hold until adhesive is dry

Before you mark and cut write top and bottom on the front of coving. Problem is that you cut coving upside down. By writing on coving when you offer up you will see this. It's strange I know but when penny drops your off and running.

The ceiling needs to be the floor when cutting. This stops people getting it correct. It's not skirting. You can't cut it like skirting.
You need to cut on the floor thinking that the floor is the ceiling. So to do that the coving is upside down when you cut.
Oh boy is that hard to grasp and some argue over that.

Lie on your back. Looking up and hold the cove so it the correct angle for the wall and ceiling line and then draw a line where you think the angle should go. That might help you.
Sorry, me again, I started by finding the lowest point of the ceiling and keeping the coving level at the bottom based at this point but the problem I had was that the top then didn’t make contact with the ceiling in parts so nothing to actually stick to so just fell down. Someone suggested pinning it but when the top doesn’t touch the ceiling, there’s nothing to pin if that makes sense
 
'Course you can. I put 4m lengths of it up, on my own, you just need to put the nails for it to rest on first, before offering it up ready buttered with adhesive.
Think you’re over estimating my skills lol

I’d still have the same problem in that if the bottom follows a straight level line, the top will only touch the ceiling in one small section, the rest will be floating due to the gap and so nothing to stick it to
 
Sorry, me again, I started by finding the lowest point of the ceiling and keeping the coving level at the bottom based at this point but the problem I had was that the top then didn’t make contact with the ceiling in parts so nothing to actually stick to so just fell down. Someone suggested pinning it but when the top doesn’t touch the ceiling, there’s nothing to pin if that makes sense

You don't have to keep the bottom absolutely straight and level, unless it's excessive, you can follow the wall and the ceiling to a large extent - if will not show.

You don't pin the coving - you put nails in place for it to rest upon. If the coving is 4" square, set a series of pins 4" out from the corner along the ceiling, and likewise down the wall. They will help keep the coving in contact, to allow the adhesive to set. Tackle the long runs first, then the shorter runs can be adjusted to fit more easily.
 
Coving comes down wall 84mm

If mark in on top edge 84mm in then cut through. That will be correct..

I only got 100mm cove here but for demo purpose.

Cut internal correctly

PXL_20230318_190633011.jpg


Now if I flip it over the saw don't touch cove. It's wrong. Look
PXL_20230318_190746500.jpg


Other way to cut but again it's not practical but will work

PXL_20230318_190659629.jpg

As above the coving is correct way up. Top is ceiling, the bottom is the wall but look how it's its positioned to cut. Just not practical
 
16791669680416071579429095396815.jpg


16791670236811249800517601134899.jpg


You said 84mm so coving is 127mm 5 inch. That 5 Inch is the curve of the coving If you bend tape around it top to bottom.

It don't come down wall 5 inches though
 
Last edited:
View attachment 298635

View attachment 298636


You said 84mm so coving is 127mm 5 inch. That 5 Inch is the curve of the coving If you bend tape around it top to bottom.

It don't come down wall 5 inches though

Hi, it’s this one from Screwfix. The projection from the wall and drop from the ceiling is 84mm


DIYnot Local

Staff member

If you need to find a tradesperson to get your job done, please try our local search below, or if you are doing it yourself you can find suppliers local to you.

Select the supplier or trade you require, enter your location to begin your search.


Are you a trade or supplier? You can create your listing free at DIYnot Local

 
Sponsored Links
Back
Top