How to get rusted-up bolts/screws free with restricted access - help!

Joined
1 Mar 2024
Messages
5
Reaction score
1
Country
United Kingdom
Hi all
Am trying to fit a replacement bottom-entry flush valve in my toilet cistern - that's not the issue.
What IS the issue is that it's a close-coupled one (didn't even know what that meant before today!) and I have to get the cistern separated from the toilet bowl so i can unscrew the old valve assembly and replace it before reattaching the cistern to the bowl.

Here's the problem: the cistern is attached to the bowl by the 2 bolts/screws you can see circled red
in the photo BUT they are rusted solid plus the access, as you can see from the pics, is extremely limited. I have pulled away the rubber washers that were there originally, plus chewed away at the screw heads as best I can with pliers / claw hammer etc but the lack of access, plus the fear of cracking the ceramic cistern/bowl, means I'm currently stuffed. What to do?

HELP!

Mark
ucrdyk4uhrz5.jpg
ka2pa2kh7ze7.jpg
 
Sponsored Links
Looks like you'll have to drill the heads off from inside or cut the bolt above the nut on the outside
 
If you have time on your side, a mixture of ATF and acetone is very good at rust removal and could release the nut and bolt.
More likely to work by going under compared to inside.
You might need to shorten the through bolt but a cordless drill and nut driver could spin the nut off once the rust has been treated.
 
Sponsored Links
You need to work on the nuts below the cistern - you'll never budge the screws inside the cistern. Spray the nuts copiously with penetrating oil and wait for an hour of so for it to soak in. Then use something like a monkey wrench or a Mole wrench on those nuts. If that doesn't shift them you could try drilling the sides of the nuts so you can drive in a wedge and split them - or maybe use a purpose made nut splitter. Or maybe try hacksawing into the base of the nuts right through the screw shaft - though the limited access might restrict this.
You'll then need new screws, nuts and rubber or plastic washers, plus a new doughnut seal for the cistern to pan joint, to re-secure the cistern - I would advise getting brass screws and nuts to prevent this happening in the future.
 
You need to cut through the bolts. Dremel with a small cutting disc can do it from above or multitool from below. Sometimes though, its worth paying someone who has the right tools and has learned from experience how to tackle these jobs.
 
Inside they look like the might be nyloc nuts, and the thread in there, might be less rusty. Try a mole grip holding the long thread below, and a socket on the nyloc nut, to release it.
 
Second the suggestion to drill them off from the top down, using a smaller bit to pilot a hole then a bit the width of the threaded part

If you can't fit a drill into the cistern (impact drivers tend to be pretty small and a step drill bit will be useful here), consider a hex shanked bit and 1/4 socket bar extension set

If you're removing the entire toilet from the wall it may be possible to get at the nuts with an angle grinder. Replace with stainless
 
Suggestions:

Nut splitter - (e.g. 535HP at Screwfix) but I suspect your space around the nut might be too restricted even for a small one, and you will struggle with working space.

Bulldog BDX - if your valve hasn't completely failed so you're not in a hurry, this penetrating fluid is much more effective than WD40 and the like. Got me out of all sorts of rusted bolt issues on the car far worse than this.

As others have posted:

Dremel/cutting disk - my view is from directly below and slice horizontally through nut and bolt. I have diamond grit disks for my Dremel but it would still take a little while with these.

Mutli-tool - from directly below with a standard metal cutting blade and trying to slice a couple of sides off the nut. It looks maybe too tight to get a Multi-tool in horizontally - but it is possible to get right angled blades for a Multi-tool that would allow you to cut through horizontally in the same way as the Dremel.

Drill bolts out from within cistern - but it looks to me in the photo like the one on the right has already been drilled off centre.
 
Hi again all

Thank you SO much for rallying around as you did. This was one of those situations that unfolded and, at the end, you say to yourself 'if I'd known xyz at the outset then I'd have called someone to do it'. 10-12 hours all told across the weekend with skinned knuckles, cut fingers, broken drill bits and enough swearing to turn the air blue.

I eventually went with the drilling-out solution involving a 2mm pilot hole followed by a 6mm. One worked reasonably ok but the other went badly off-centre and i had to resort at the end to snapping the remainder of the screw-head away with pliers and a mole-wrench, luckily enough of it having been drilled away by that time.
attachThumb98180


And then on Saturday evening, just at the 11th hour when I thought it was sorted, I found out the hard way it wasn't. Silly me thinking 'no need to put any of that silicone stuff in like the previous people did - surely the rubber washers that came with the replacement valve assembly will be watertight, won't they?'

WRONG!

So I had to get silicone then go back there on Sunday to partially dismantle the toilet and put some silicone in to seal it properly. This should have taken 30 mins-1hr at most. But guess what? While unscrewing one of the 2 coupling bolts, the wing nut fell off and vanished into the space under the toilet bowl and trying to retrieve it took me another 2-3 hrs.

Last issue - the fill valve is a Fluidmaster bottom entry one with a brass shank, attached by a brass bolt to a braided flexible hose running up into it from the isolator. As you can imagine, access to it is extremely tight - pretty much like this
attachThumb98181
and so I couldn't get a spanner or mole-wrench in there, only do the brass bolt up finger-tight and hope that the washer in the bolt stops it leaking. Which it seems to have done so far but I'm not happy about it. But - with the flexible hose running up into it, I can't get a box-spanner in there either.

Any suggestions?
 
Links in this post may contain affiliate links for which DIYnot may be compensated.
Screwfix and the DIY sheds sell basin wrenches for taps. They will likely work on the valve input back nut too. I have one like Screwfix 528RH and also one like 868XR. The latter is a bit fiddly but sometimes easier to get into tight spaces + it adjusts itself to the nut you're working on + the head pivots so you can operate it at angle if you need to.

 
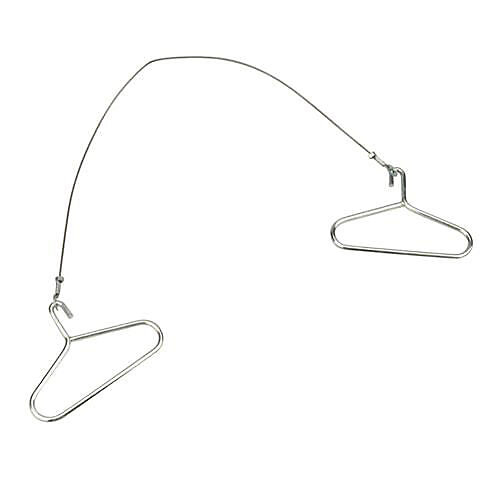
All - many thanks for the further suggestions, esp the wiresaw one - that might have got in between even if a hacksaw didn't.

I was loth to buy a basin wrench (or any tool) for a single use but luckily got lent one. But even then the access was bl00dy tight - would have been better off with the 8-in-1 tool! Why DO they design these things like this - I thought the air-suspended Citroens I used to drive were bad enough!

Kind regards, Mark

PS: And yes, if I'd known at the outset how it was going to go I would have paid someone!
 

DIYnot Local

Staff member

If you need to find a tradesperson to get your job done, please try our local search below, or if you are doing it yourself you can find suppliers local to you.

Select the supplier or trade you require, enter your location to begin your search.


Are you a trade or supplier? You can create your listing free at DIYnot Local

 
Sponsored Links
Back
Top