Any tips for fitting laminate doors?

Joined
2 Mar 2019
Messages
287
Reaction score
3
Country
United Kingdom
Hi.

I have fitted half a dozen doors before which have been Hollow type,

I now have some laminate doors to fit. Some are fire rated (very heavy)

I'm thinking to only remove from hinge side so its only bare on that side.

Probably shave top over the bottom side for bathroom ones.


Has anyone fitted these? Howdens grey ones.
 
Sponsored Links
Probably 4 to 5mm.

New linings fitted but not super straight

Will be more for where carpets will be fitted (4 doors) . Probably 15mm or more.
 
Eesh, what a pain in the ass; if new linings were fitted, that's a good time to strive to size the hole to fit the door rather than sizing the door to fit the hole.. If you need to cut a non straight, are you sawing first or just planning to plane the entire thing?
 
Sponsored Links
When I did the linings they were already trenched. All I did was try to keep them straight.

I have a planer and circular.

Would you cut door so when door shuts the gap between lining and door is about 3mm all around. I think this maybe more difficult to do as lining is warped.

Other option is to plane the whole length so when door shuts in some places it will be 4 to 5mm gap and further down 2mm as lining is out by few mm.

What would you do?
 
If possible it is easier to chop in the hinges then adjust the linings by removing the architraves (on both sides), adjusting the wedges (to fit the door) then refixing the architraves. On fire doors the gaps should be 3mm all round (in the range 2 to 4mm) with a maximum of 4mm at the bottom when closed. These gaps are mandatory for fire doors and if you don't meet the specifications the s
smoke seals won't work and fire will also get through (or round) the door in a lot less time than the doorset is nominally rated for. TBH it is possible to adjust doors to fit barrel or pincushion shaped linings but it takes multiple offer in, mark, pull out and adjust cycles to get an even gap around three sides (which a pro should do and which looks far better than a variable gap). A power saw is useful to adjust lengths, but for widths (i.e..length rips) you need a plunging rail saw for accuracy, making a plane or planer a better weapon of choice. Whilst power planers are good at (easily over removing) material, a hand plane is infinitely preferable to a power planer for doing the final fine adkustments. Power planers just won't adjust fine enough and also tend to leave ripple marks which then need to be either sanded out or (preferably, because sanding can dub over the door edges ) planed out with a finely set, sharp hand plane

In order to shoot any door in you need a (home made) door block to hold the door, some 4mm plastic packers and a couple of cheap WinBags.

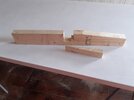
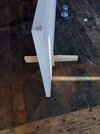
This is a door clamp:

20221016_101239.jpg
20221016_101223.jpg


Made from a single piece of 3 x 2 or 4 x 2 softwood. Here it is in use:

20221016_101855.jpg
 
Last edited by a moderator:
I've shaved 3mm of the hinge side.

The door frame is warped near the bottom of the lock side.

It's tiled with architrave on one side pinned in and other side plastered right to door frame.

What's best way to shave the door frame?

Other option is to shave 3mm more off the hinge side howe er the gap will be tight on the bottom of lock side and about 5mm on the top
 
The door frame is warped near the bottom of the lock side
I'm a bit confused. Could you clarify a couple of things for me - you said "door frame" at one point but the door is internal and there are architraves, so is it a rebated door casing (which would be 30 to 40mm thick), a door lining (which is basically flat 20 to 30mm thick with stop laths pinned or nailed in place) or a door frame (much heavier section timber, normally on outside doors, but not always, but in general these don't get used with architraves).

Normally you would eye down any timber you ard going to install looking for any crowning, bowing, cupping or winding (twist) before you fix it in place, rejecting the bad stuff. The same applies to doors, where you are mostly looking for cupping (across the width of the door) and winding. If you absolutely must install a warped door, use the straightest edge for the hinge side, but if your door is out by more than 3 or 4mm in the you will struggle to deal with it unless you are installing in a plain door lining with planted stops (see below)

If the problem is a warped door frame, then they are pretty difficult to straighten, particulary twisted legs, and TBH replacement is often cheaper than the effort involved.

If the problem is with a door lining, the stop laths can generally be removed and refixed if needs be bent to match the shape of the door

If the problem is with a rebated door casing and the warp in the door then ideally the architraves (heads and the agfected leg) need to be removed, the door hung in the opening, the lock side leg unscrewed, any foam cut out, the leg bent into position and refixed. Some compromise about how well the door fits may be necessary. After this the archis can be replaced. If you have already tiled, the silcone down the edge of the architraves will need to be knifed to get it off.

As an alternative you  may be able to deal with the warp by pulling one or other of the hinges out a bit and refixing (on the grounds that flaws the hinge side are less noticeable), but the limit forvthatbis about 2 or 3mm

As to altering a rebate by planing, do you have.a rebate plane and how good are you with hand tools? Yes, it is doable with a rebate plane (fillister rebate or bull nose rebate plane) with a good sharp wide chisel to finish into the corners, but is is a real pain to do and not the easiest thing to execute neatly. As before it is another job where no power tool is really suitable for the task

Personally I wouldn't plane the rebates. Donthe hinge trick if you can (the old screw holes get drilled out, wooden dowels glued in and when the glue has set the plugs are chiselled flush). If that didn't work fully I'd then bite the bullet, remove the arc and bend the casing to fit the door. Messing around with rebates is one of those PIA jobs that you won't derive any satisfaction from (and if you do crack a couple of tiles, which you shouldn't do if you are careful, it will.probably still cost less than a rebate plane that you'll be lucky to use twice in your entire lifetime)
 
Last edited by a moderator:
@JobAndKnock awesome reply. Really appreciate it.

It's a rebated casing I used. The bottom of leg is twisted on the lock side.
The hinge side rebate is bowed in middle.

I used a belt sander which was taking ages. I used a surform which made the job a lot quicker. Then sanded after. Fairly neat job.

I have recessed the hinge on the bottom rebate but top one will not be recessed because of the warp.

Horrible job but I think I'm finally there. I should have been more careful when fitting the door casings. You live and you learn.

Also the laminate door sides and top and bottom edges are not laminated but painted to match. Shaving from both sides has made it far easier to install.

I've also scribed certain points where i will shave door so I get a 3mm all round.
Only problem is I don't have a hand planer so have to do with electric one and the sand over it to make the transition look smooth.

Cheers
 

DIYnot Local

Staff member

If you need to find a tradesperson to get your job done, please try our local search below, or if you are doing it yourself you can find suppliers local to you.

Select the supplier or trade you require, enter your location to begin your search.


Are you a trade or supplier? You can create your listing free at DIYnot Local

 
Sponsored Links
Back
Top