Bricks Crumbling on Chimney Breast. - Pics included!

Joined
29 Jan 2010
Messages
28
Reaction score
1
Country
United Kingdom

Hi Everyone

2nd post on here! This has proved to be quite a saga so hopefully the experienced posters here can help me out :)

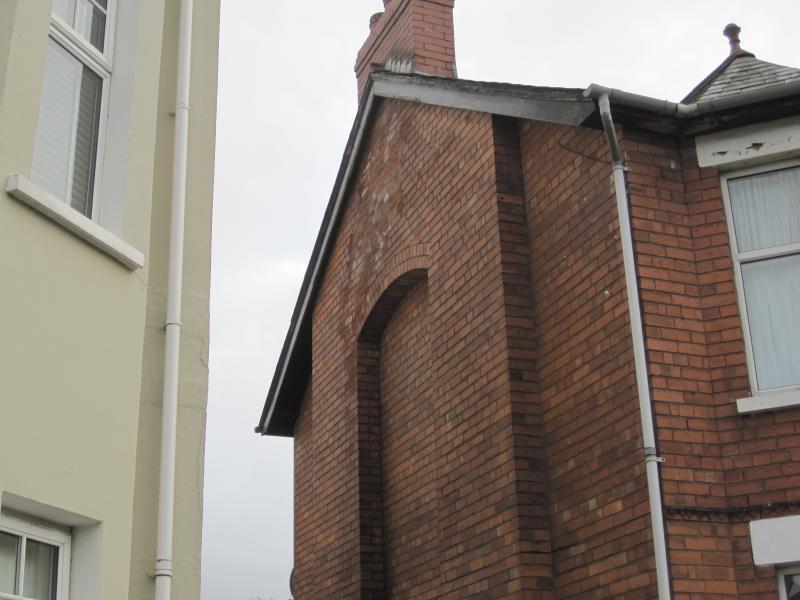
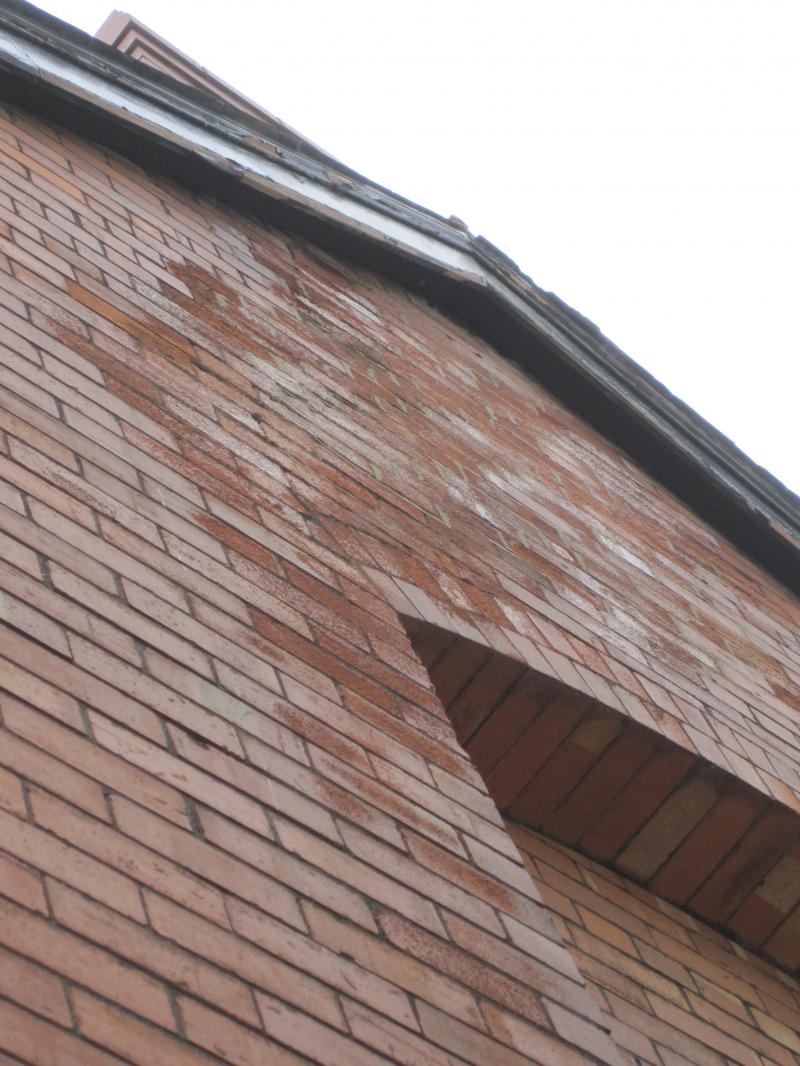
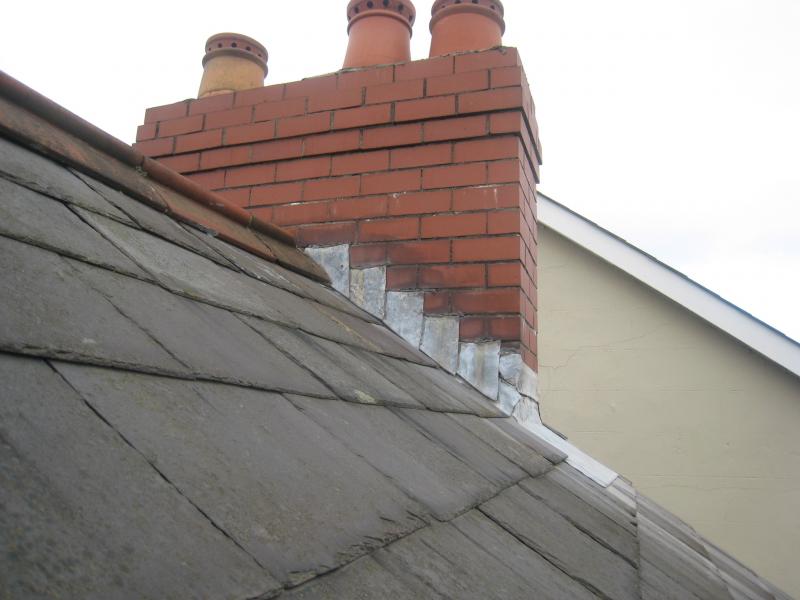
I’ve got some crumbling bricks on my chimney breast. It has been getting worse over the last 6 or so years. I have had various people look at it but nobody is sure what is causing it.

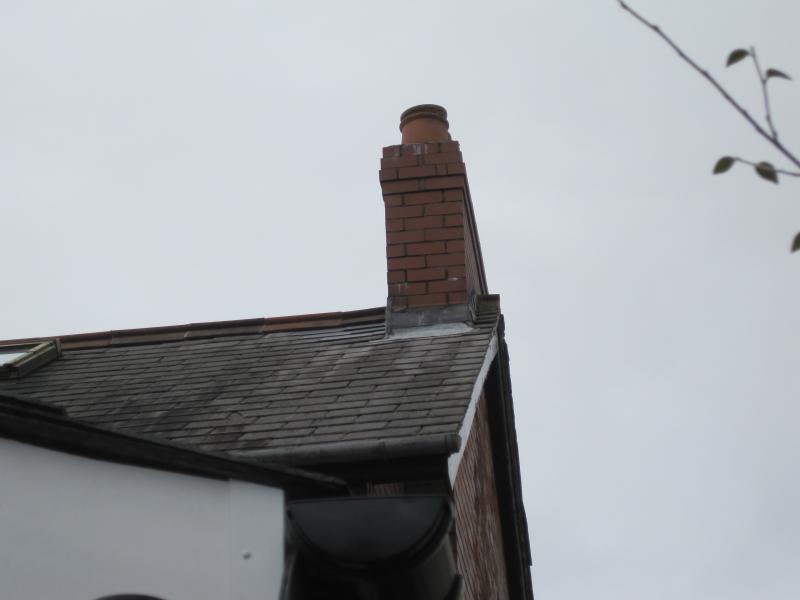
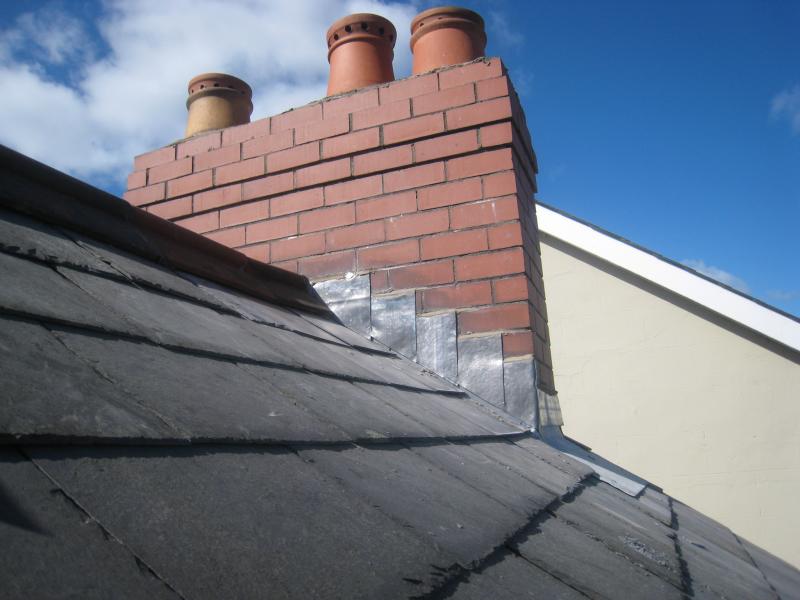
I have 4 flues and these are now unused. One flue has no pot and has been cemented over. The other 3 have caps on.

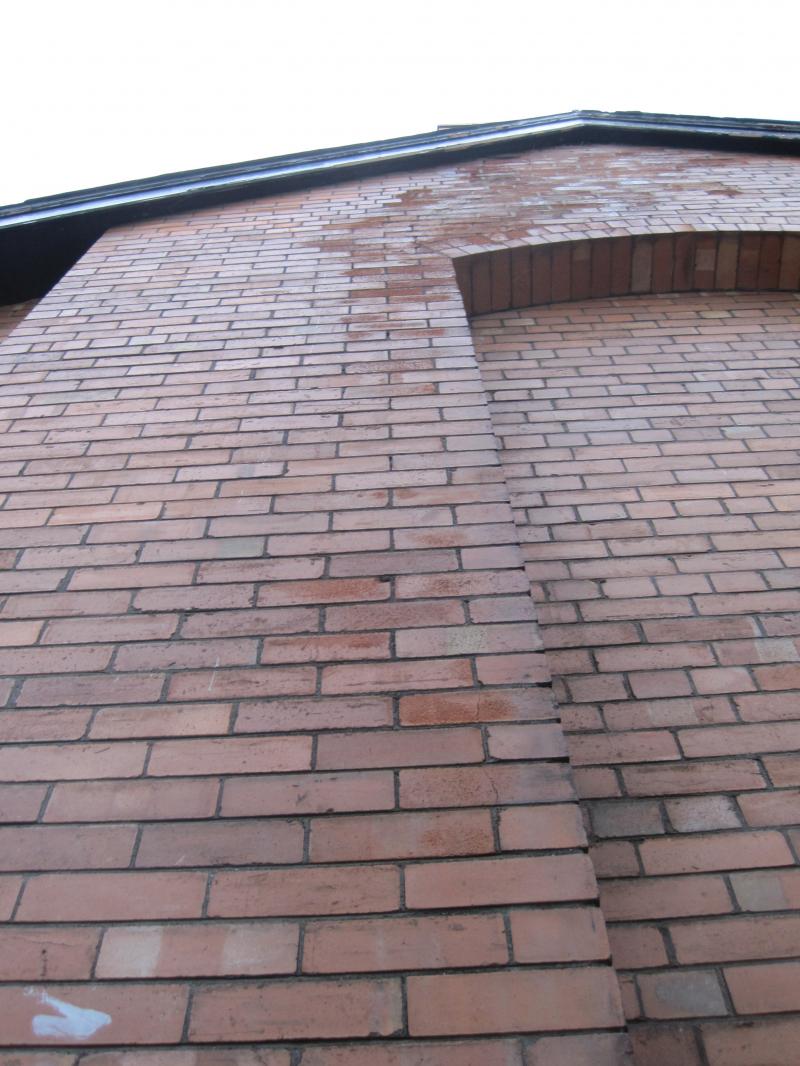
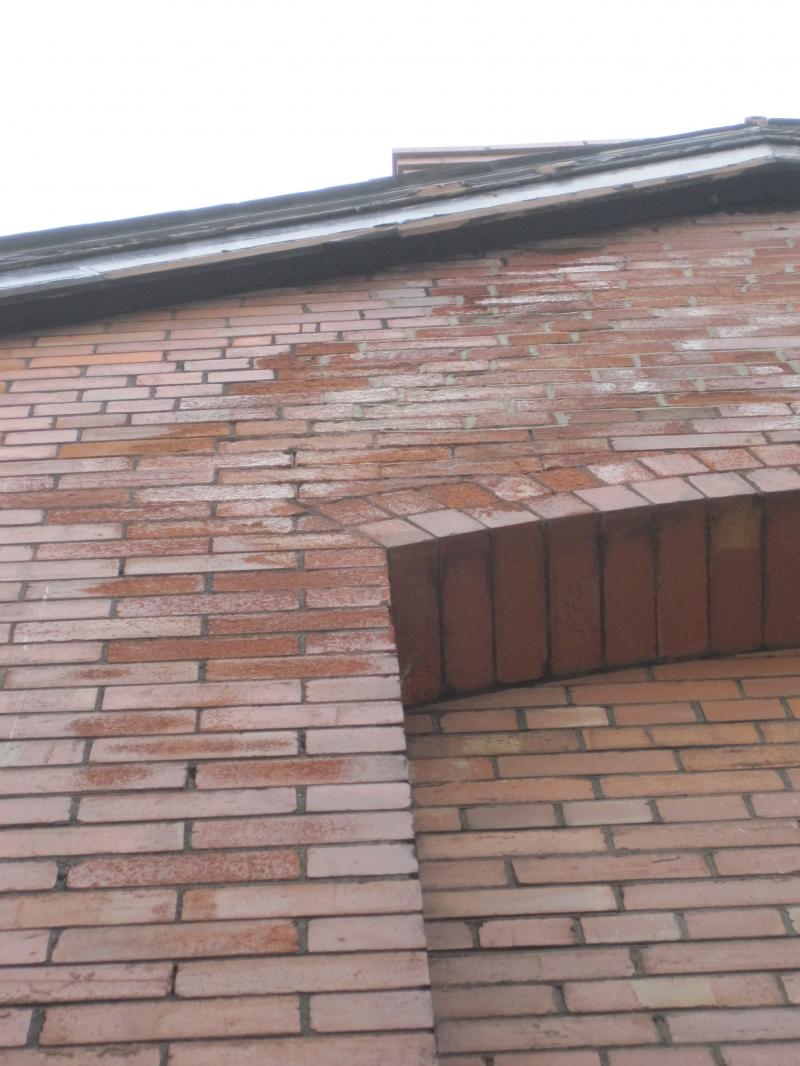
I think it could be something to do with the Chimney as it seems to follow the line of the flues down one side. If it was just general weathering I would have thought the bricks affected would have been more random.

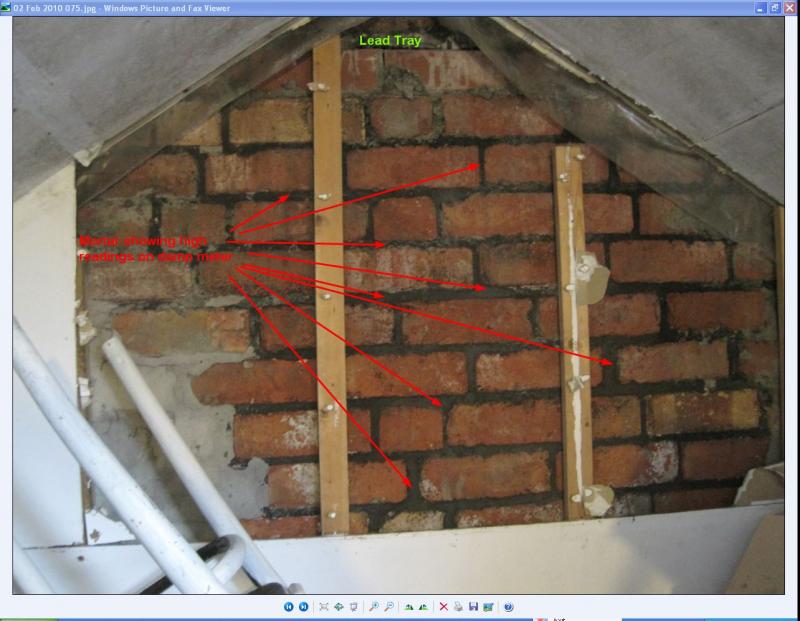
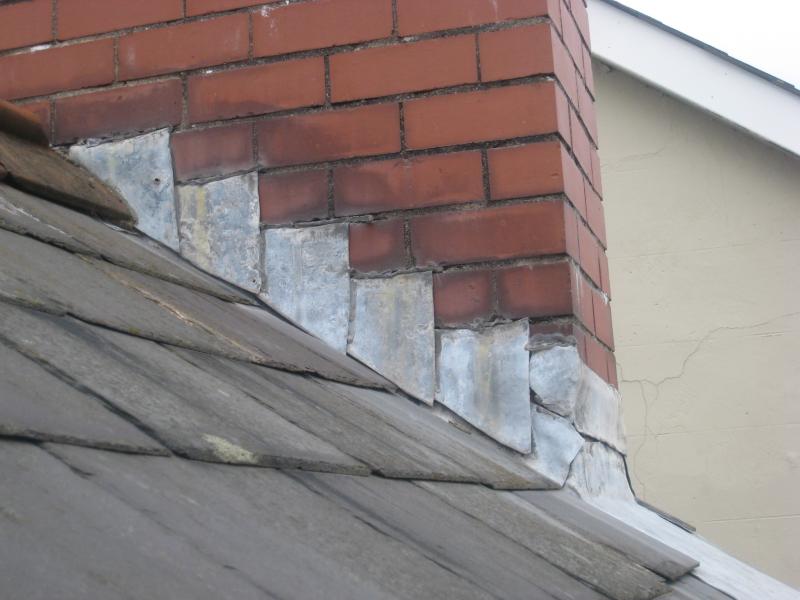
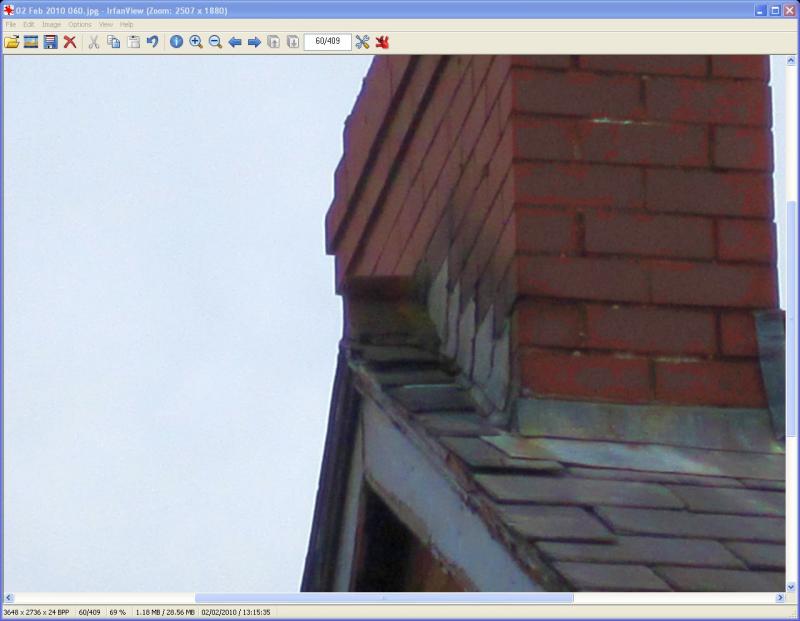
When I look at the chimney breast inside the loft, I can see that the mortar is dry directly below the lead tray, but as you go down the mortar gets very damp and crumbly. I have tested this on the damp meter. (see photo. Red arrows point out damp mortar)

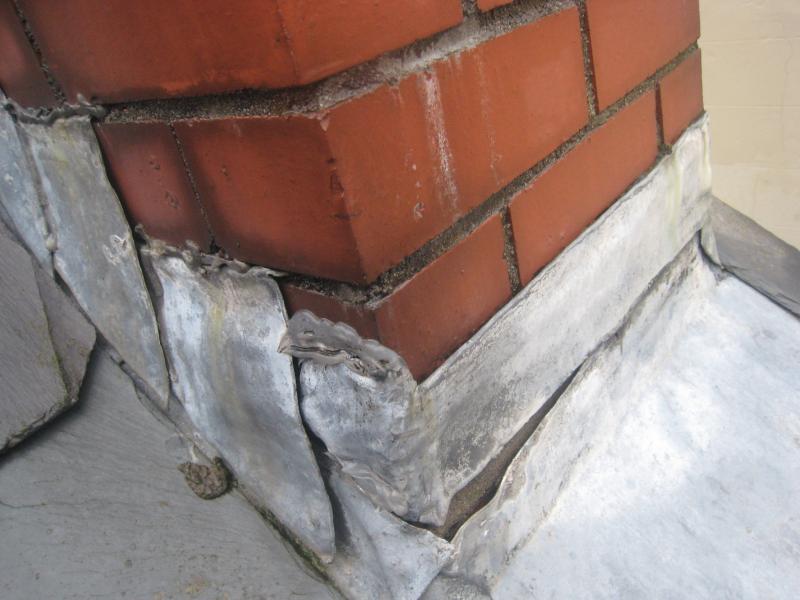
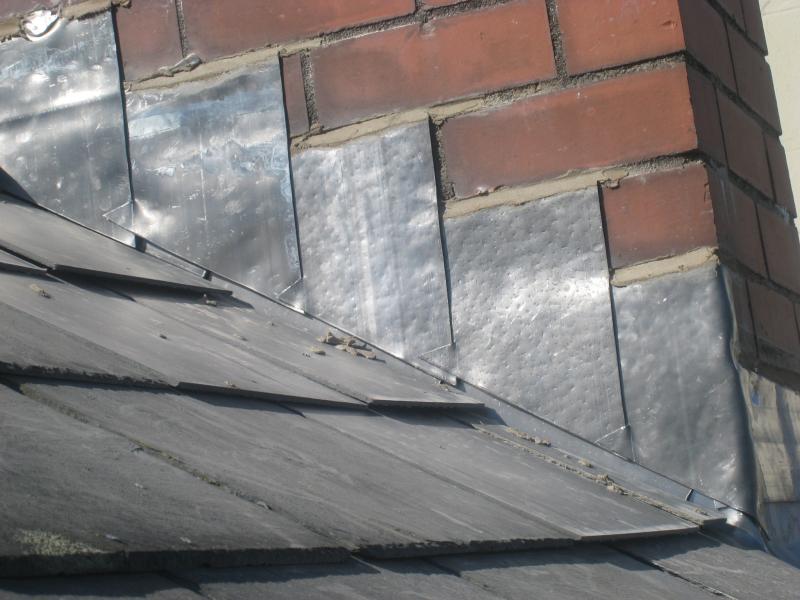
The flashing was replaced last year on the roof side of the chimney and I was told the flashing was ok on the other hard to get at side, but I am not sure if it is. I have blown up some photos of it from the garden and it looks ok. The builder who did this repair also re-pointed the weathered bricks with normal cement. This can be seen in the pics. I understand now that using lime mortar would have been better. They also washed the white residue off the bricks and then washed them down with a hose.

I think that the damp mortar inside the house in the loft might indicate that water is getting inside the chimney and finding it’s way out through the bricks on the outside leading to the bricks getting attacked.

A possibilty also is that the rain water is getting down the outside of the chimney, running between the chimney and the roof then down the chimney breast. Maybe the problem wouldn’t follow the track to the left side if this was happening though?

I notice that the bricks are being attacked right up under the eves, which shouldn’t get much weather, further indicating a problem from above maybe?


Has anyone seen a problem like this on a 1920’s red brick house? Is there any way to diagnose it accurately?

What about removing some bricks from the chimney breast inside to get a look at what’s going on inside the chimney?

Any ideas?

Sorry for the long post but I felt some detail was necessary.

Cheers, Andy
 
Sponsored Links
Has anyone commented about the condition of the flaunching on top of the stack, and used to help keep the chimney pots on? Faults with this could cause the faults you have.
Its also good practice to see slate soakers at the bottom of the chimney stack, to prevent water ingress here.
Presumably the lead flashings go all around the chimney? The stepped flashings must be good on both sides.
John :)
 
Thanks John

I think the flaunching was supposed to have been renewed but the pots were not removed so it was likely a patch job.

I've got a photo of the set up of the lead on the chimney stack Hopefully this is clear enough.

It's pretty much the same from the front view

Cheers, Andy

 
Thanks for the photo...what we see is a lead 'apron' and it looks good, and hopefully is the same on the other side.
There may be a bit of heave on the ridge tiles though, but I wouldn't think they would cause such a problem.
I'm wondering if the stepped flashing on the outboard side of the stack is far enough under the slates....
John :)
 
Sponsored Links
John

Fair point about the outboard flashing. No scaffold was used for the flashing repair on the rest of the chimney so it's possible it's not great. If this flashing was poor, would the dampness make it round to the mortar joints I have exposed in the loft?

The raised ridge tile was part of the last repair. This was reseated and all the lead at the inboard side and front and back replaced.

I have noticed some damp on the ridge board up to about a foot out from the chimney on the inboard side, so that ridge tile will need looked at. The chimney bricks adjacent to the ridge board are dry so I don't think this is affecting the chimney.

It was mentioned before about putting a lead cap on the chimney to seal it. Would this be a bad idea?

Cheers, Andy


Cheers, Andy
 
Hi Andy
Capping any chimney pot is a good idea if you think that water could be getting in there, but there must be considerable water ingress to cause the dampness on the inner leaf inside.
Therefore I would suspect the flaunching on the top or the leadwork between the chimney and the outside of the building.
Oh for a scaffold and a closer look!
John :)
 
Shame you could not have provided a shot of the chimney pots! At first sight I would suggest that you have a number of problems:-

1. Condensation in the sealed stack + as already suggested rainwater ingress into a sealed stack which is unable to dry out thoroughly as the stack is sealed.
2. Condensation reacting with the soot in the chimney and causing acid to attack the mortar joints - common problem.
3. Combination of condensation/saturated external brickwork on sealed stack and frost and/or acid damage or could be salts coming out of the brickwork, whichever the problem is brought about by the sealed stack much as you have suggested.

Solution: Vent the sealed stack - saying that you would be best advised to vent all the stacks, with the ones that have a pot - build in a low level air brick to allow air to circulate and in summer months dry out the stacks and reduce the effects of condensation in winter months. With the sealed stack introduce an air brick at low and high level - no need to go over the top, single brick sized air brick will do and can match in with a brick course and will not look out of place.

Regards
 
Cheers alittlerespect, excellent info. That all sounds like a good idea.

I've uploaded a few more pics including a view of the pots. The first ones show the old inboard flashing which was renewed last year. The old flashing looks like it was just glued on with silicone.

The new flashing is also shown and looks decent to me. I can also see evidence of new cement along the edges of the flaunching.

I've also zoomed in a couple of photos of the current outboard flashing, both front and back. These aren't particularly clear but might give some clues. I can't tell if the flashing on this side was siliconed on or not.

Maybe it's obvious but the chimney has been replaced at some point and is not original.

Cheers Andy

 
Copying some of the other guy`s ideas ;) but I would have a concrete slab cast right across the top in place of the flaunching/pots with single brick airbricks around under it venting all the flues and individual ones @ bottom of each flue. . Then for a real belt+braces I`d have a lead sheet over the concrete fixed into wood plugs set in the concrete and secured with lead dots ;) But concrete alone would probably do
 

Thanks Nige

With reference to where the air bricks should go below the lead sheet, I have a photo that shows a view inside the chimney before one of the pot caps was put on last year. One of the pots had been left without a cover.

This photo was taken by the bloke who fitted the pot cover and is rather poor :( 
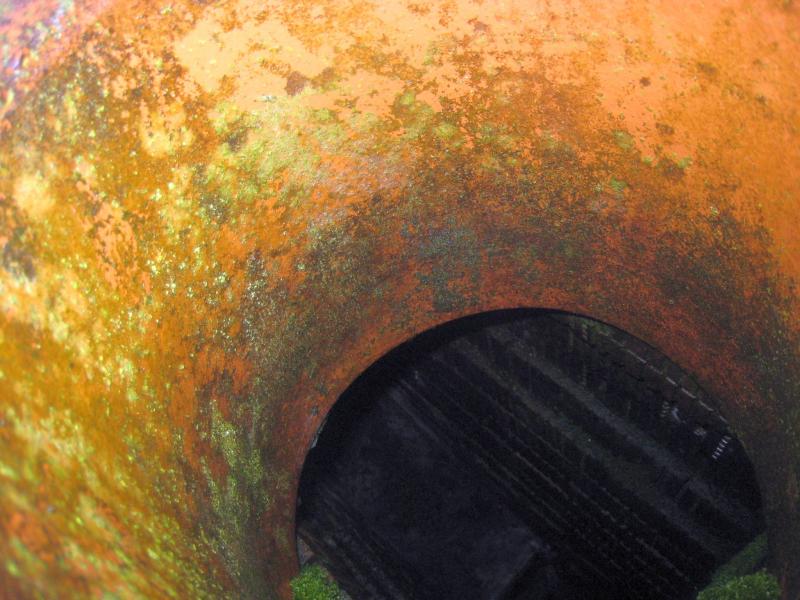
. Does this show that all the flues open out at the top of the chimney rather than the flues being continuous right to the pot?

I'm just wondering where exactly the air bricks should go? How far from the top should they be? If the flues become one at the top should I put the air bricks lower down on the gable wall below the roof line?

Thanks for all the help so far. I feel like I'm going to get this cracked once and for all. :D

Cheers Andy
 
Hi John

Aye, they're the old flashings before the inboard side was renewed as in the following pics.

The old flashing was stuck on with silicone. Pretty grim looking! The outboard flashings haven't been renewed so could also be stuck like this also. It's hard to tell from my pictures so far.

Cheers Andy
 
Flues are all separate to each pot but only separated by Feathers :?: single bricks - so easy to link the tops all together- then one course of bricks with airbricks spaced round- then the reinforced concrete slab . Individual airbricks @ bottom of each flue :idea:. Lead covering only included just because I can do it ;) and it would need to be well fixed round the edges - up in that windy area. So don`t think it`s a vital feature
 
The lead flahings do not look like flashing, they are soakers. Stepped flashing should go over them.
 

DIYnot Local

Staff member

If you need to find a tradesperson to get your job done, please try our local search below, or if you are doing it yourself you can find suppliers local to you.

Select the supplier or trade you require, enter your location to begin your search.


Are you a trade or supplier? You can create your listing free at DIYnot Local

 
Sponsored Links
Back
Top