- Joined
- 6 Aug 2023
- Messages
- 198
- Reaction score
- 26
- Country

Hi everyone,
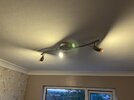
My wife and I recently got a room redecorated and she has asked me about fitting a set of spotlights we got from IKEA. When we moved into the house we discovered that the room in question had a god awful looking round fluorescent light thing that was bright enough to light the dark side of the moon and made that annoying fluorescent hum at night.
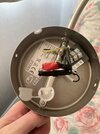
Before the decorator came in I opened up this light and discovered that it was just wired into the remains of the ceiling rose that was once there - the fitting itself was designed to fit around the ceiling rose once the cover had been removed.
The IKEA light has a simple setup of live, neutral and earth going into a terminal block (I believe it’s also called a chocolate block) so I’m going to have to remove the ceiling rose to do this.
I’m fairly confident I’ll be able to do this myself - I’ve been wiring plugs since I was 10 years old and I have done things like replace light switches and sockets. I also found a YouTube video where an electrician went through the process step by step.
In the video he talked about identifying the wires, and explained about loop in and loop out and switched live etc and then showed how to replicate the wiring in the ceiling rise using Wago connectors. I am fairly confident I will be able to do this.
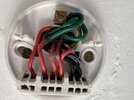
I’ve attached a picture of my ceiling road setup here just for reference. I believe the single red wire on the far left of the photo is switched live. The red wires in centre will, I believe, be permanent live and run to/from other ceiling lights.
My question to you good folks is about these Wago connectors. In the video, the guy connected everything up and then just pushed the Wago connectors back up through the hole, leaving only a short piece of 3 core wire to connect to the spotlight. However I was doing a bit of reading last night and quite a few people said that in order for wiring to comply with relevant British Standards the Wago connectors would need to be in some kind of enclosure. I’ve been looking at some of these enclosures and none of them seem to be small enough to fit through the hole in the ceiling. I’m not keen on making a bigger hole and then plastering over it, as some people have suggested.
What are my options here?

