Clothes airer pulley system

Joined
11 Jul 2013
Messages
18
Reaction score
0
Location
Lancashire
Country
United Kingdom
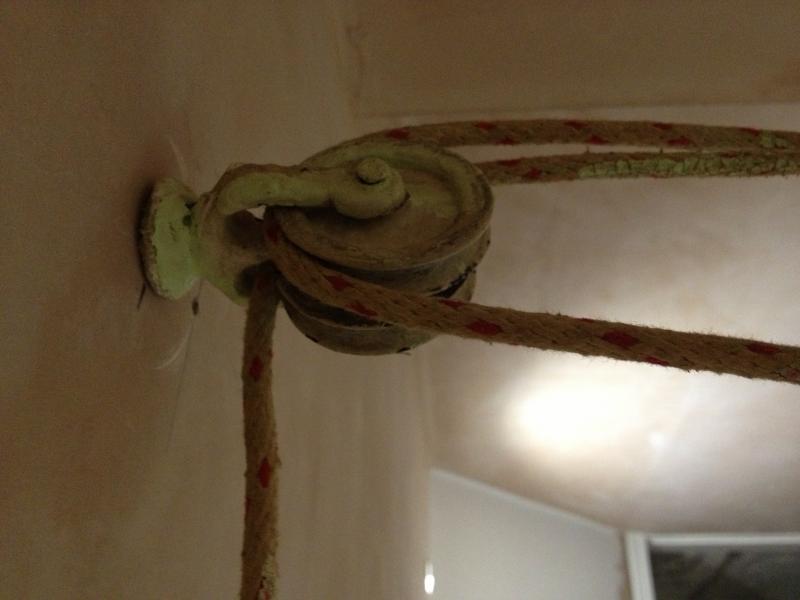
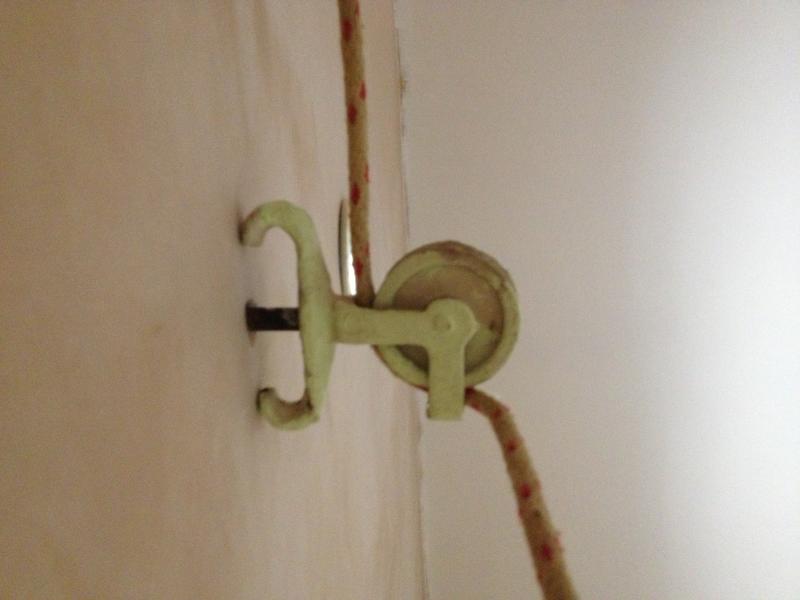
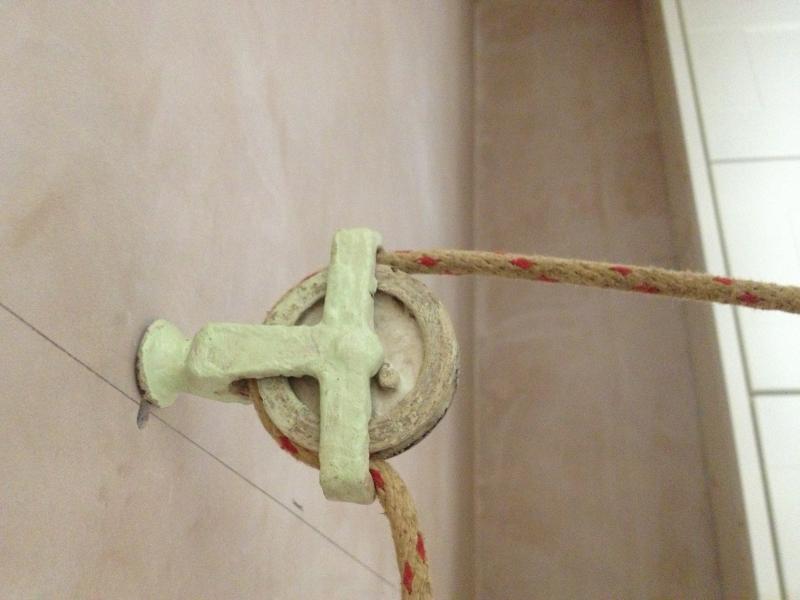
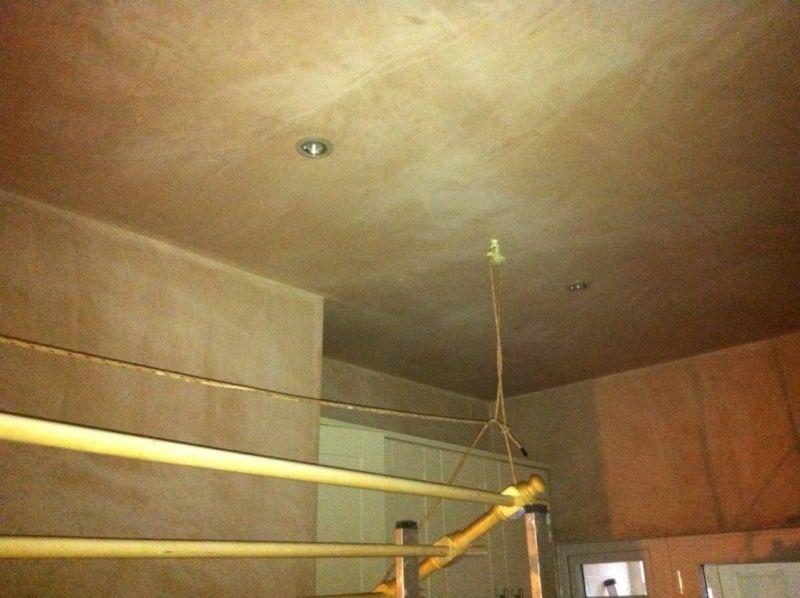
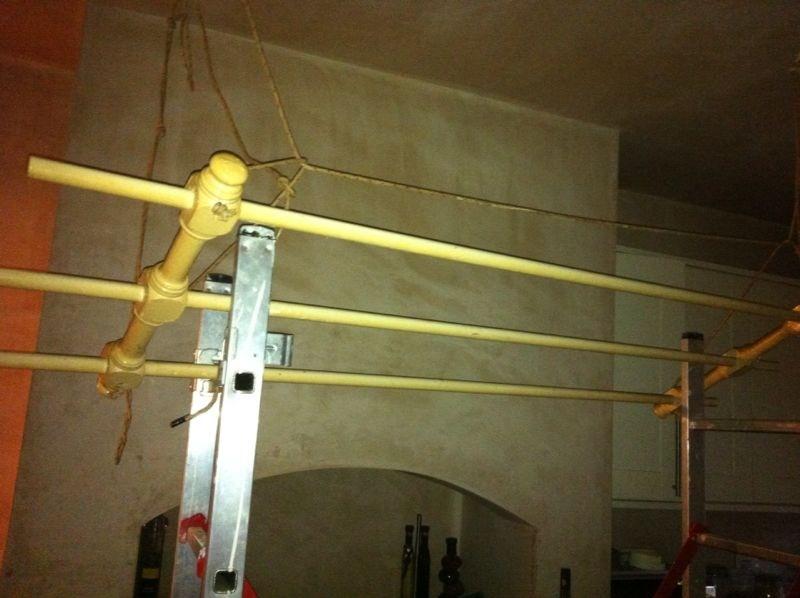
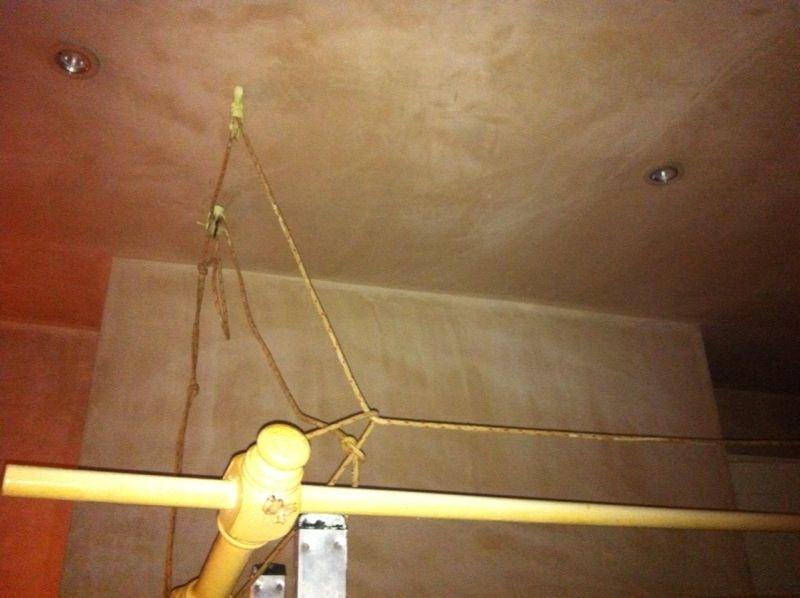
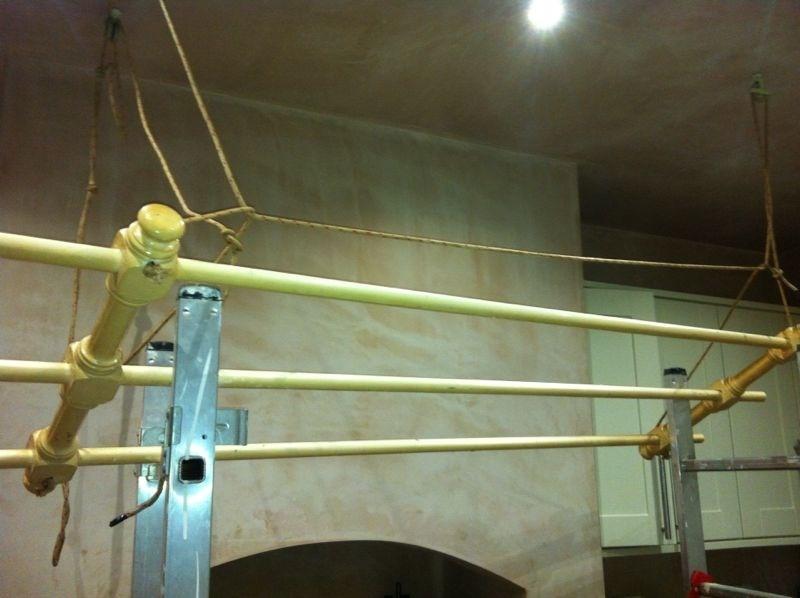
I have an old fashioned clothes airer that hangs from the ceiling in front of the chimney. It has 3 pulleys, 1 with 2 wheels, 2 with 1 wheel.

Builders took it down to do some work, and I assumed they'd know how to put it back. None of us can fathom it out and it's driving me insane!

I have tried google but can't find instructions for 3 pulley systems, so if anyone can explain how to position the pulleys and ropes (or send me a pic of your own if you have one) I'd be very grateful!

Here are some pics if it helps..

Thanks!
 
Sponsored Links
1 way pully in ceiling at both ends.
The rope connects to the frame of the dryer and goes up through it.

These ropes both go to the 2 way pully - also in the ceiling and then heads down to the cleat that you will need on the wall.

The cleat MUST be firmly attached to the wall with BIG screws into solidness.

The pulleys MUST be into the joists.

I say these MUSTs because a dryer full of wet washing is very heavy and there is a lot of strain on the pully system when raising it.

I refitted ours after an extended absence while our kitchen had some long term decorating done :) we have not needed the dryer as much because of it.

However, it does contribute to dampness so you must consider some ventilation.
 
Thanks for your reply.

My airer doesn't have holes for the rope to go through... It has two triangles of rope at either end that the pulley rope attaches to (no idea how this is done).

The two single pulleys go in a straight line, but the third double pulley sits directly behind one of the single ones (imagine an L Shape)... How does the rope change direction?
 
There should be one rope attached to the apex of each triangle(tied with a good strong knot).
One should go up to the single pulley, across the ceiling to one wheel of the double pulley& then down to the tie off point(normally a cleat as mattylad says).
The other should go up to the other single pulley the over to the other wheel of the double & down to the same fixing point.
They will have to tied off to equal lengths at this point & knotted so that they both rise & fall together by the same amount.
The rope should not loop under the apex of the ropes as shown in your pics.
Alternatively if you only have one rope then do it in reverse direction ie fit the ends of the rope over the double & take one over the first single pulley & down to the apex & the other across the ceiling to the other single pulley & down to the apex.
 
Sponsored Links
Thanks jj

I think I'm getting there now. It looks much better than it did, although the set up still looks wrong. I think it might be because I have the pulleys in the wrong position. There are three of them and are all different.

This is the double which I'm assuming sits on its own closest to the wall directly behind one of the single wheeled ones

The single ones sit in a straight line a bit in front of the double, making the L shape. They are both different, so does anyone know if their positions matter?

Any ideas?
 
So are you now saying the pulleys are wall mounted & not ceiling mounted as shown in your original pics.? If so I doubt you will get it to work as with the weight of wet washing on the rails, the ropes will probably bind in the pulley mounts. They are normally all mounted in a straightish line on the ceiling with the double nearest to a wall where the cleat is to be fixed. Can you post a wide angle pic showing your complete set up.
 
Thanks for your replies everyone. I've got it working at last!

The pulleys are ceiling mounted (the pics turned round when I uploaded them).

Google hasn't been of any help- not found any airers with the same pulley configuration, but an old lady I know has managed to talk me through it and I realised there is a missing wheel in one of the pulleys which enables the rope to change direction. Once the wheel was found and in its correct position it was very easy to install!

Thank goodness for old ladies!
 

DIYnot Local

Staff member

If you need to find a tradesperson to get your job done, please try our local search below, or if you are doing it yourself you can find suppliers local to you.

Select the supplier or trade you require, enter your location to begin your search.


Are you a trade or supplier? You can create your listing free at DIYnot Local

 
Sponsored Links
Back
Top