- Joined
- 29 Dec 2010
- Messages
- 17
- Reaction score
- 0
- Country

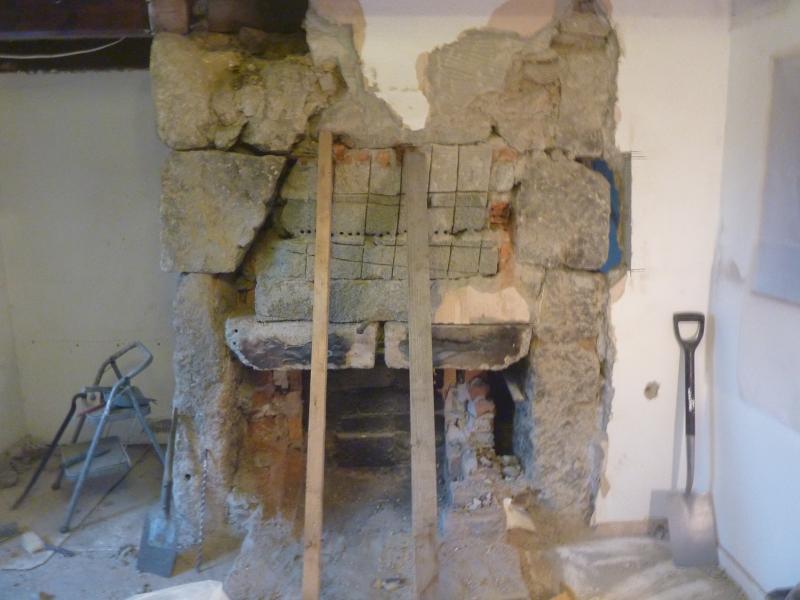
We have a little cottage in Cornwall and we started chipping back the horrid 1970s fire to see what was behind ... here's a pic
I should say that before we started any work we had an initial assessment of the flue by a local stove and flue specialist, who assured us that the type of flue was suitable for what we had planned & we will be using a HETAS registered installer to fit the stove once all the clearing and structural work is complete ...
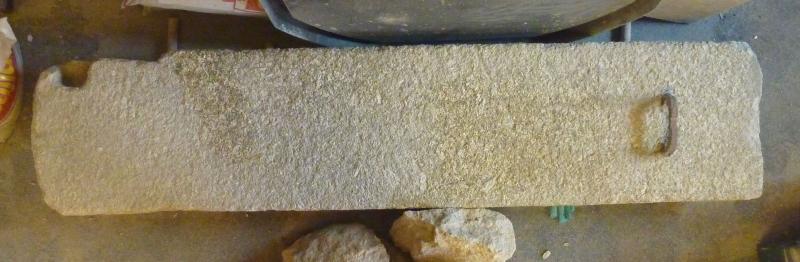
sadly as you will see below, the lintel was broken out when the 1970s fireplace was put in ...
... still not sure how or why it was done in the first place but we have sourced a reclaimed granite lintel ready to take the place of the old one as soon as we have cleared back the depth of the original inglenook ...
It’s been really hard going as it has primarily been filled with concrete blocks laid side on (the little lintel in the last pic even had 6 reinforcement bars within it!) I was hoping it would have just been a brick face ...
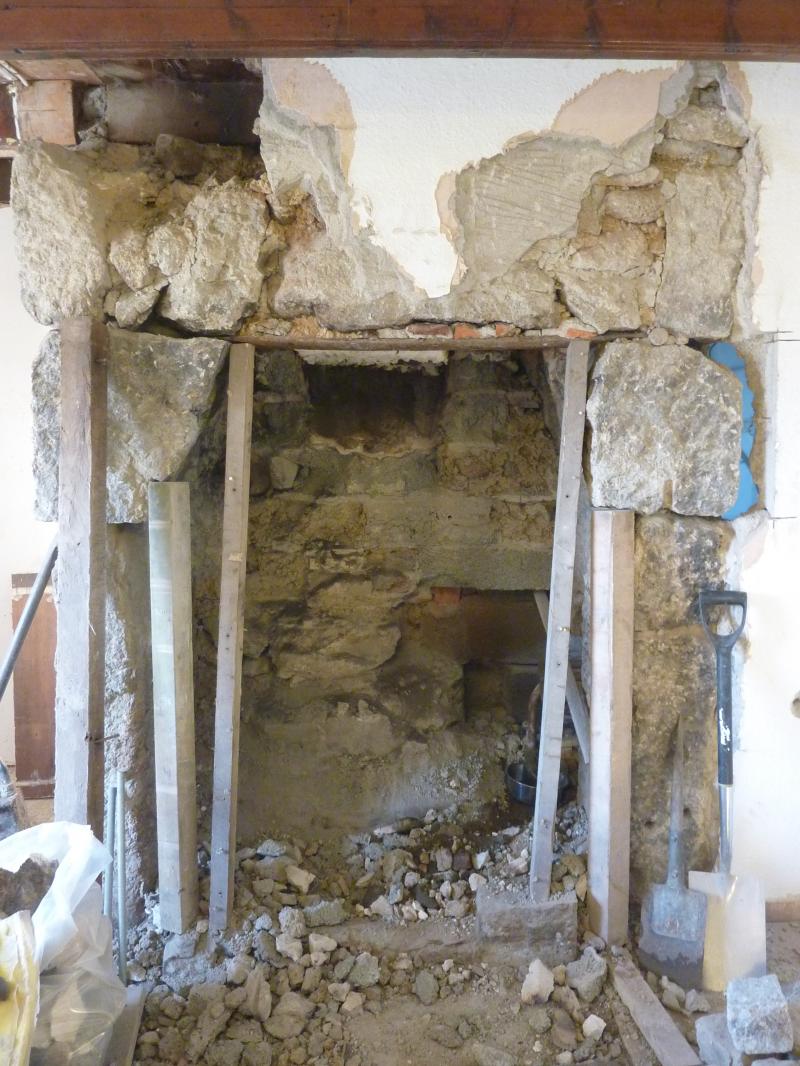
So this is where we have got to – the depth of the inglenook is not clear from the photo so I have sketched the side view to hopefully help explain ...
We have now found what we believe to be old granite infill to the left and breeze block continuing to the back wall to the right (as you look at the photo) – the flue has been lined with a filler around an air bladder to leave a pipe and there is a thin metal bar supporting the granite above the lintel ...
So to the question ...
Has anyone done something similar? And is the inglenook likely to be structurally sound if we continue to chip out the concrete infill? All being well there is less than a third to-go ...
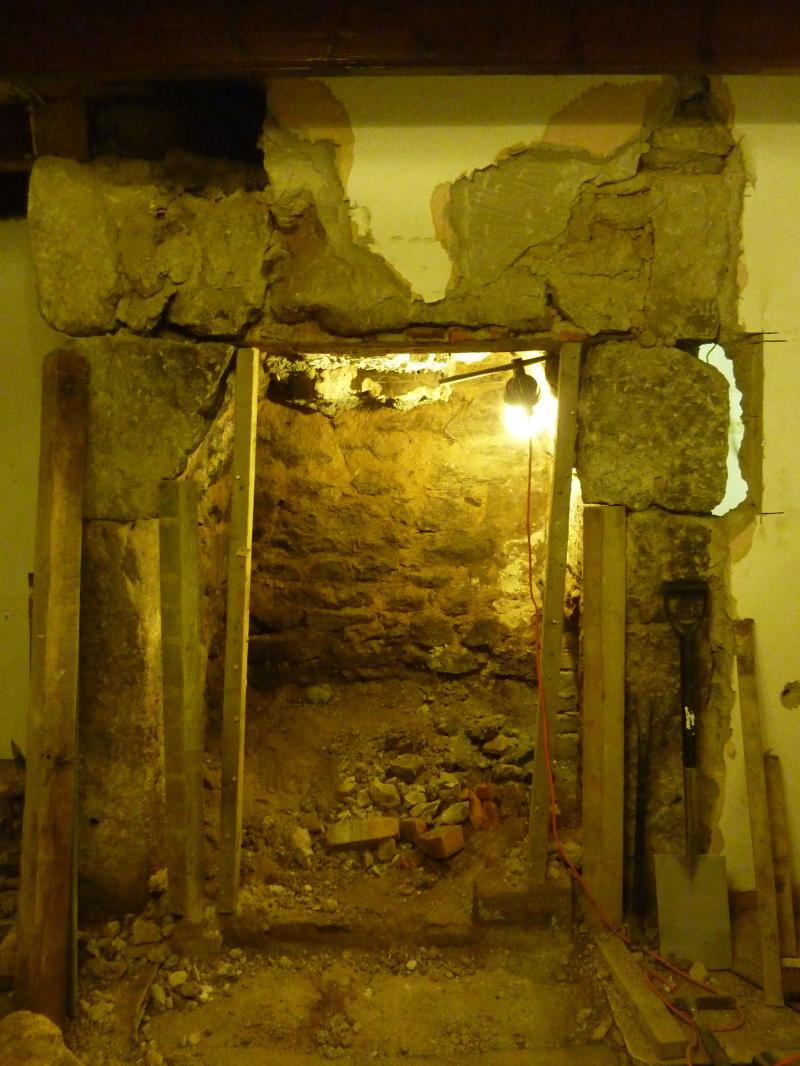
My main concern is the structural integrity of what’s above – I’m not sure if the flu is lined all the way up to the chimney but it appears it may be ...
The sooty residue on the inside of the granite appears to keep going behind the infill that remains ...
Whoever did this must have built it with the top remaining structurally sound but having not seen this before I’m not sure how to proceed ...
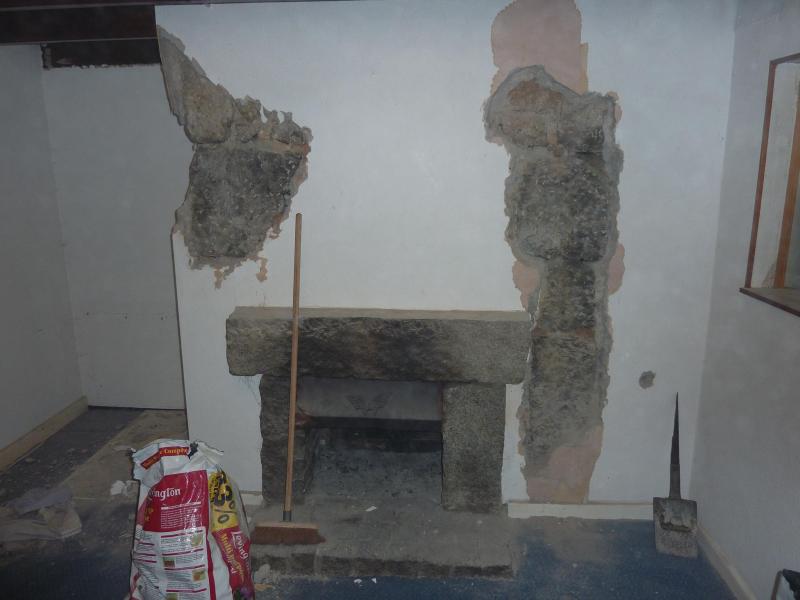
Anyway here’s some more pics – any advice [other than put it back again ] would be much appreciated
View media item 29697
the plan:
View media item 29702
I should say that before we started any work we had an initial assessment of the flue by a local stove and flue specialist, who assured us that the type of flue was suitable for what we had planned & we will be using a HETAS registered installer to fit the stove once all the clearing and structural work is complete ...
sadly as you will see below, the lintel was broken out when the 1970s fireplace was put in ...
... still not sure how or why it was done in the first place but we have sourced a reclaimed granite lintel ready to take the place of the old one as soon as we have cleared back the depth of the original inglenook ...
It’s been really hard going as it has primarily been filled with concrete blocks laid side on (the little lintel in the last pic even had 6 reinforcement bars within it!) I was hoping it would have just been a brick face ...
So this is where we have got to – the depth of the inglenook is not clear from the photo so I have sketched the side view to hopefully help explain ...
We have now found what we believe to be old granite infill to the left and breeze block continuing to the back wall to the right (as you look at the photo) – the flue has been lined with a filler around an air bladder to leave a pipe and there is a thin metal bar supporting the granite above the lintel ...

So to the question ...
Has anyone done something similar? And is the inglenook likely to be structurally sound if we continue to chip out the concrete infill? All being well there is less than a third to-go ...
My main concern is the structural integrity of what’s above – I’m not sure if the flu is lined all the way up to the chimney but it appears it may be ...
The sooty residue on the inside of the granite appears to keep going behind the infill that remains ...
Whoever did this must have built it with the top remaining structurally sound but having not seen this before I’m not sure how to proceed ...
Anyway here’s some more pics – any advice [other than put it back again
] would be much appreciatedView media item 29697
the plan:
View media item 29702
 It's notifyable to your LABC for inspection & possible witness test unless you use a HETAS registered installer. Thats in addition to the structural work you appear to be doing on the chmney breast itself. You will need a compliance certificate (issued by one or the other) for the stove if you want to avoid problems when you sell & to avoid the risk of invalidating your property insurance in the event of a problem.