Cornish Granite Inglenook Fireplace Restoration (with pics)

Joined
29 Dec 2010
Messages
17
Reaction score
0
Country
United Kingdom
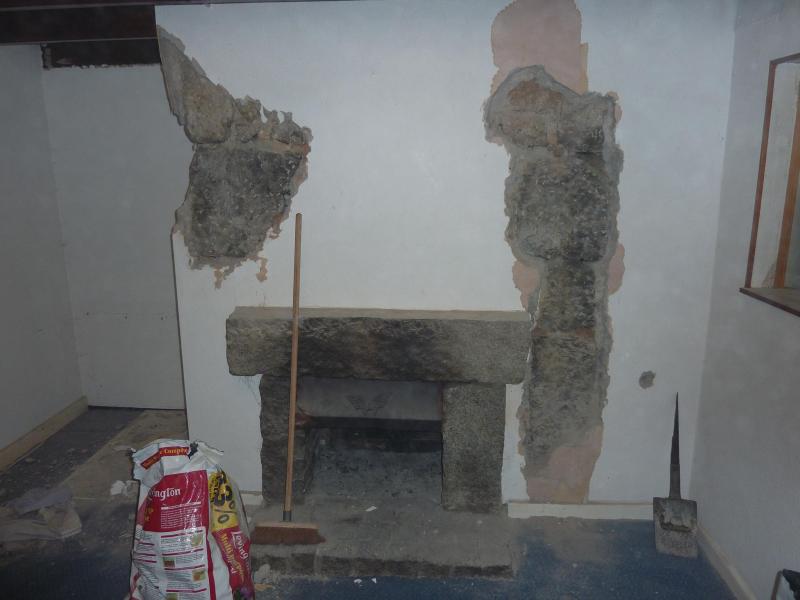
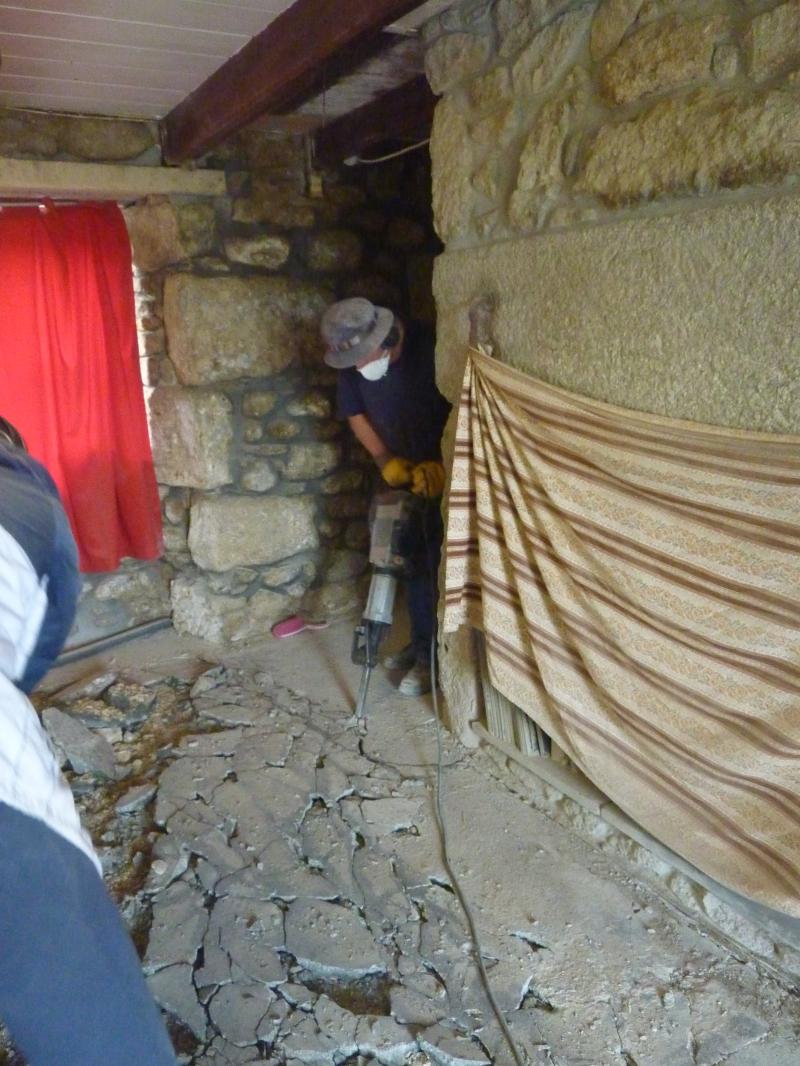
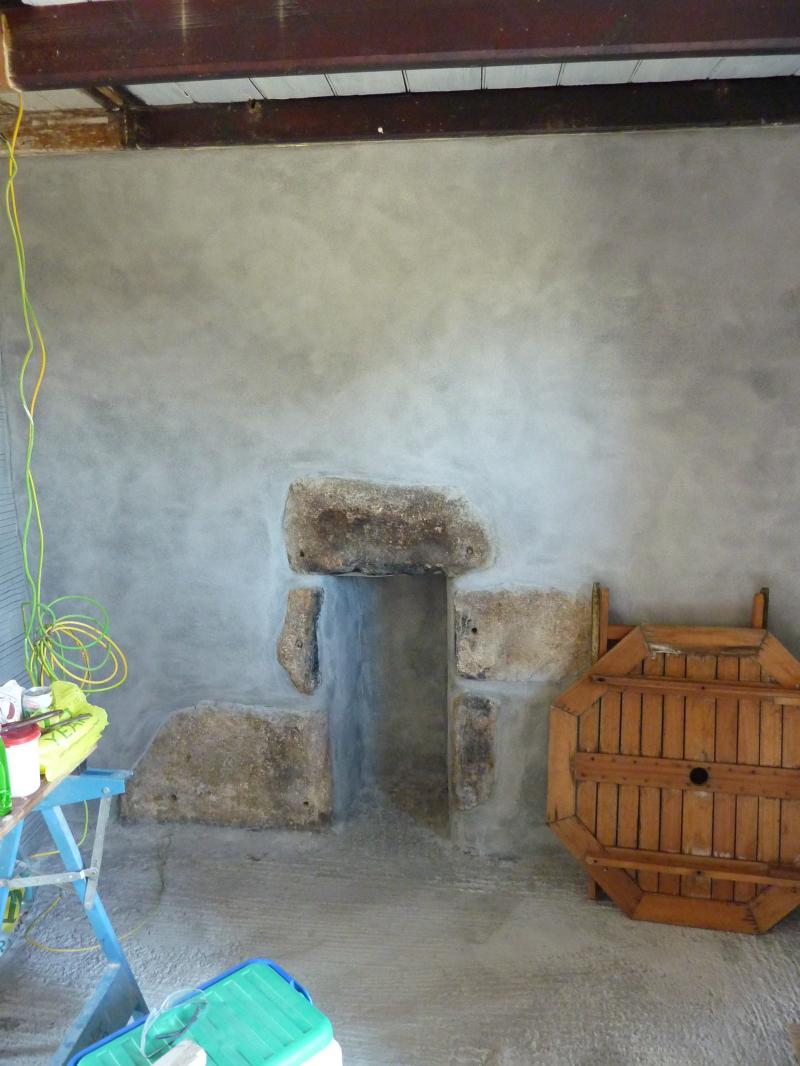
Hi - We have a little cottage in Cornwall and we decided to chip back the horrid 1970s fire to see what was originally behind ... we were hoping to find a large granite inglenook and lintel and hoped a small wall was all that stood between us and a nice wood burner ... how wrong we were ...


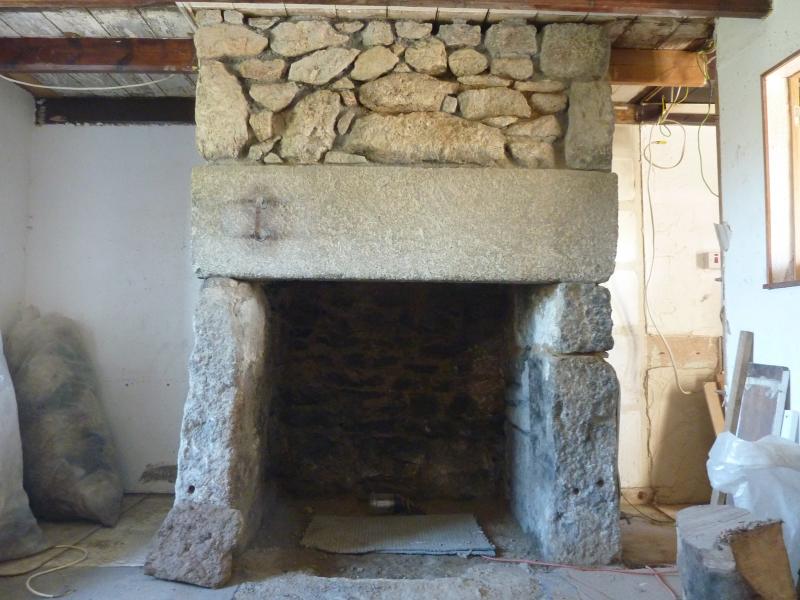
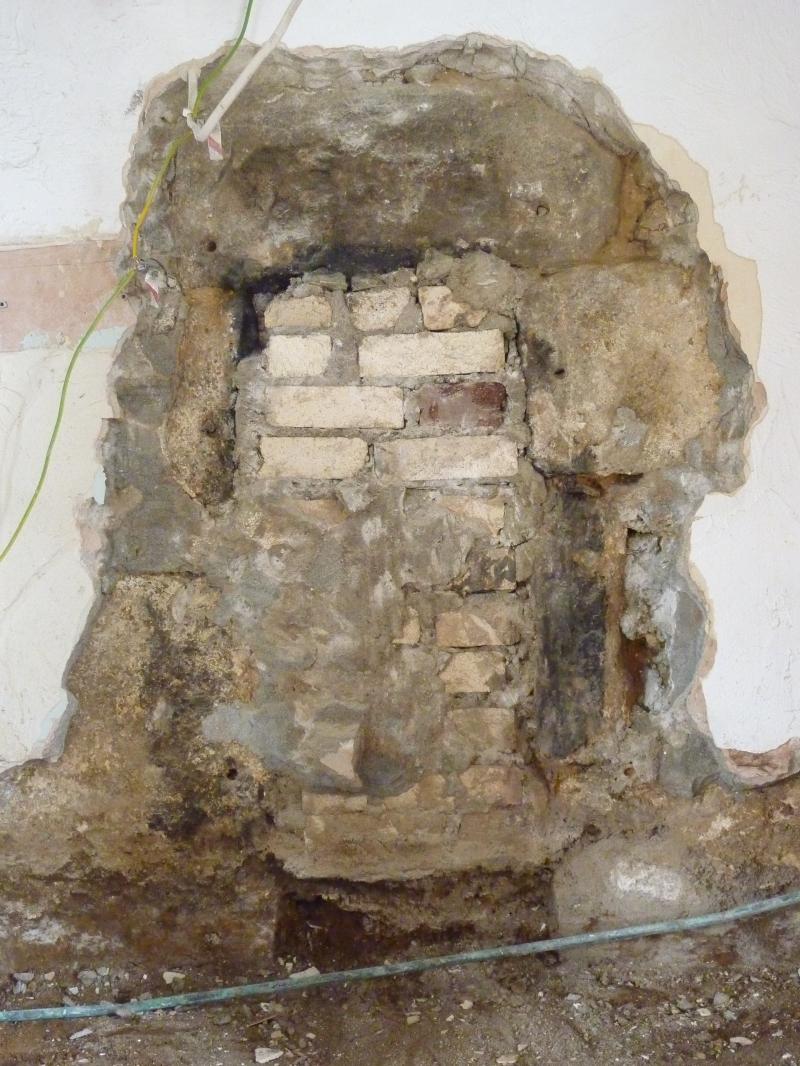
... sadly as you will see below, the large granite lintel was broken out when the 1970s fireplace was put in ...


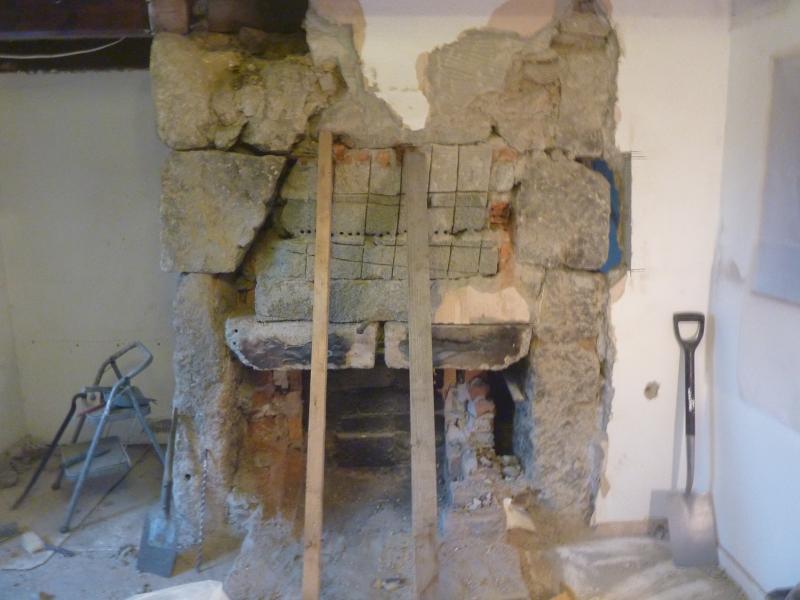
... and unfortunately it was primarily filled with concrete blocks laid side on all the way back (the little lintel in the last pic even had 6 reinforcement bars within it!) ...


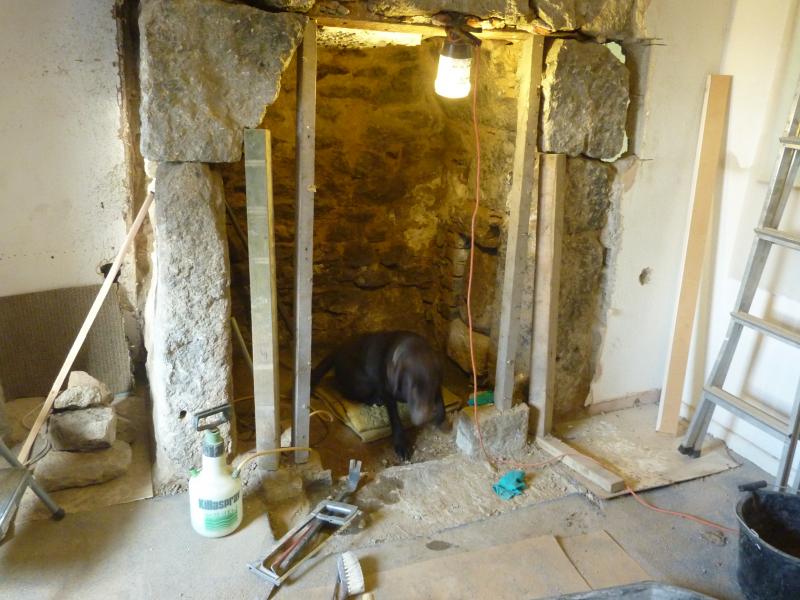
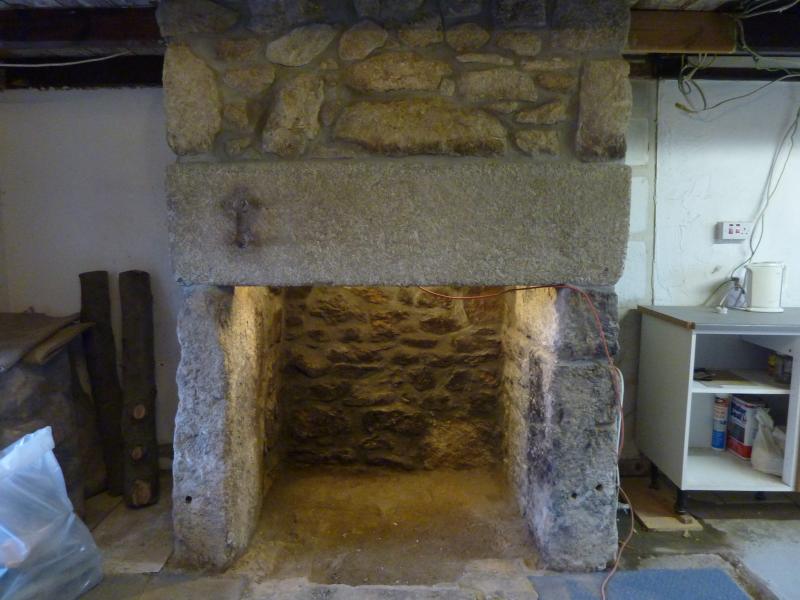
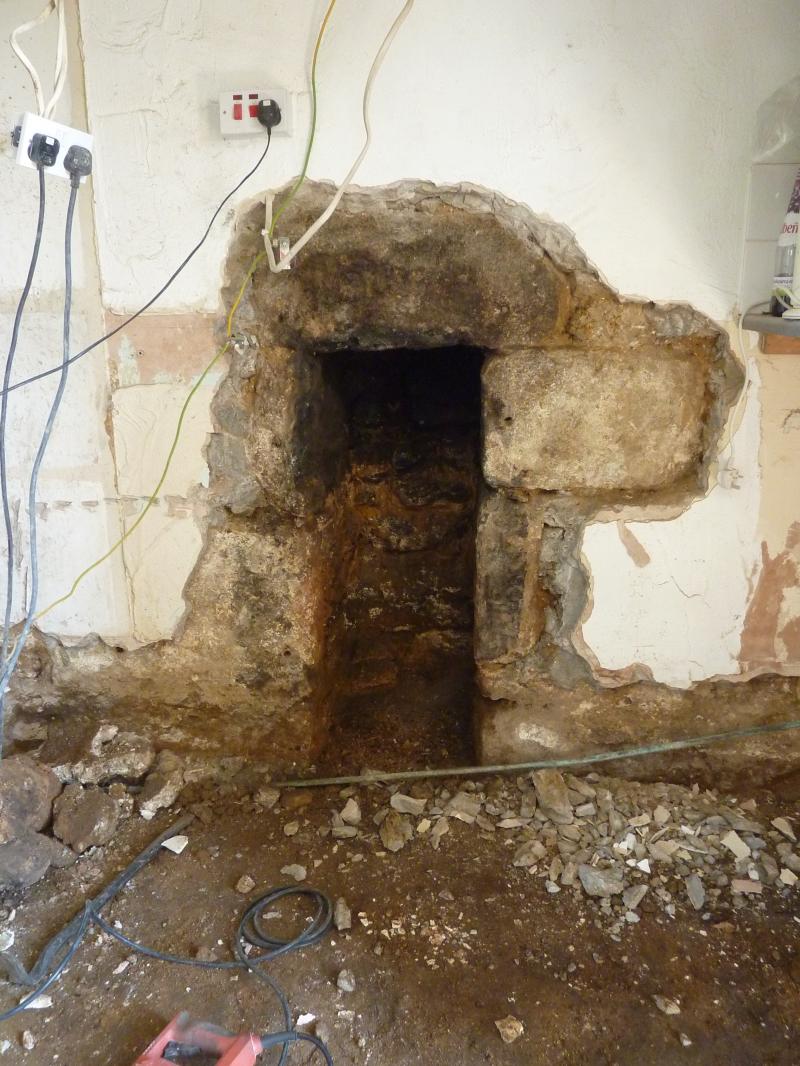
... our main concern was the structural integrity of what was above but we thought whoever did this must have built it with the top remaining sound, having not seen this before we were unsure how to proceed ... we carried on chipping it out anyway ...


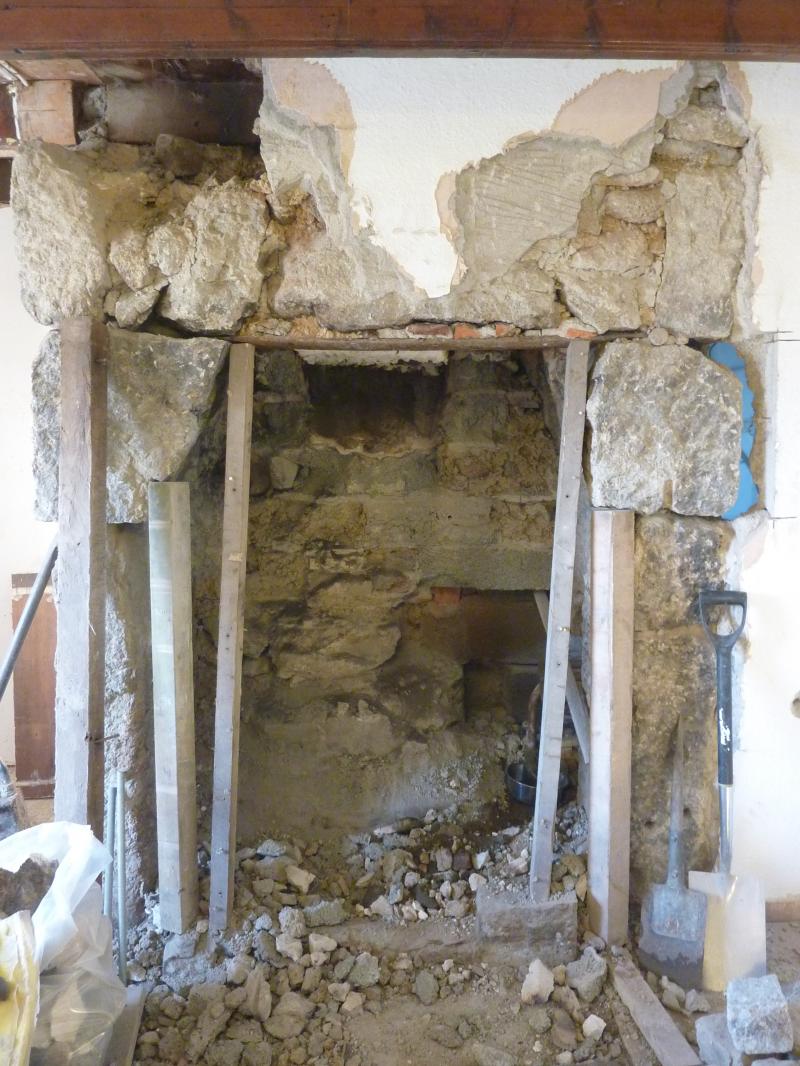
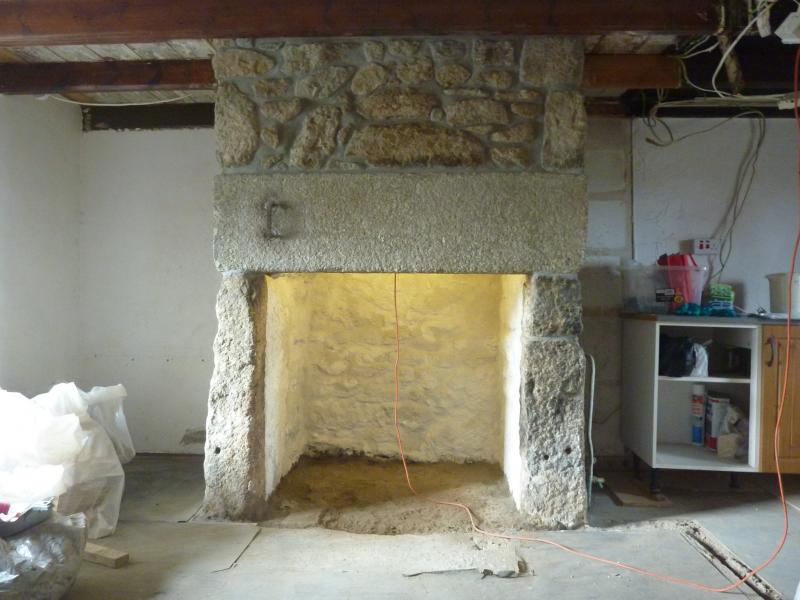
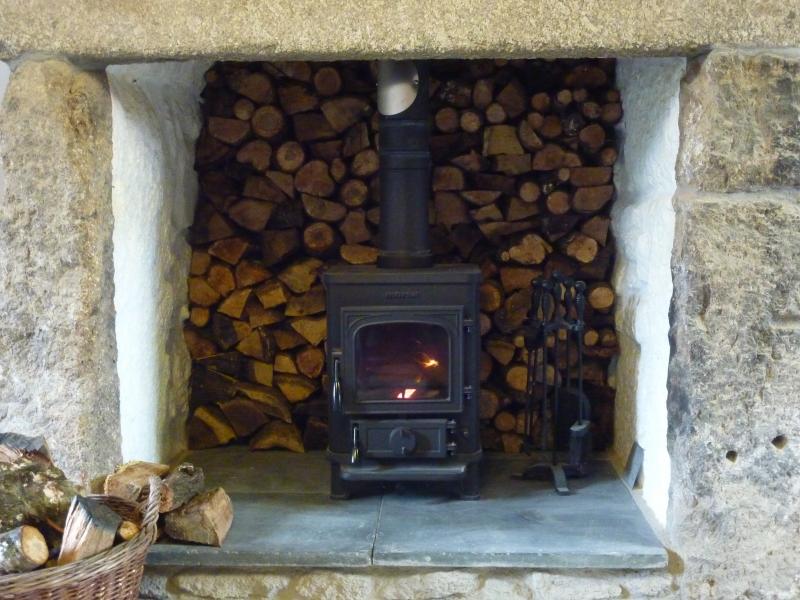
... thankfully we could then clearly see how the inglenook was constructed and how the inside was filled – all very stable ...


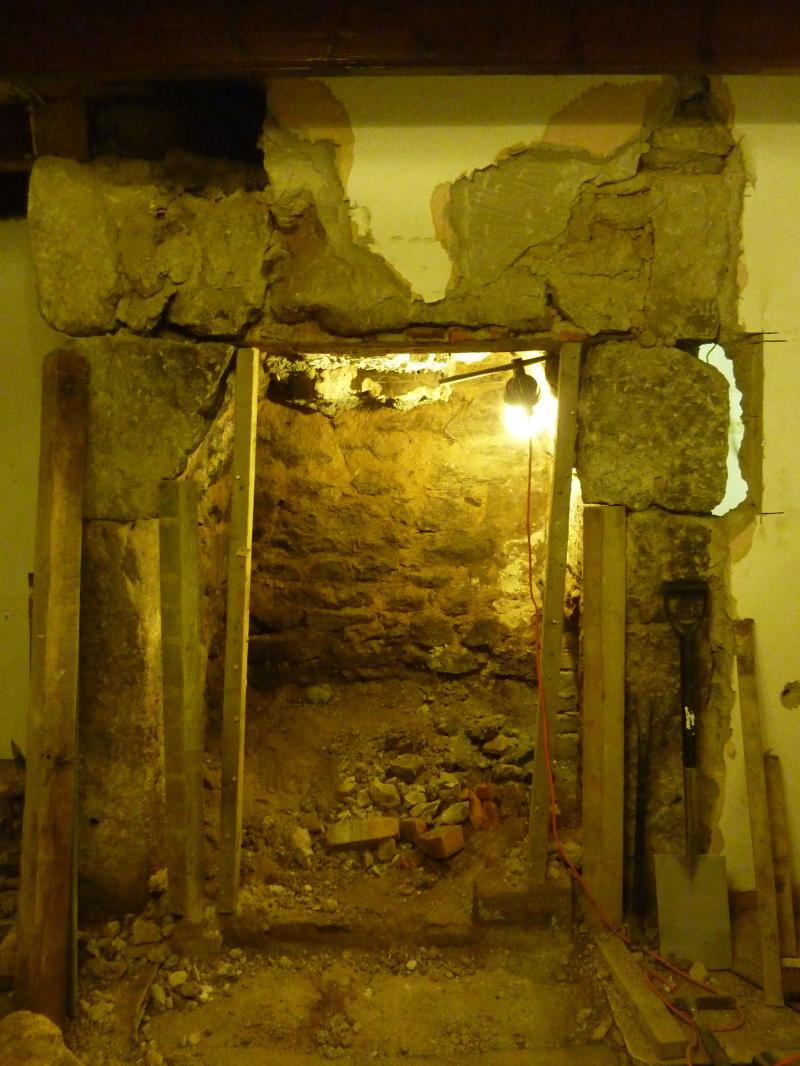
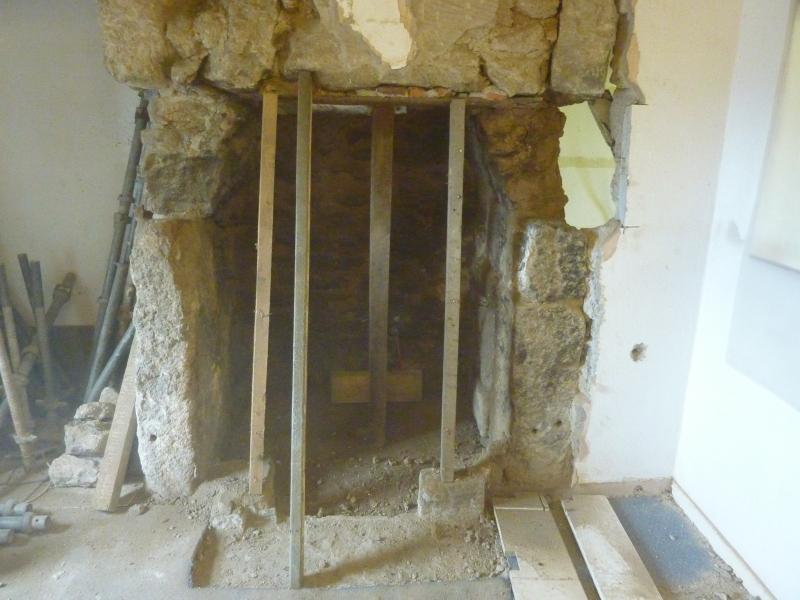
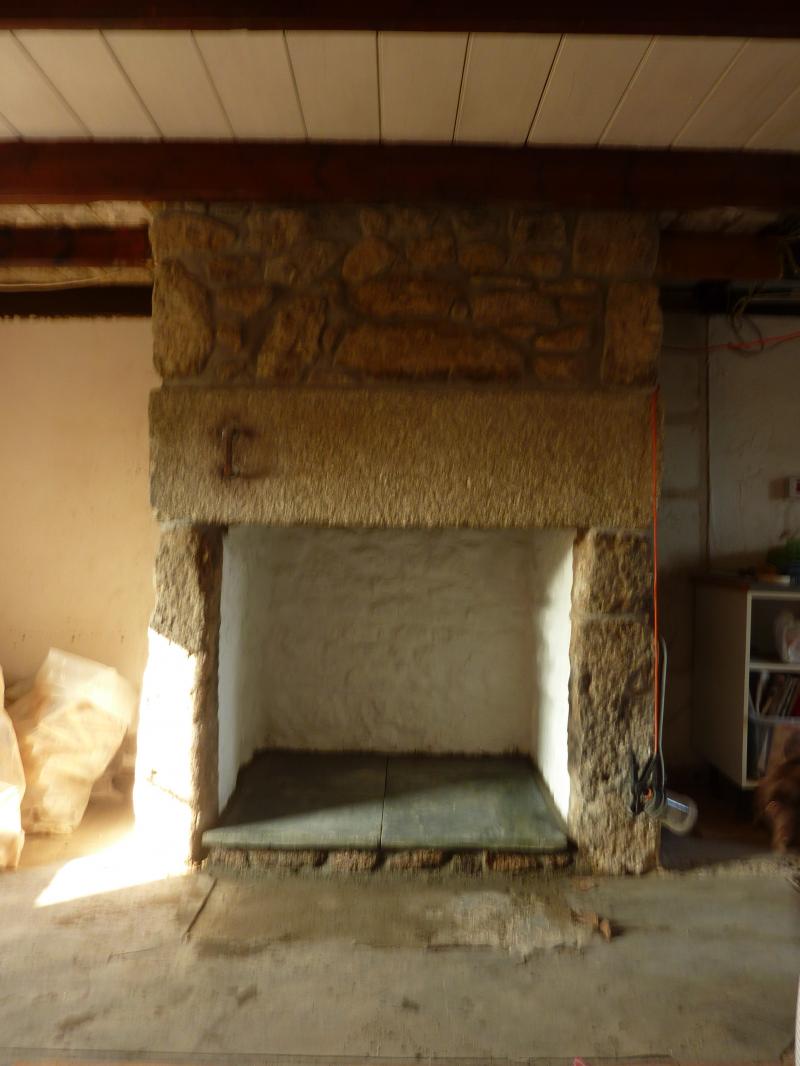
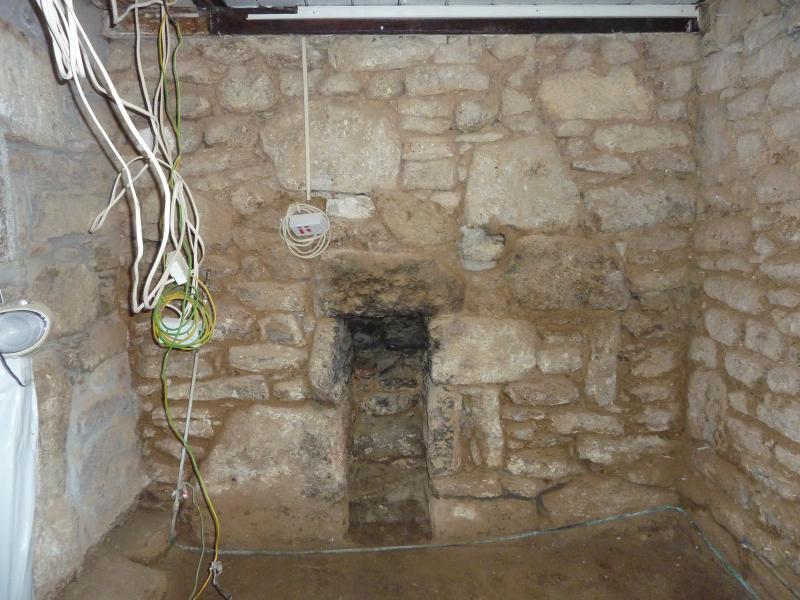
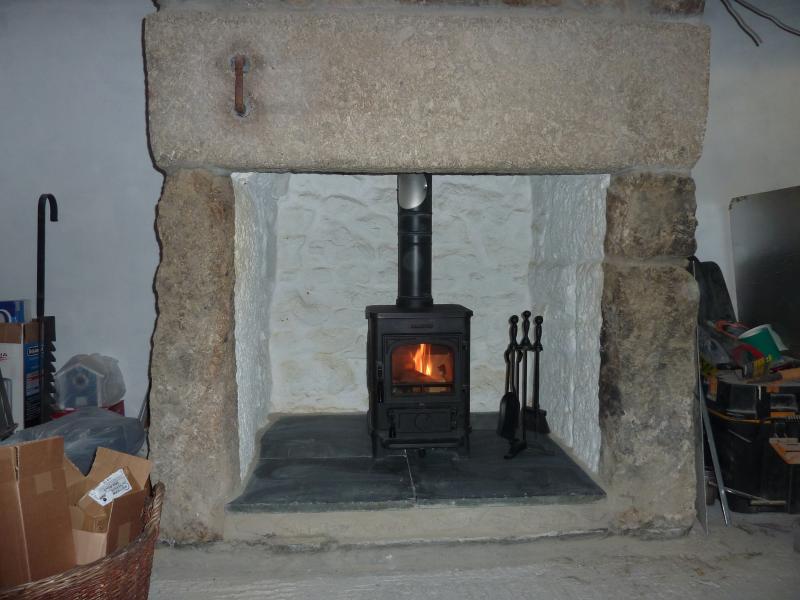
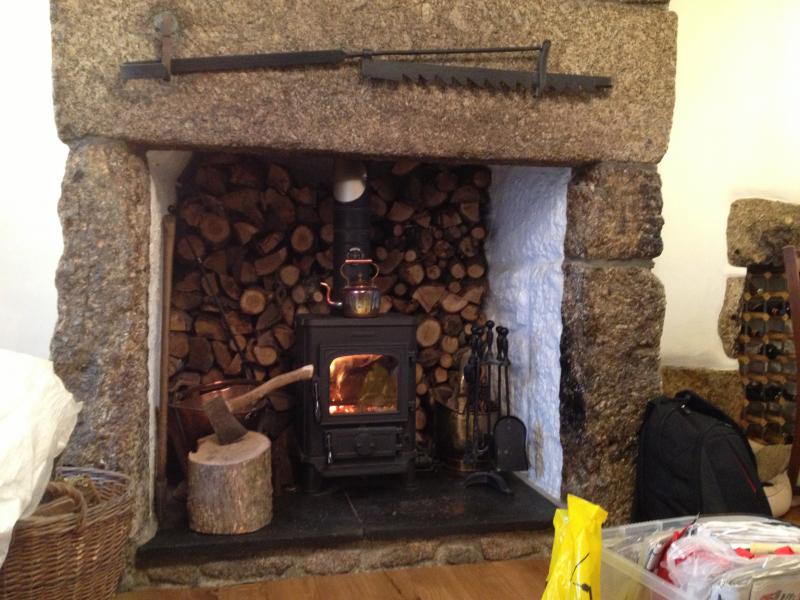
... we finally found the sooty back wall !!! – the pic’s don’t do it justice ... the internal dimensions are roughly 1.1m deep (behind the lintel to the wall) x 1.2 m wide (inside -between the sides) ... just a little bit to go now to get it to floor level, then back off to the local reclamation yard to find a nice bit of slate for the hearth ...


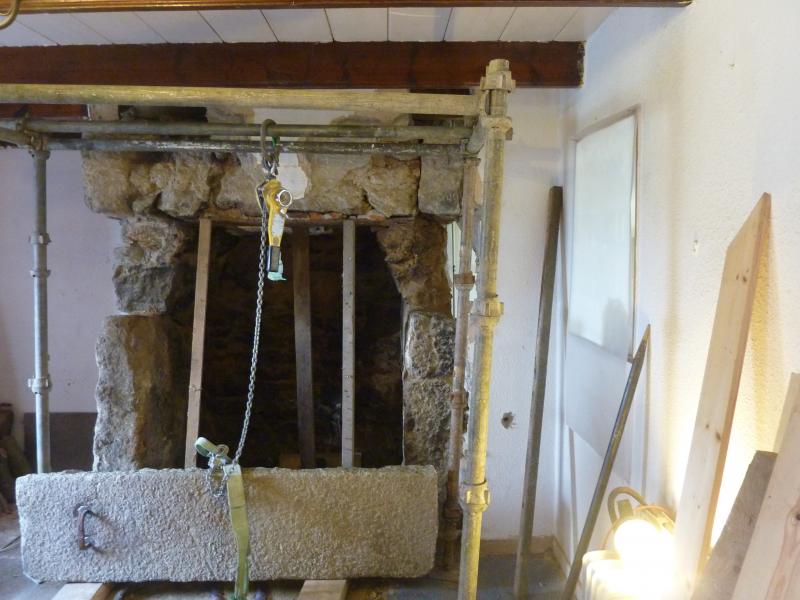
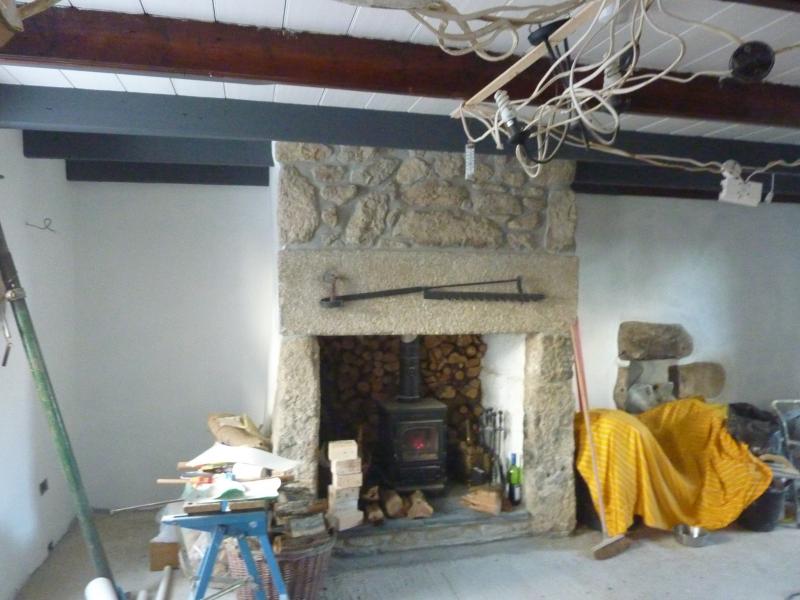
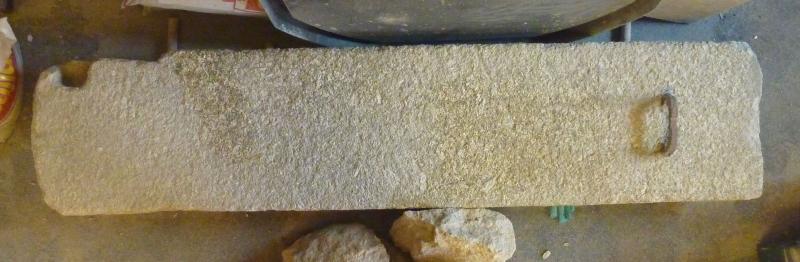
... We have found a Lintel with the right dimensions and colour granite to replace the original it’s just a little long ... So this is where we are now ...
:D
 
Sponsored Links
Superb! I bet your hearts were in your mouths when you started taking that lot down! Isn't it nice to get everything back to basics though and properly restored.

What arrangements are you making for storing your wood? You need to build a well ventilated shelter in the next month or two and get some wood delivered ready for next winter. If it is not half seasoned already it will be touch and go.

On the stove, always err on the smaller size. You will burn it harder and it will burn cleaner as a result, you don't want to end up with an oversize stove smouldering away all day getting sooted up inside.
 
Sponsored Links
Thank you – The hardest part was not knowing what remained above ... but yes it has been great to get everything back to basics.
Wood has been stored and we have purchased a Morso Squirrel which should be the ideal size and doesn’t require any extra air vents.

So here’s an update:


Last picture looked ok on the camera but looks like I will have to take another ...

Next up will be the stove :D
 
Ahh yes I remember that one; what you’ve done is not for the feint hearted but it looks good & has turned out very well for you. Lets see the fire when it's installed ;)
 
wow well done very scary working with old builds. I had to find solid ground once for the harth; i'm not a tall man but I ended up shoulder hight with the floor before I found it.
 
That's a thing of beauty.

Takes balls of steel to play granite jenga with a house hovering over you.
 
That looks fantastic, excellent work. We have a very similar fireplace in need of a bit of tlc - I wondered if you could spare a bit of time to advise? i have recently taken out a raised concrete construction that was about two feet off the ground and looked really ugly.... I'm at ground level now and have hit soil, I was wondering how you built up the hearth. Also i noticed you had painted the inside, the back of ours is very sooty, what kind of sealant did you use? Really grateful for any advice, cheers, Stuart - St Just, Cornwall
 
As this comes up so often, I’ve put together this generic post.

You can DIY an open fire or stove install but you need to understand the Building Regs (which changed in October 2010), submit a Building Notice & pay a fee. Your LABC will inspect &, assuming everything is OK, issue a compliance certificate; the BI may want to witness smoke & spillage tests. No compliance certificate may lead to difficulties when you come to sell your property; if you cannot produce a compliance certificate in the event of a problem, your insurance company may invalidate your policy & reject any claim.

Lots of archive threads on this & some things you need to watch out for, read the links but not all may be relevant or apply to you;

http://www.stovesonline.co.uk/stove_building_regulations.html
http://www.solidfuel.co.uk/pdfs/opening_up_your_fireplace.pdf
http://www.woodburnerwarehouse.co.uk/building_regualtions_for_stoves.phtml
http://www.planningportal.gov.uk/uploads/br/BR_PDF_ADJ_2010.pdf
http://www.hetas.co.uk/public/certificates.html
http://www.solidfuel.co.uk/pdfs/buidling_regs_consumer leaflet.pdf
//www.diynot.com/forums/viewtopic.php?t=183614
//www.diynot.com/forums/viewtopic.php?t=211524
//www.diynot.com/forums/viewtopic.php?t=242738
//www.diynot.com/forums/viewtopic.php?t=224751
//www.diynot.com/forums/viewtopic.php?p=1855590#1855590

& some more sobering reading just in case you think it’s all a load of old tosh:
http://www.solidfuel.co.uk/main_pages/news.htm
http://www.dailymail.co.uk/news/art...wood-burning-stove-leaks-carbon-monoxide.html
http://www.eveningnews24.co.uk/news/warning_over_heaters_after_norfolk_couple_s_death_1_811099
http://www.dailymail.co.uk/news/art...ouple-dead-arms-sofa-overcome-coal-fumes.html

Also get at least 3 quotes from local independent HETAS installers:
http://www.hetas.co.uk/nearest_member

You might be pleasantly surprised & you should ask yourself if you really want all the hassle & risk getting it wrong; climbing onto the roof with an 8M stainless steel snake on your back is not for the feint hearted!

__________________


Read more: //www.diynot.com/forums/viewtopic.php?t=267604&highlight=#ixzz1I6jlicut
 
Thank you and sorry it has been a while … where to start? …


Well since the last pic we’ve done quite a lot … having realised what was under the hearth and how thin the floor slab had been we have completely renewed and insulated the slab and in doing so made another little discovery … :D


This little beauty was hidden behind layers of artex and plaster in the kitchen … So we couldn’t resist exposing it further …


I assume the apparent wooden plugged drill holes may have held the front of a small Cornish range? … not worth keeping the plaster around it so decided to start fresh …


… and due to its depth and position in the now dining area, were now planning to convert it to hold a decent wine rack! … job done! Now back to the inglenook


Richard you will be happy to know that we have our metal plaque and certificate for our little stove … and it kept us very warm throughout winter …


Due to the inglenooks depth we have taken to storing wood behind the stove … we have been assured there is more than enough room not to have to worry about combustion and it helps to keep the wood nicely seasoned …


The last pic (sorry again a little blurry) shows the little fire in relation to the inglenook … were now putting down the oak floor …

Thank you for your comments misterhill – I’d be happy to pass on the little I know … as for the soot – we used a couple of coats of ‘Polycell One Coat Stain Stop’ http://www.polycell.co.uk/products/polycell_one_coat_stain_stop.jsp ... But saying that it could probably do with another … good luck !
 
Hi - They are roughly 300mm back from the stove but the stove also has a heat deflector (came with the stove) to its rear ... the logs have been there for a year and haven't shown any sign of combusting :)
 

DIYnot Local

Staff member

If you need to find a tradesperson to get your job done, please try our local search below, or if you are doing it yourself you can find suppliers local to you.

Select the supplier or trade you require, enter your location to begin your search.


Are you a trade or supplier? You can create your listing free at DIYnot Local

 
Sponsored Links
Back
Top