Damp on internal wall

Joined
28 Jun 2009
Messages
149
Reaction score
0
Location
Northamptonshire
Country
United Kingdom
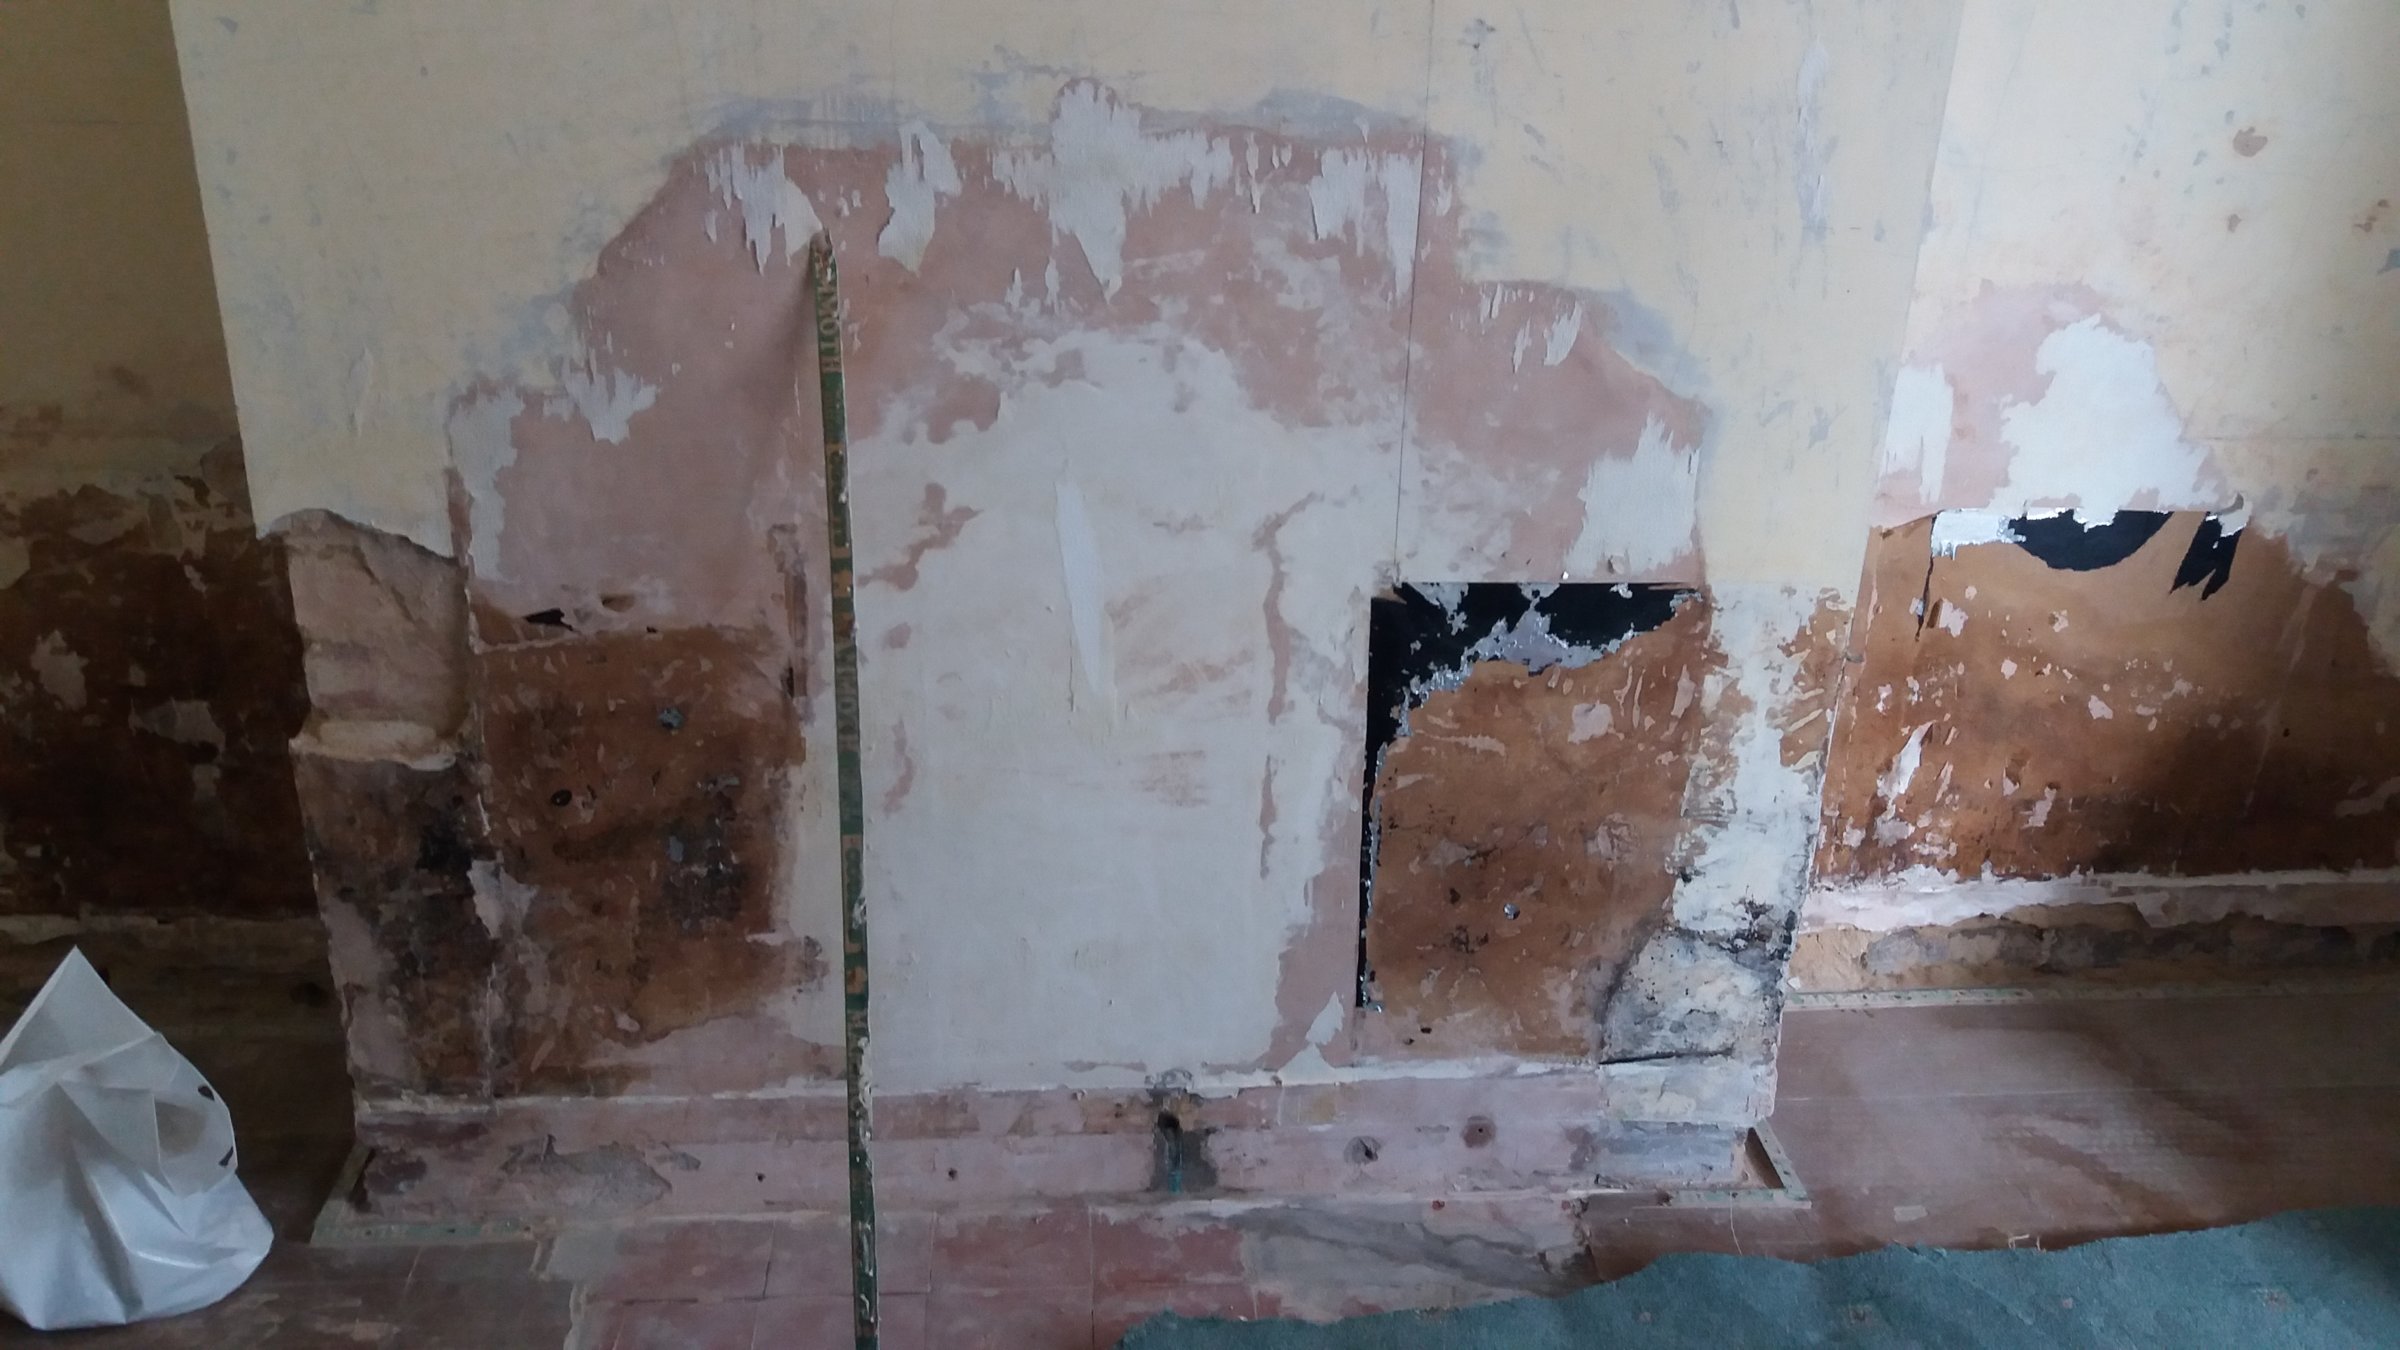
Hi we have a 1950s house and have found damp in the dining room on the internal wall shared with our neighbours. The wall was covered up to about 2 foot with a foil backed wallpaper and then papered over the top.

The chimney has been blocked up at some point and there haven't been any vents put in. Also the internal render goes down to floor level in some places. In some places the wood noggins in the brick work have partially disintegrated and some of the plaster has blown or is crumbly.

We are trying to workout the cause of the damp and then what can we do to address it. Photos below.

Chimney blocked, no vents, plastered to floor
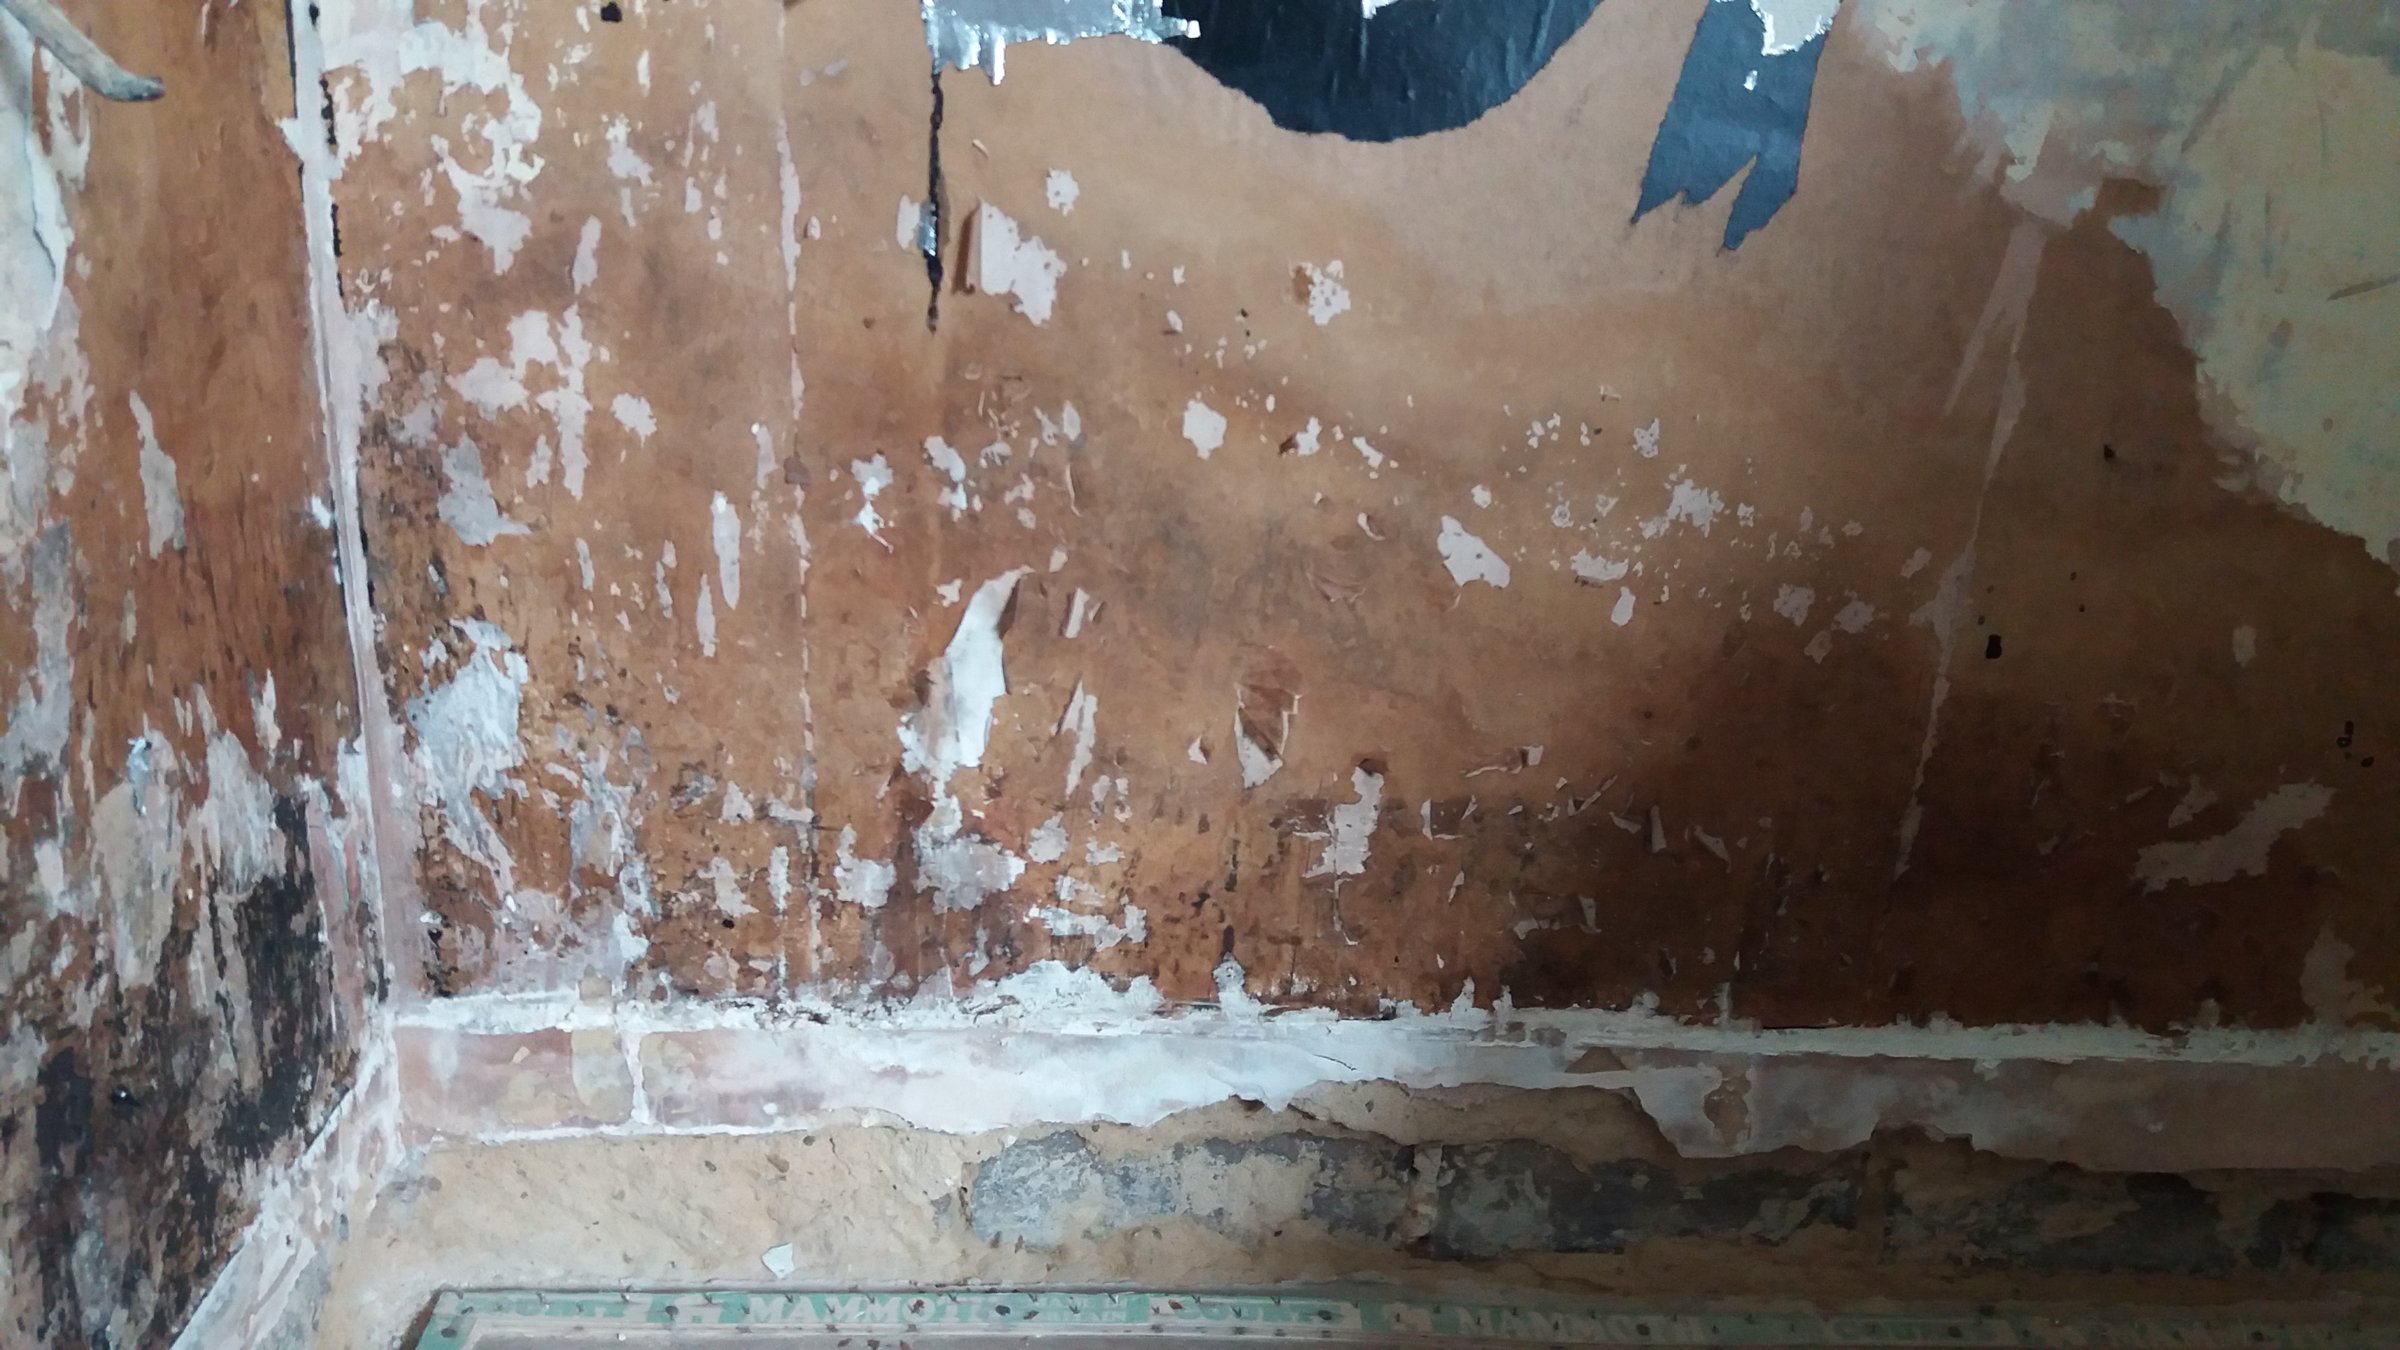
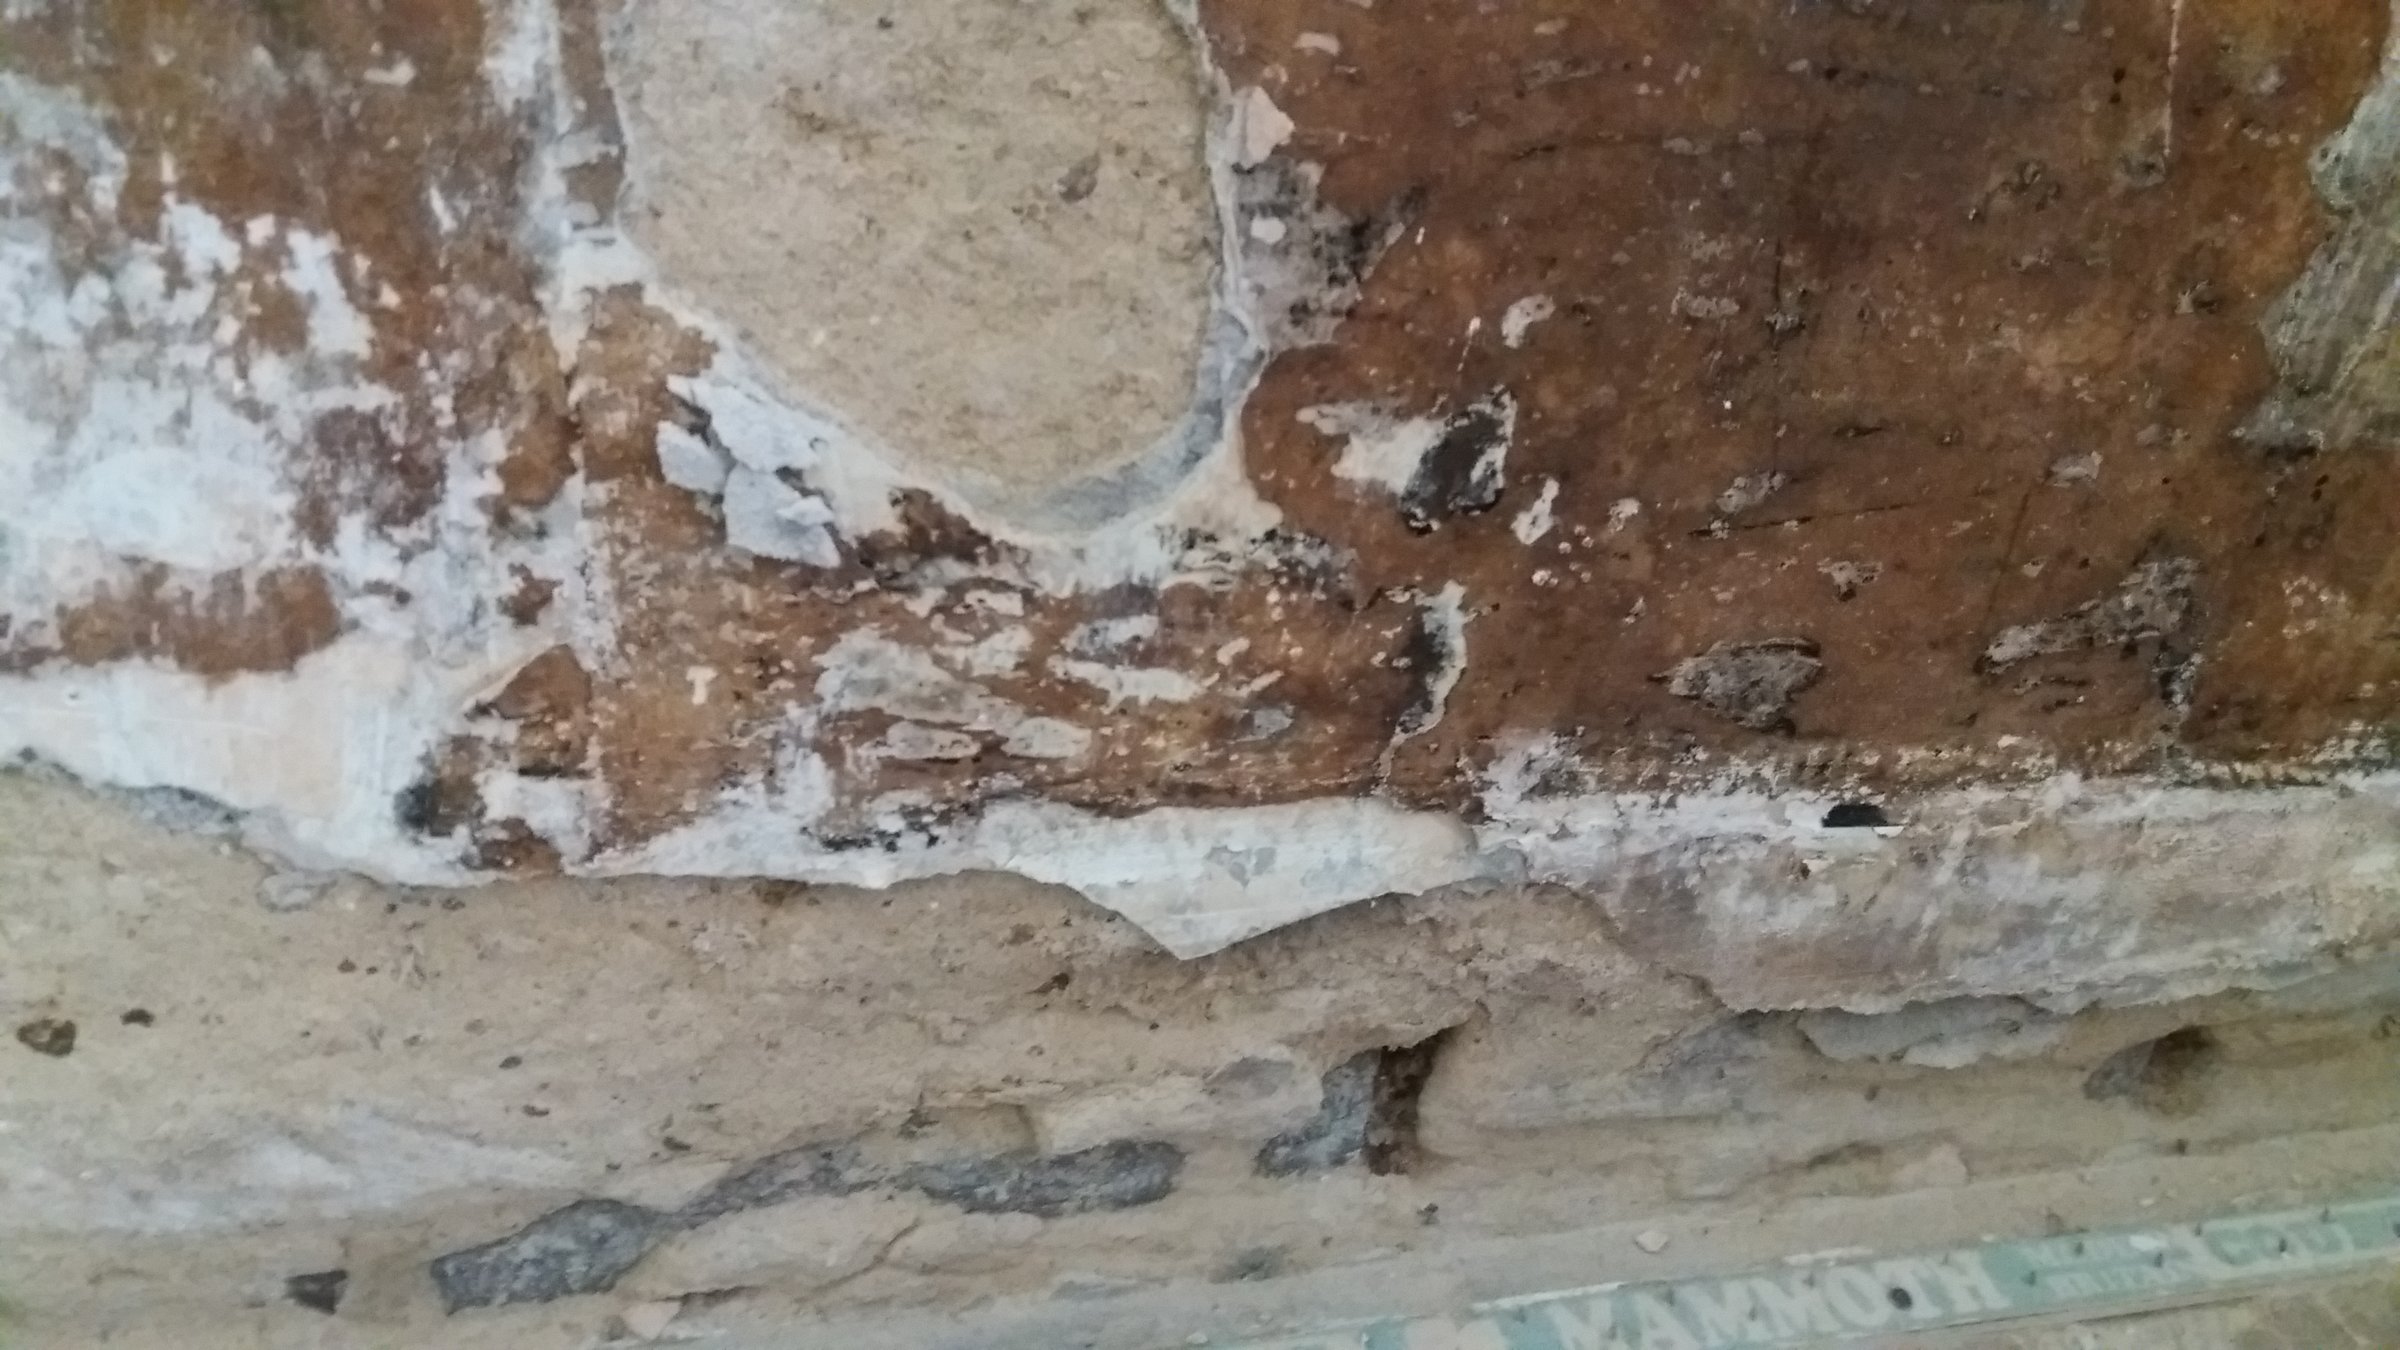
Blown plaster

Old plaster down to floor level

Damp marks

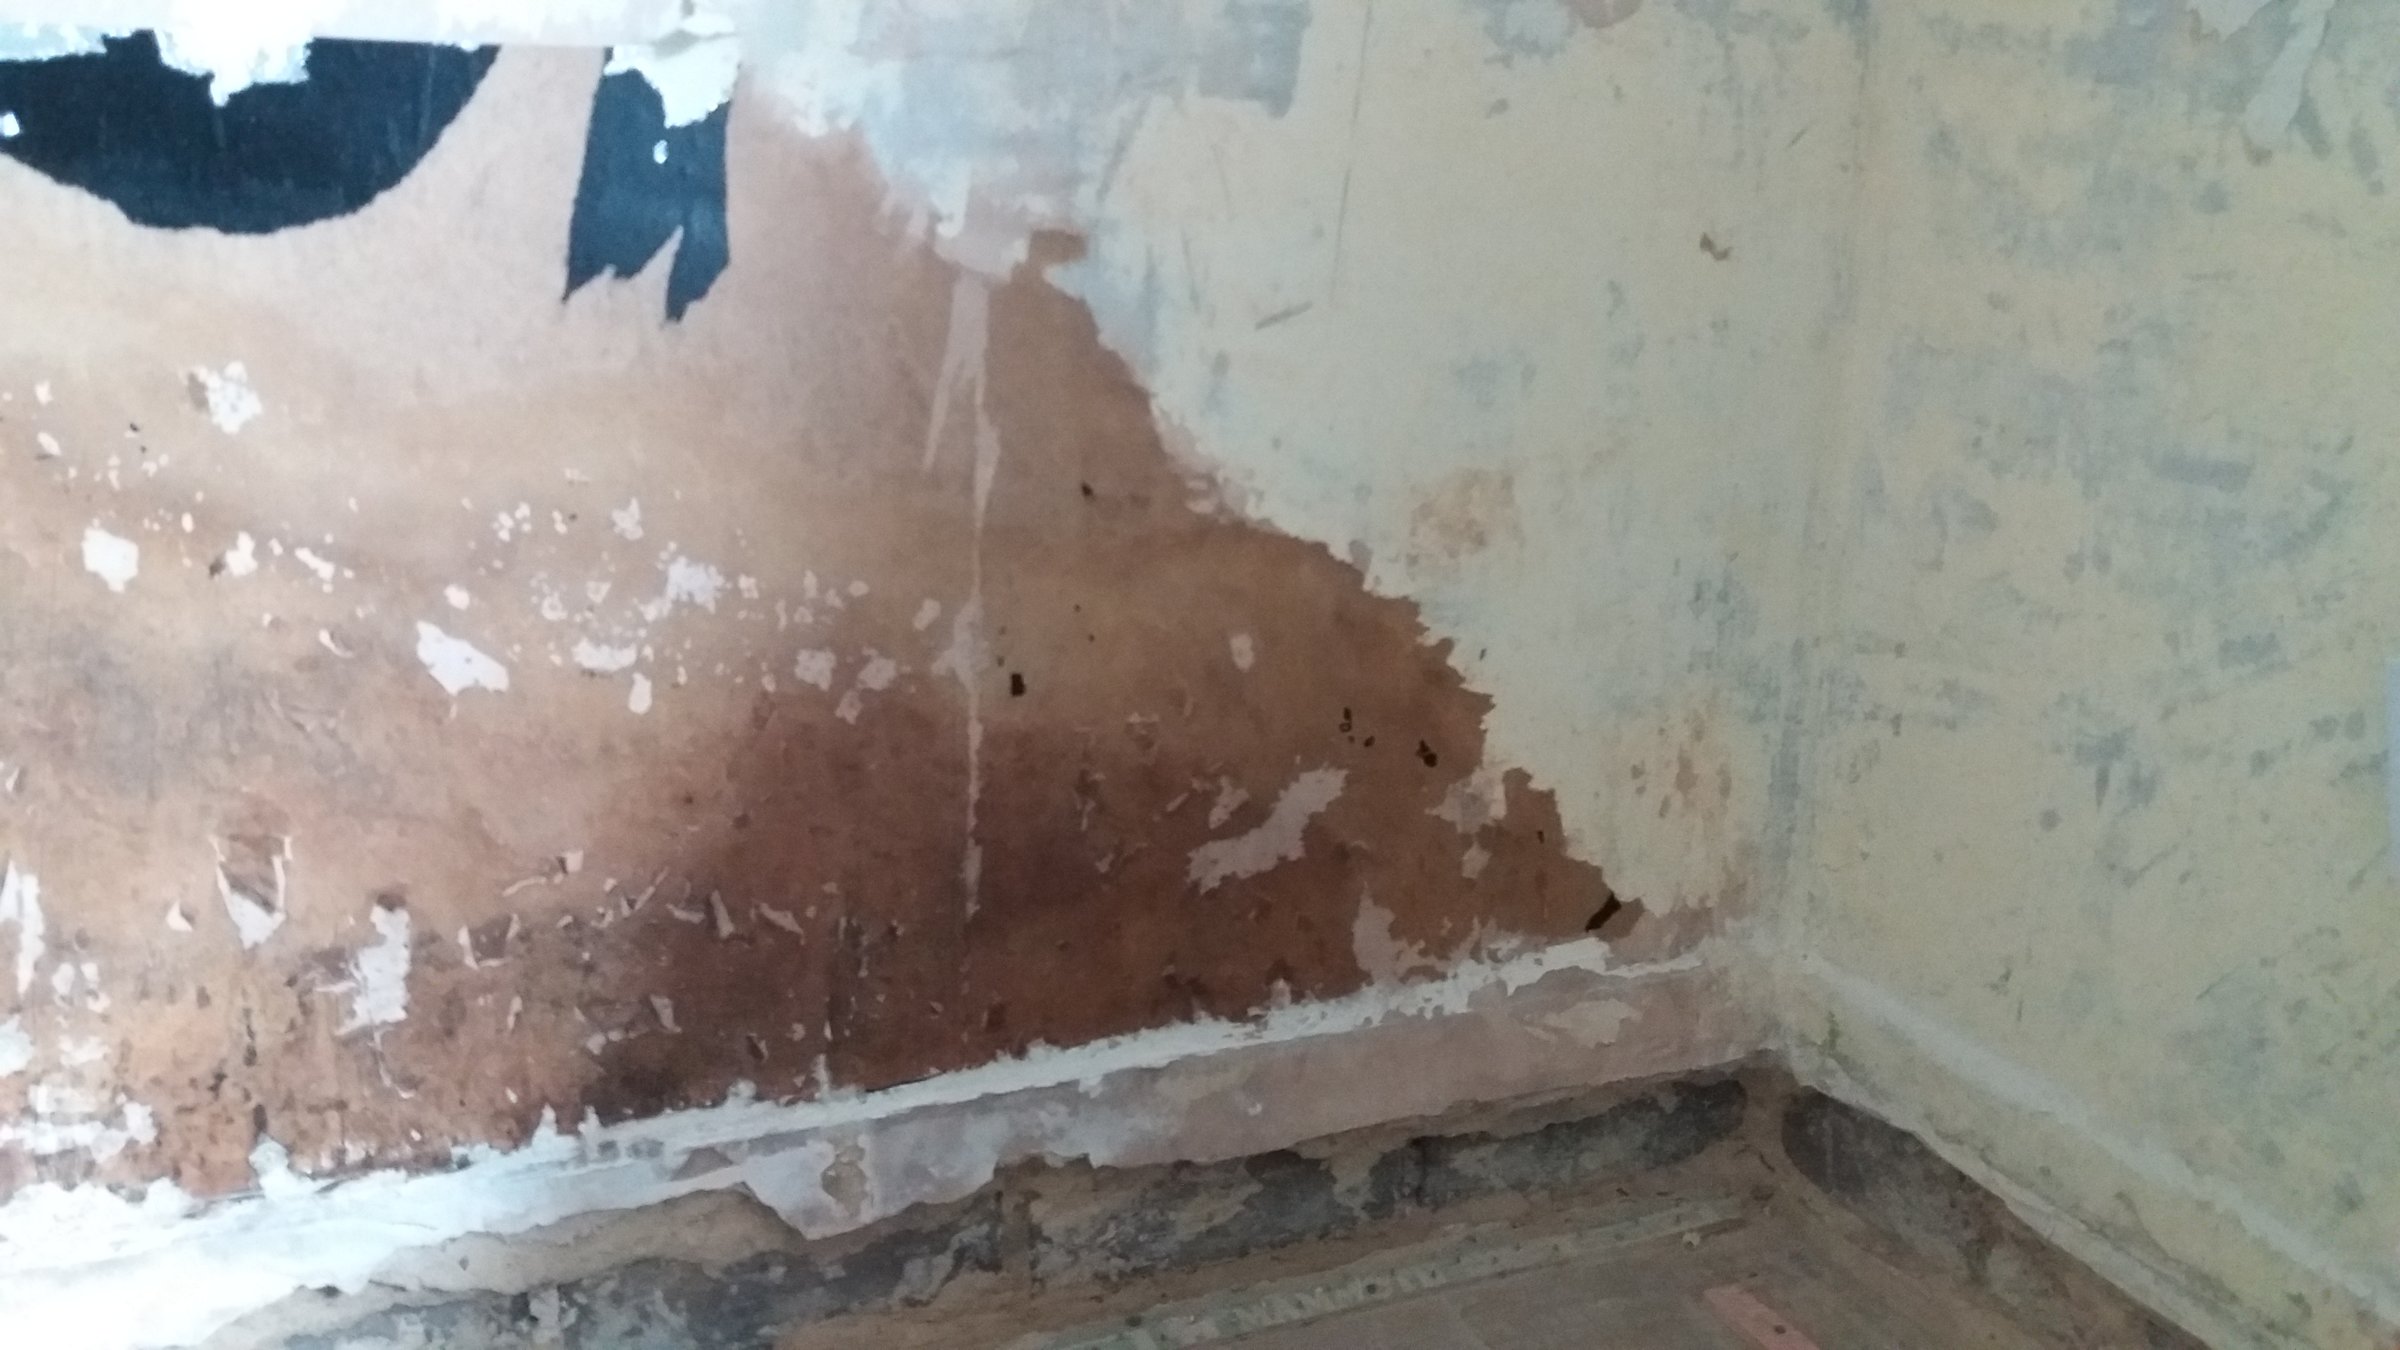
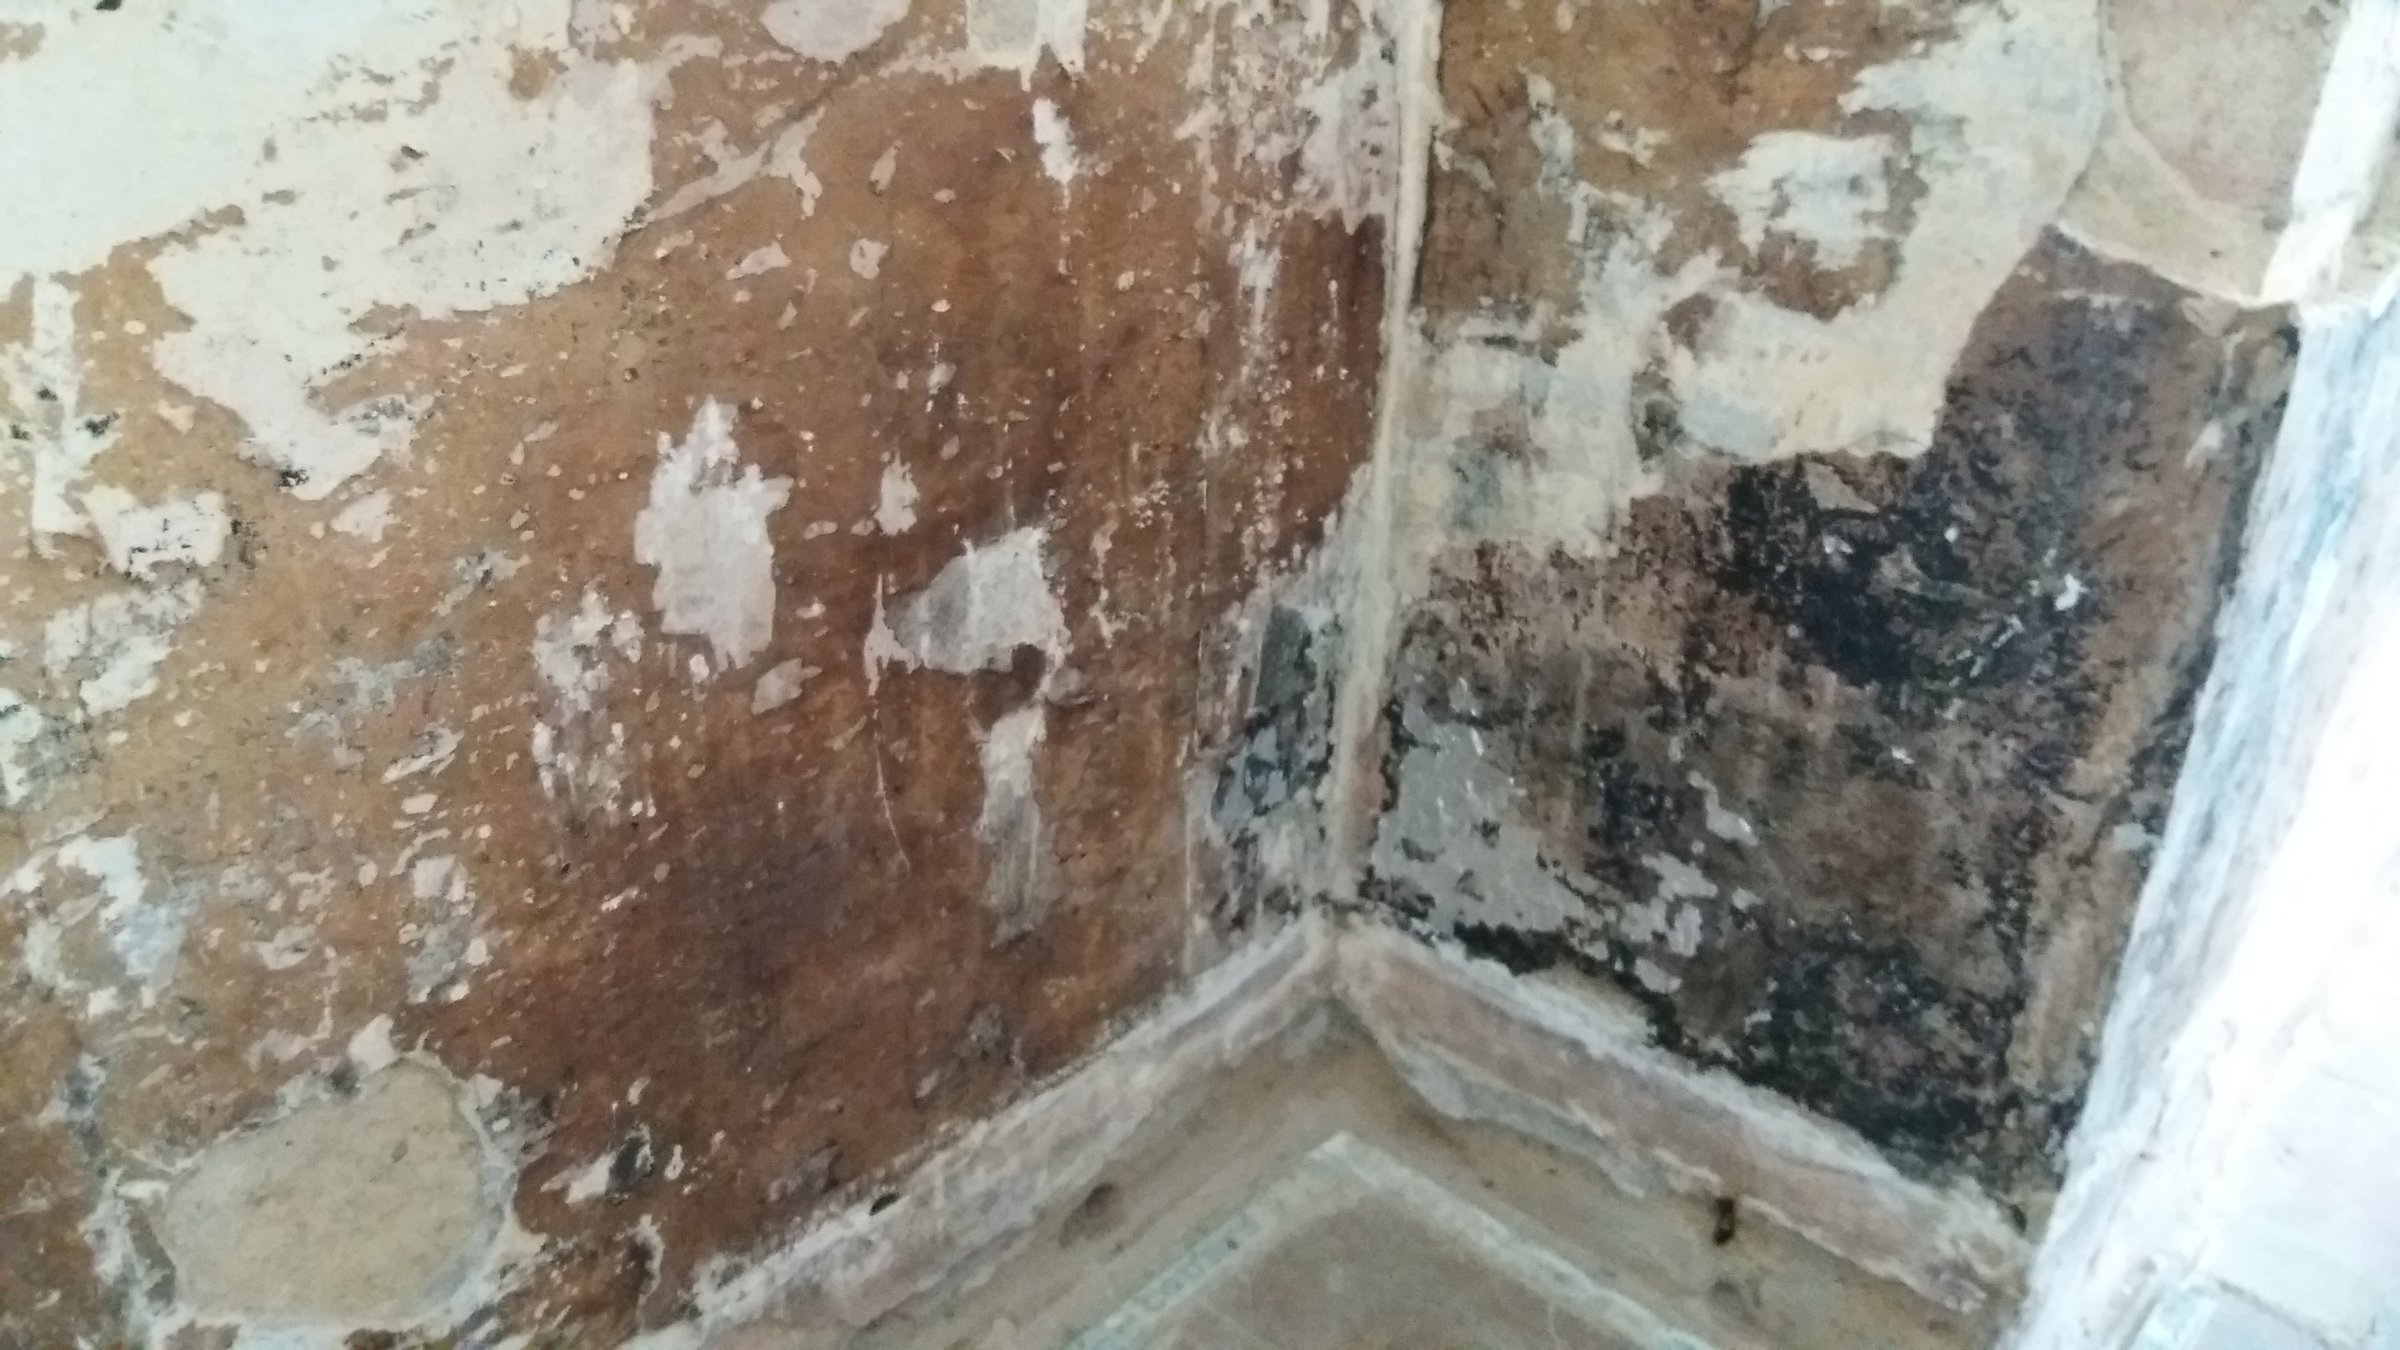
Corner against the chimney

The damp looks bad but as parts of the foil backed paper remain might look worse than it is, the paper is brown waxy backing black on top and then the foil, so where the photos show black in most cases this is just the black paper.

It seems worst in the two corners next to the chimney.

Any advice greatly appreciated
 
Sponsored Links
I had the same when I renovated the house I took off all the old plaster which was original so 150 years old lime and sand and had the walls lined with damp proofing sheets which looks like bubble wrap and can be plastered over so the damp can’t come through to the new plaster don’t know the name of it as a company installed it.
 
I'm not a builder but I think you know you need to hack the plaster off, preferably up to 3' high. Get yourself a damp meter and take a reading. Leave the plaster off for a few weeks to allow the brickwork to dry out and take another reading. If it's the same as the first then I would think you will need the dpc checking/repairing. An air brick vent in the chimney breast will be good to help with air circulation.
Don't forget that when you re-plaster you have to stop above and dpc.
 
Last edited:
after removing the carpet tack strips - (prise them up)
you will need to hack off the plaster back to brick to a height of one metre.
open the fireplace bricks to allow the flue to be swept - the flue must be ventilated top and bottom.
you have a suspended floor so check the air bricks are sufficient and providing through ventilation under the floor.
go under the floor if possible and check the trimmimg joisting around the hearth.
any solid hearth might rest on packed soil that could be bringing up rising damp.
the joists supporting your floor sit in pockets in that damp wall and they might be rotting.
remove all wood wall plugs - squirt remedial chemicals in the vacant holes.

search under "soil and hearths"
 
Last edited:
Sponsored Links
We are trying to work out the cause of the damp and then what can we do to address it.

Add vents, of course, top and bottom, but the pattern doesn't look like chimney condensation to me, it looks like water in the floor and wall. As it is an internal wall it is not likely to be rain or drain related, but could very well be an old water pipe. It might be one in the adjoining room or house. Sometimes there are pipes from an old back-boiler that are still live but were capped or flattened and forgotten. Sometimes it is a radiator pipe. What is on the other side of the wall?

Damp is water, and it must be coming from somewhere.

Very often the incoming water pipe runs under the hall floor towards the kitchen at the back. If the kitchen or hall floor are concrete, often with tiles or terrazzo, you will not easily see the leak, but you will find the floor is damp, and water will appear if you put an impervious cover or object on it, and it may show at the bottom of the walls.

Have a look inside the chimneybreast, open it up, and remove any builders rubble, which will hold damp, and look for water in it. Dig out any damp material under the hearth (the brickwork will go quite a long way down), and you can dig until you reach the footings (brickwork spreads out at the bottom), then stop.

Also lift as many floorboards as you can and look for traces of damp. Remove rubble and any organic material such as wood, felt or dead rats, which can promote rot and insects. There should be a cool breeze you can feel, from air blowing in the airbricks on one side of the house, and out the other. If this flow is obstructed, rectify it.

Covering up damp with bitumen, foil or new plaster will not repair leaks or cure the source of water.

Victorian houses usually have a slate DPC. Slate lasts about ten million years. Sometimes it is bridged or cracked. Chemical injections are not a good fix. Chip away any plaster lower than the tops of the skirting boards with a bolster and club hammer. This will enable the bricks to dry, and you will be able to see any damp areas. The water is usually coming in near the middle of the bottom of the patch. You can fix battens to the wall later, to refit your skirtings. if you look at the outside walls, near the doorways, you will probably be able to see the DPC. It is pretty sure to be at the same height throughout the house. Expose it and remove any bridging render or plaster.

Have you got a water meter? (this is an important question)
 
Thanks for all the replies

The floor is concrete rather than suspended wood and I'm wondering if the damp could be spreading out from here towards the walls as the underlay and carpet don't allow any moisture to escape.

I'll hack off the plaster back to bare brick and open up the chimney to check it's not full of rubble and swept out, as it's not had any vents put in I'm not confident it's been blocked up properly.

I'm curious about the foil wallpaper as it's only on this internal wall, was it something used to protect against damp and could this actually have had a negative impact and held the moisture in not allowing it too escape and making the damp worse.

As it's a 50s house I'm guessing the internal plaster would be a cement based render rather than lime? I don't think there are any water pipes in that wall it's the one shared with neighbours. The old back boiler was in the kitchen which is on the other side of the room and the radiator is on the other side too. It does have what looks to be a gas pipe running along the floor up to the chimney and cut off but there isn't any moisture around that area.

John D do you mean a water meter for bills, if so yes we are on a water meter if you mean something else then no we don't have a damp or meter for measuring water.
 
the foil was used to cover up damp so you can't see it. It tends to result in the water accumulating behind it and coming out somewhere else. It is bad practice because it does not involve finding the source of the water and repairing it.

Yes I meant a water meter that measures your usage. look at yours. You will need a small torch, a rag, possibly a ladle, and a large screwdriver or old spoon to lift the lid.

Look for a glass window over the numbers. There may be an air bubble in it. The bubble will move all the time water is flowing through. It is much more sensitive than looking at the numbers.

If it is moving, turn off your all the taps and see if it stops. If not, turn off your indoor stopcock (probably under the sink) and see if it stops.

Is there a T-handle in the meter pit? It is to turn off the water supply. It may be blue plastic. You can use it in the next test if there is no bubble.

what is on the other side of the wet wall? Hall or room?

In a 1950's house the interior plaster is usually gypsum. It may be pink, sometimes grey. If it is creamy white it may be lime.

Where your fireplace has been bricked up, you can see the modern pink plaster (the bright white is decorators filler).

On your old plaster it looks to me like a lime render with a hard coat finish plaster on top. The finish will be very fine and smooth, you can write on it with a pencil, and the lime will be rough.

As you have a concrete floor, it may be wet, and you will be able to see the damp patch when you roll back the carpet. You can tape a piece of clear plastic tightly to the floor (or indeed the wall) and it will highlight damp because water droplets will appear under the plastic, because they cannot evaporate away.
 
Last edited:
in pic number one - to the right of the chimney breast there are "lines" in the floor surface that seem like joins between T&G boards - what are they?
was the floor originally suspended? look for external air bricks.
do the neighbours have mirror image damp problems? is their floor solid or suspended?
plaster or render should not contact any solid floor - plaster should stop about 40mm to 50mm above the FFL.
there is no sign of a DPM that should be seen at the edge of the floor and/or going up the wall a few inches.
look for a DPC in the lower wall.
where does the gas pipe run and terminate?
unless its on the RH cheek of the chimney breast i cant see any elec outlets.
 

DIYnot Local

Staff member

If you need to find a tradesperson to get your job done, please try our local search below, or if you are doing it yourself you can find suppliers local to you.

Select the supplier or trade you require, enter your location to begin your search.


Are you a trade or supplier? You can create your listing free at DIYnot Local

 
Sponsored Links
Back
Top