Finish on external window reveal

Joined
10 Nov 2012
Messages
4
Reaction score
0
Location
London
Country
United Kingdom
Hi,

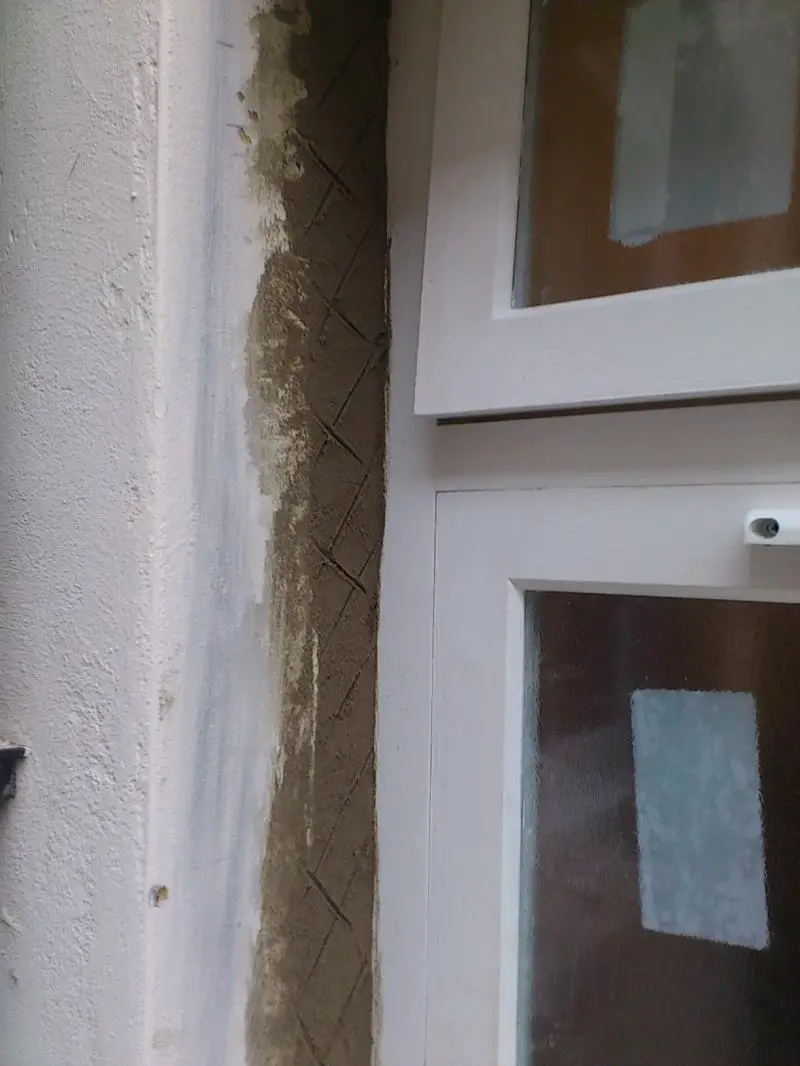
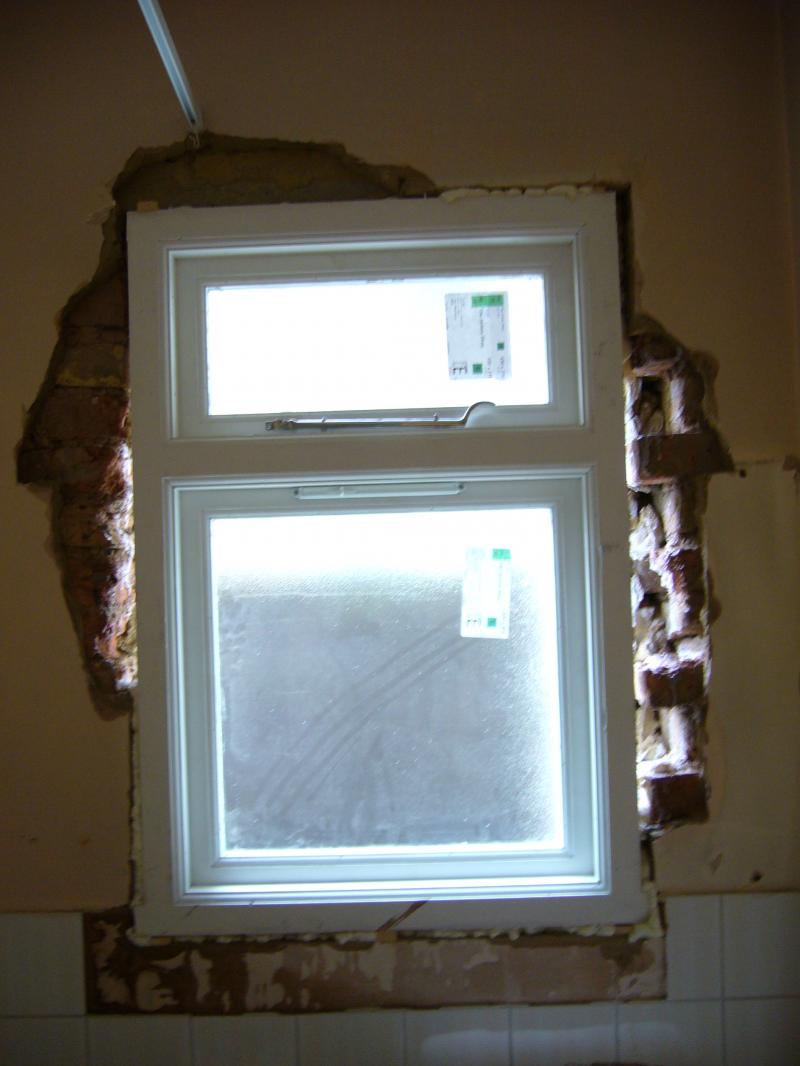
I have just fitted a window and need to build out the outside reveals either side of the window by 5-10mm. I have already made good as much as possible around the window as I wanted to make it air-tight. The issue is that the reveal already has render around it that's been painted. At the moment I have left the render I have applied, keyed-up it up and I was going to apply a final bit of render tomorrow but I am uncertain. I don't know if new render will take to the existing so perhaps I should finish the reveal now as best I can. What can I do to the existing renders surface to allow the new render to blend in.

Does anyone have any thoughts?
Thanks in advance.

[/img]
 
Sponsored Links
looks a tidy little job you have done there, i would clean up the painted edge and then fill the gap with your new render then use a sponge to help blend it in, it looks like you have a bit of a texture in your render and your patch shouldent show up to much once its been painted
 
It looks like there is a metal bead on the edge of the revel. You should of filled in like you have done then scrapped it back so it was 10mm below the original revel and then when it had gone off put some more muck on top and float and sponged it level with the revel. Is it to late to scrape it below the revel and fill in with a coat of render, what mix did you use to fill in ? Any w/proofer or feb in it? Or like steve said you could put a thin coat on it and feather it in.
 
Thanks for getting back to me.

I think it's too late to remove that part of the render from the bead to the patch I've done. What I've done since is use a nail, wire brush and a bolster and tried to make as much of a key as possible on the painted surface. I'm concerned about the next coat taking/sticking to the old render. It will be pretty thin in place. I hope to feather it from the window back to the bead. Also there's a lentel above. There's about 10mm I need to cover there.

I used a ready mix for the render. It's branded Tarmac and says it's suitable for rendering and brick-laying! It doesn't say specifically what was in the mix. I have to confess I didn't use any water-proofer. I did use a general purpose PVA on to the bear brickwork. I hope that was the right thing to do. Should I apply some before attempt the finishing coat?

Tomorrow I intend to apply the finish. I have a cheap float and a sponge. If you strongly recommend the water-proofer, I can remove what I've done and re-do it.

What I have not show is the other side of the window. When I removed the old window, there were 75-100mm gaps in places where the toothed brickwork had been left un-repaired. In trying to make good I did put a couple of bits of brick in to the teeth. The point I'm trying to make is that that render is quite deep in places so I'm not keen on re-doing the work.

Thanks,
Dermot

 
Sponsored Links
I think you will be ok with what you are going to do it shouldn't make too much difference if you used a ready mix render mix , I wouldn't worry about the w/proofer now,but you could mix some neat unibond with a hand full of sand (it would be better if you had some SBR) stir it together and paint it on to your revels before you render them and let it got a bit "tacky" and the render them up and let it go off a bit then lightly float then in then sponge them up. If you could make yourself up a piece off wood with a nail in that fits into the frame where the window is and hangs over the revel you could set it at what depth you want then pull it thru after you have put your render on and that will give you an equal revel all the way round the window, Do you understand what I am saying? When you do the head of the window dont put too much muck on at once build it out slowly and put it on and dont keep going back over it.I would put the head on first and let it stiffen up while you do the revels,as you might have to build it out...
 
Let me see if I have understood. The timber is the length I'd like the revel to be at the point where the render meets the window. The nails are fixed at equal distance from each end and used to guide and keep the margin between the timber edge and the render equal. Then you run the timber vertically. Is that what you mean?
 
Let me see if I have understood. The timber is the length I'd like the revel to be at the point where the render meets the window. The nails are fixed at equal distance from each end and used to guide and keep the margin between the timber edge and the render equal. Then you run the timber vertically. Is that what you mean?

No, you have a piece of wood that is about 4" wide by 6"s longer than the distance from the angle bead to the window,you put it from the angle bead to the window then cut an angle on the window end so it is flush with the window. then get the depth that you want your render to be at the window and put a pencil mark on the cut angle part where you can put an oval nail in the end of the wood so it fits in your frame around the window.You can move the nail in or out to get the depth of your revel, when you put your render on you hold your wooden guide on the angle bead with the nail sittin in the frame around the window and with both hands pull it upwards keeping it
level and you will take the excess render off giving you equal distance between revel and window all the way round. You may have to open the window or take it out and put it back after you have done around that area if you cant pull the wood thru with it in place,.I know this is a bit long winded and it's hard for me to explain it in words as opposed to showing you. But I hope you get the idea.
 
Yes, I get you. Cut a bevel on the end that rests against the frame with the nail ensuring it stays a fixed distance.

I wanted to say thanks for all the help and tips. It's been a great help.
Thanks,
Dermot
 

DIYnot Local

Staff member

If you need to find a tradesperson to get your job done, please try our local search below, or if you are doing it yourself you can find suppliers local to you.

Select the supplier or trade you require, enter your location to begin your search.


Are you a trade or supplier? You can create your listing free at DIYnot Local

 
Sponsored Links
Back
Top