
What is the best way of filling gaps in floorboards before sanding

-
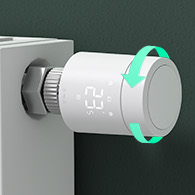 Looking for a smarter way to manage your heating this winter? We’ve been testing the new Aqara Radiator Thermostat W600 to see how quiet, accurate and easy it is to use around the home. Click here read our review.
Floor Boards
- Thread starter Trevor Livermore
- Start date
")
 , most have mine have been knackered also, looks like the spark used brute force to lift the boards, some have great big chunks missing, not just the tongues. I always thought you used a circular saw along the length of the join, that way you only ruin one board.