Hammie's Loft Conversion

Can you tell me what thickness your roof insulation was. Did you have to put in between and below the rafters.

Thanks in advance

S
 
Sponsored Links
I used 2 layers of 70mm thick insulation in the ceiling, 1 layer of 70mm in the walls, all the seams were taped with foil tape too. The first layer i screwed on underneath the rafters (not in between), and constructed stud work below that...


Then I fitted the second layer between that stud work, and screwed plasterboard on...


It's vital you leave an air gap between the insulation and the tiles, otherwise you'll get condensation and rot in the timbers, I can't remember the required gap off the top of my head though, anyone else recall?
 
I've seen 50mm quoted as an air gap but I don't know if there's a hard-written rule anywhere. I spoke to my builder today as we're having our roof felted soon and I'm doing something similar to you in the loft, and he said that if you're using Tyvek you don't even need a gap at all, the Tyvek will still work fine. Think I'd still leave one though!

How did you know how to do the stud work: it's looks complicated! How is it supported? Any tips or places to find out how it's done?

Great post, thanks for the pics and ideas

Oh, one more question: did you use a vapour barrier?
 
Sponsored Links
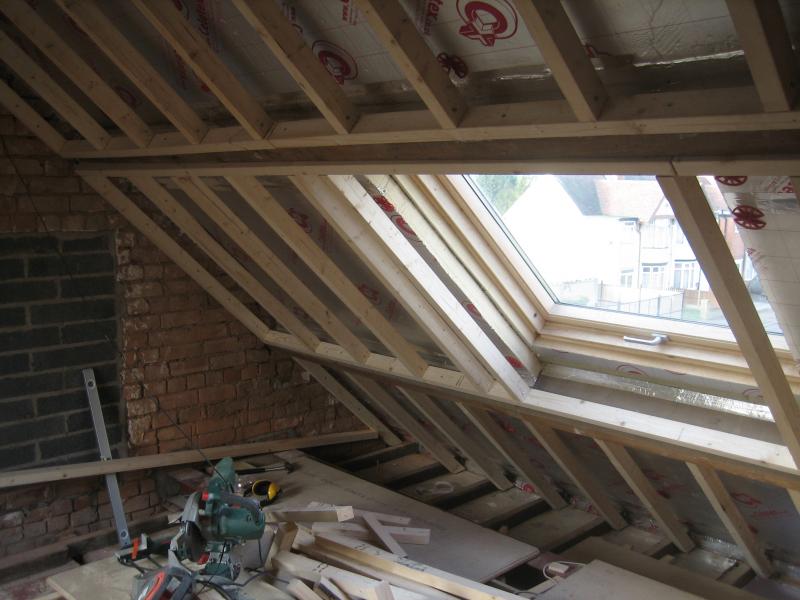
The studwork for the roof is mostly supported by the purlins, I braced the lower purlin off the floor steels to help take any additional load (don't have any pics of that unfortunately). The purlins in this house were original (~90 years old) and had developed a ~2" sag at the centre, I started off by nailing horizontal timbers onto the purlin with 4" nails to give me a straight edge to work with...


You can see in the pic how much sag there is, there's much more timber overlap next to the window compared to by the wall. I then skew nailed vertical timbers every 300 or 400mm (I forget the spacing), it's a good idea to plan out your plasterboarding so you can make the boards line up to timbers on their edges without any cutting. For the walls I just used (lots of) wall plugs to hold the studwork, using strips of wood as spacers where necessary.

A laser range finder and a mitre saw is highly recommended, it would have taken me 3x as long without them. It's actually one of the easier jobs to do, and quite enjoyable because it goes up quick. The only tricky bit is around the windows, you might have to get creative around there. Any DIY website should be able to give you a good idea of how to approach it, if you want a more detailed overview though I'd check out the 'Manual of First and Second Fix Carpentry', very useful book which has lots of stuff on floors and stairs too that is invaluable.

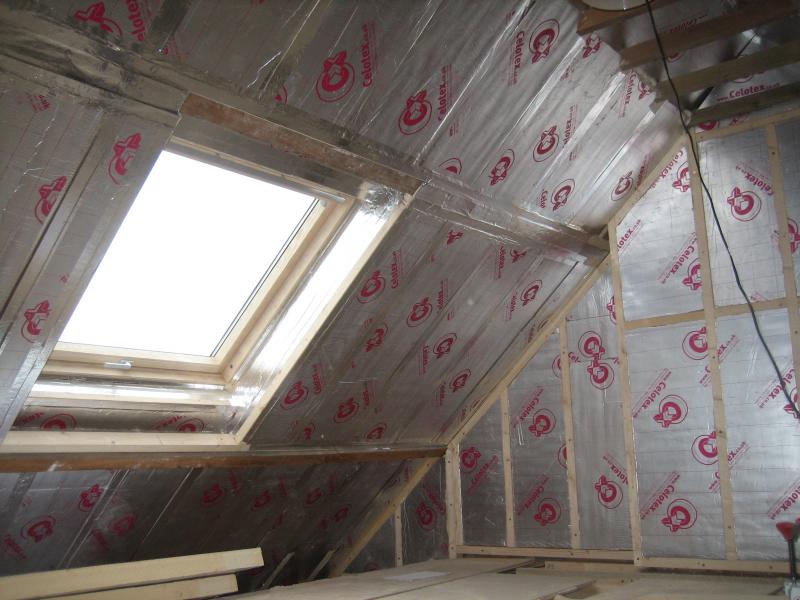
Oh, and I didn't use a vapour barrier, but I did seal every single insulation joint with expanding foam and foil tape, I would probably look into vapour barriers if I were to do it again as it took an age sealing it all.
 

DIYnot Local

Staff member

If you need to find a tradesperson to get your job done, please try our local search below, or if you are doing it yourself you can find suppliers local to you.

Select the supplier or trade you require, enter your location to begin your search.


Are you a trade or supplier? You can create your listing free at DIYnot Local

 
Back
Top