

hi,
We just bought a house that had these two stains on the kitchen ceiling:
After a bit of investigation, I concluded that one stain was from worn sealant around the en-suite shower (sealant replaced) and the other from a leaky joint in the airing cupboard (olive replaced, leak stopped). It's been a couple of weeks since I made these repairs and the ceiling felt bone dry, so I thought I'd try to paint over the stain. I had to remove a 25 cm strip of plasterboard joint tape. I bought some joint tape to replace it but it didn't stick with the paper glue that I used. My first question is then what should I use to make it stick? Would wallpaper glue work?
Anyway, I still put on a coat of white emulsion with a basic paintbrush and and achieved this result:
My second question is how many coats will it take for the stains not to show through at all and does the fact that after one layer it still shows through in one or two places mean that the root of the problem is not fixedl? My third question finally is how do I achieve the textured effect (stippled?) that you can see on the rest of the ceiling?
Any help much appreciated
We just bought a house that had these two stains on the kitchen ceiling:
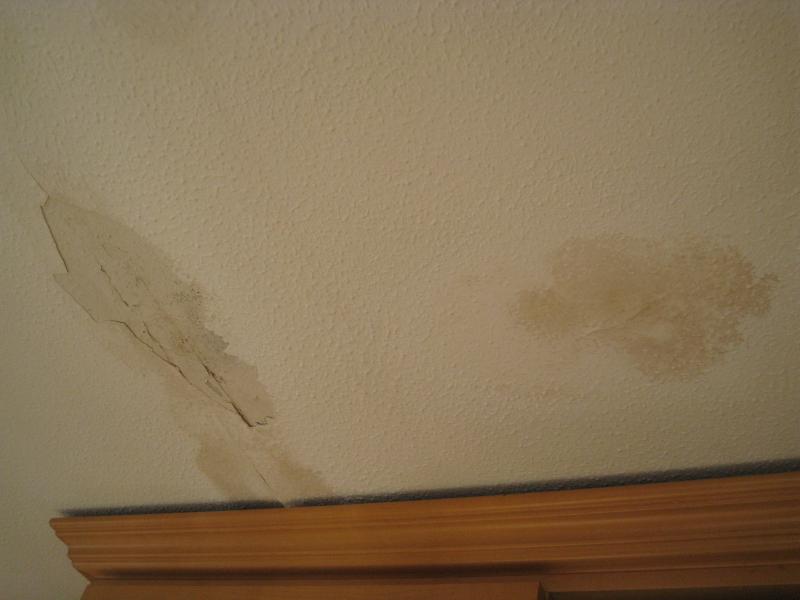
After a bit of investigation, I concluded that one stain was from worn sealant around the en-suite shower (sealant replaced) and the other from a leaky joint in the airing cupboard (olive replaced, leak stopped). It's been a couple of weeks since I made these repairs and the ceiling felt bone dry, so I thought I'd try to paint over the stain. I had to remove a 25 cm strip of plasterboard joint tape. I bought some joint tape to replace it but it didn't stick with the paper glue that I used. My first question is then what should I use to make it stick? Would wallpaper glue work?
Anyway, I still put on a coat of white emulsion with a basic paintbrush and and achieved this result:
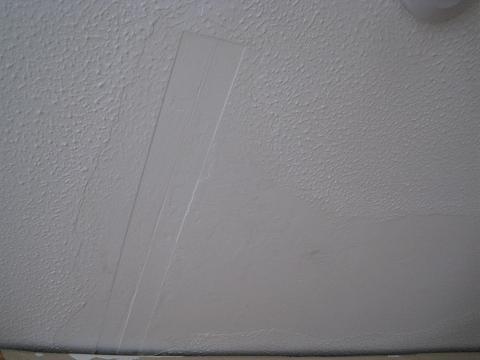
My second question is how many coats will it take for the stains not to show through at all and does the fact that after one layer it still shows through in one or two places mean that the root of the problem is not fixedl? My third question finally is how do I achieve the textured effect (stippled?) that you can see on the rest of the ceiling?
Any help much appreciated