• Looking for a smarter way to manage your heating this winter? We’ve been testing the new Aqara Radiator Thermostat W600 to see how quiet, accurate and easy it is to use around the home. Click here read our review.

Kitchen counter LEDS are faulty- uniformly dim

It's also a tell tale sign of a chromacity shift towards yellow, due to lower currents...
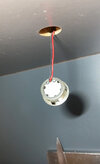
Thanks, that is what I have found when playing with COBs, especially when viewed out of the light beam.

But this
If the photo shows the true colour of the LED (yellowy slightly green light output), then the phosphor has degraded. Pretty common at that age and will need replacement.
is something I have not encountered or heard of before, which I readily accept as a schoolday.
 
Years ago I played with red LED lamps, in University to try to make them brighter, the experiment was a failure, as the lux meter will clearly show the average light, which is not the same as the light perceived by the human eye. However the experiment was to over drive the LED but for a short time, and we found if over driven, the LED reduced output and stayed reduced.
My neighbour said the LEDs flickered a bit and went bright before going dim
So seems likely the driver went faulty, and damaged the LED's, so only cure is to renew them.
 
Hi all,
... My neighbour said the LEDs flickered a bit and went bright before going dim, which suggested some sort of power surge but I find that unlikely through a transformer.
I missed that line in my initial read,
That is quite a classic description of one LED going rogue. Chances are it might only be one bulb requires replacement. I literally had that recently while I was soak testing a stage light after repair where I saw the bright flash out of the corner of my eye then the set of 3 LED glowed dim, just the one required replacement.

But again I'm not trying to say it's what has happened in your case.
 
Ok, an update- as this is a neighbours flat it hasn’t been a priority but I was reminded about this and had another look. So it turns out the Led downlighters aren’t glued into the shelf bottom as suspected, but just pressed in and can be carefully removed by inserting a knife into the gap and gently levering one side at a time.

Once removed, removing a circlip separates the holder/diffuser from the led itself. I could solder on replacements easily enough - providing I can find them. The code ul94-v0 turns out to mean they won’t propagate fire, rather than a helpful serial number to identify them.

Any suggestions on where to find appropriate replacements?

Thanks all
 

Attachments

  • IMG_5031.jpeg
    IMG_5031.jpeg
    493.7 KB · Views: 44
  • IMG_5029.jpeg
    IMG_5029.jpeg
    174.6 KB · Views: 48
Step one is measure the current
Diffrence line neutral 8 Feb 24 reduced.jpg
is it using the 350 mA stated on the driver? Likely not, if as I suspect lower, then you may find a faulty one by shorting out each LED in turn, but I suspect LED's damaged due to a surge, I suspect the lot needs changing, but until you measure the current, just guess work.
 
Yes, I did a reverse image search and found similar- but I don’t know which ones are suitable.

The information I have is the transformer is putting out 43v and there are 10 leds (I’m expecting to replace all of them).

I don’t have a way of measuring the current on the circuit. Surely there’s a way of specifying 10 LEDs based on what I do know above?

Cheers
 
This is the salient point
1737554679088.png
the LEDs need to be rated at 350mA, the driver will regulate the voltage (up to 43V) and likely to be around 30-36V (depending on the LEDs) to provide that current.

So you are looking for LEDs rated at 350mA and about 2.5 to 3V.
 

If you need to find a tradesperson to get your job done, please try our local search below, or if you are doing it yourself you can find suppliers local to you.

Select the supplier or trade you require, enter your location to begin your search.


Are you a trade or supplier? You can create your listing free at DIYnot Local

 
Back
Top