kitchen worktop idea?

... square edge definatly, if i dont need male female joints great.
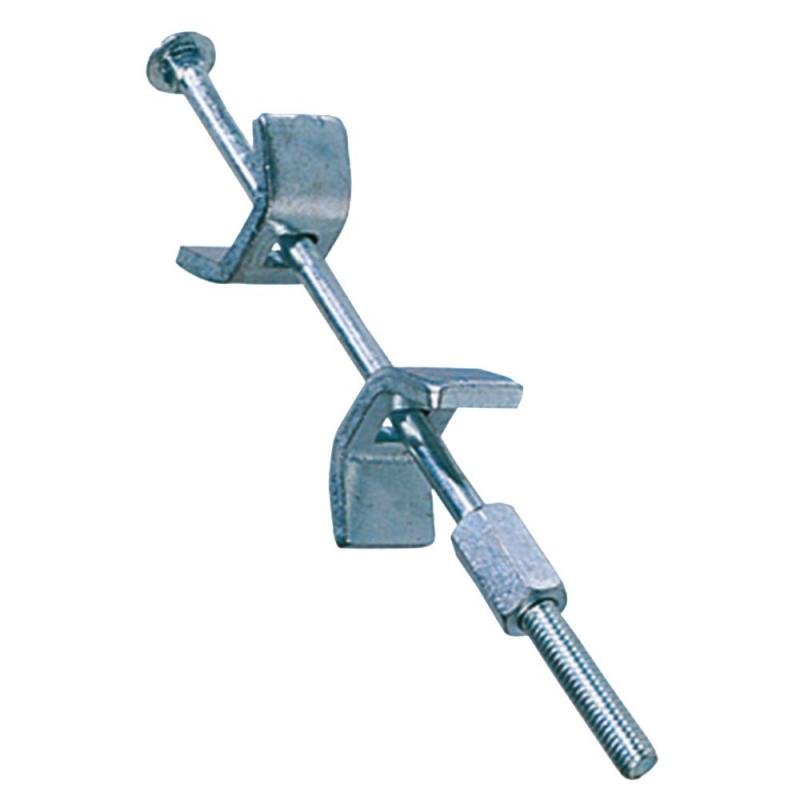
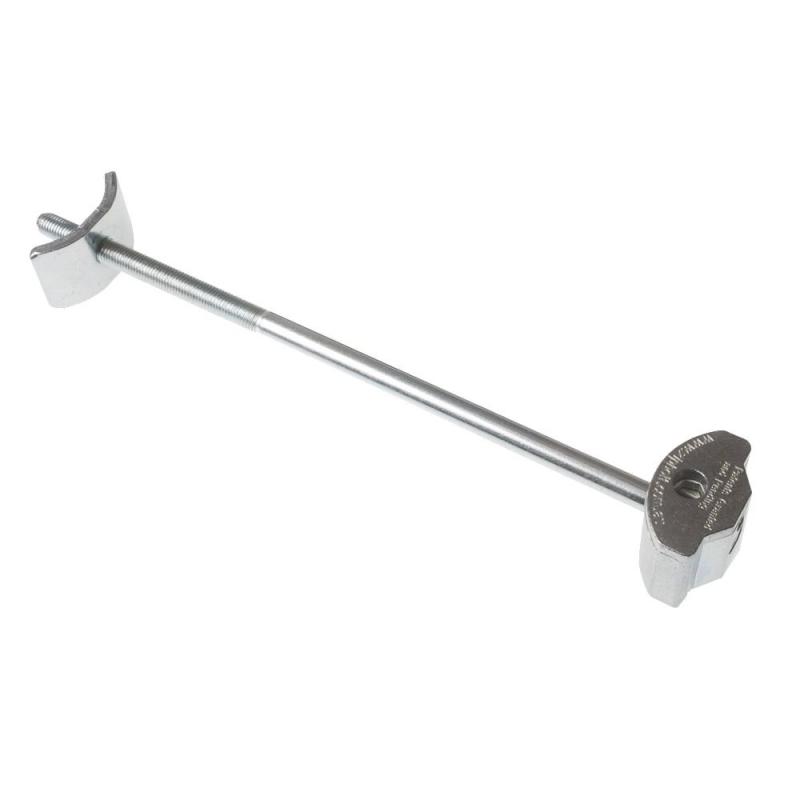
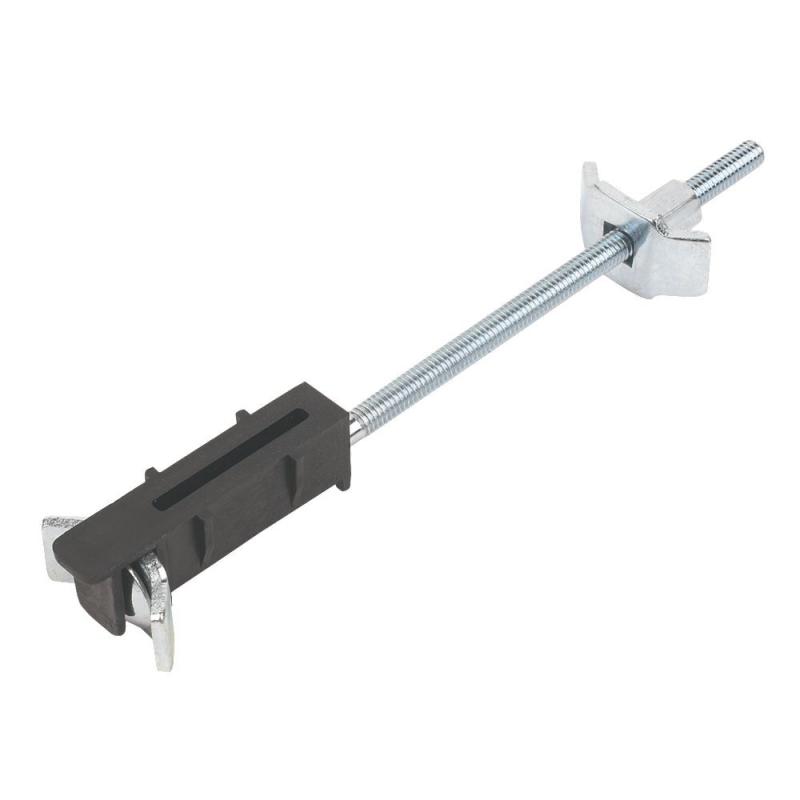
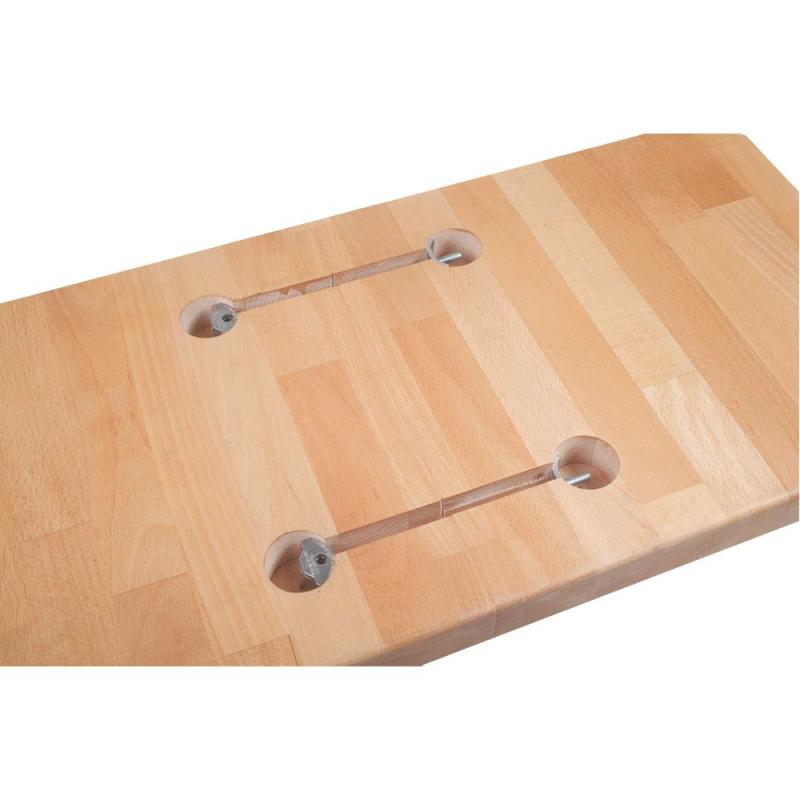
Remember that you'll still need to pull the joints together. I'd suggest putting a groove in either side of the joint (router groover or biscuit joint set) and using something like a loose plywood tongue or loose biscuits to locate vertically, sealing the edge with a small amount of clear silicone and then pulling the joint together with standard worktop dog and bone joiners.

Could i use router and guide to cut length to size?[
You'd be better off using the saw with a guide to cut a couple of millimetres over length then trimming to size with the router and a guide TBH

Could i make a jig for sink cutout i wonder? I'm guessing two guide rails screwed onto underside of worktop. Or am i way off there
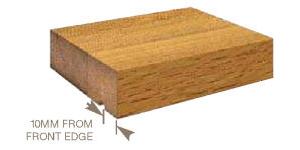
Not a million miles. As you already have a circular saw I'd revise my statement above; set-out the cut-out on the underside, rout-out the drip groove set-in a little way from the edge using a small core box bit or a small straight bit (see drawing below), drill-out the corners, make the saw cuts in from the edge to the corners with the circular saw slightly oversize so you leave a millimetre or two to trim back, make the back cut-out (corner to corner) with the jigsaw and a fresh coarse blade being very careful that you watch for blade deflection and keep to the line and finish into the corners with a hand saw. Lastly fix your jig the underside and trim the edges with the router. All the jig is in reality is pieces of 2 x 1 planed softwood pinned in place (being underneath the damage will be hidden when you install)

I have no idea how to do grooves, and would welcome any tips, can i buy jig for this?.
Best bought-in. Needs to be packed up a few millimetres at the far end (away from the cut-out) so that you get fall towards the sink. Use with a plunge router, 30mm guide bush and appropriate sized core box bit. The jigs I've pointed to are about the cheapest out there - they are effectively "one shot" but for the more durable ones you are at £100

Drip groove? I have no idea what that is, could you clarify please.
A drip groove is a small groove on the underside of a timber overhang, near to the edge, which stops water running underneath. It helps prevent rotting. Most often noticed on window sills:


Note that the use of a drip groove means that you need to have an overhand of circa 20 to 25mm over the sink opening. It's also a good idea to have a drip groove running beneath the front edge of the worktop - this is actually done on some better quality commercially available llaminate worktops such as the Duropal ones
 
Sponsored Links
Aye, it wasn't intended to wind you up (and apologies if it did) - it was intended to make you think about assigning a cost to your own time: making a worktop out of sleepers would have taken days or weeks and that takes time away from the wife and kids (not that I'm saying I wouldn't do the same, possibly even proactively look for those situations ;) ) so it has a cost too.

Essentially, if you're going to take time out of your life you need to balance up the "time is money" and work out whether it's better to stay away from your leisure time by working overtime (or elsewhere) and use the money you earn to buy the things (worktop) you need.. Or whether you stay away from leisure by making the worktop you need.

I'm of the opinion that the latter nearly always takes more time and hence costs more than the former and often (if it's not an area of expertise) realises a poorer quality result :/
 
Okay cj, my apologies if you meant no malice and i read it wrong. I have ordered drip jig and worktop jig, found used for £12.
Just trying to decide whether to go budget or stretch to hitachi jk rrecommended Does look good tho.

Jk, got ya, drip groove, like window makes sense.
Not sure what size bit for drip jig, 12.7 seems the norm? it is b&q one.
Will route grooves for brackets on square edge, 3 each side?
Overhang, check. Drip groove on sink side. Maybe all 3, check.
are moisture barriers worth it? Or gimmick... have washing machine and dishwasher underneath.

Any thoughts on ppreferredoil for wood. Thinking osmo polyx or danish?

Also not sure what to seal butler sink to underside of worktop with (silicon?), as well as what to seal between joins (waterproof wood glue?)

Again all, i really appreciate all your help and aapologizeif im not always very clear, its because im not always sure of the right question. [/url]
 
My last problem, i think, is how to deal with the sink. I would love big chunky wood underneath supporting it on show, i know it is more work and expense but was always going to be an issue. Or could knock something up and close the doors.
It is a small butler sink, but very heavy, so will need something solid in either case. Not sure wether to have side of sink open or in worktop? Hope that makes sense.
if anyone has had experience would love to hear your thoughtS.

👍😄
 
Sponsored Links
Oh my, thats a beaut. If i can get it looking anything like that i be a happy man, so will the wife. I have the problem that its a double cupboard and sink is in middle. But love the idea of using an ofcut underneath, that would give the look, with front of sink showing yet hide pipes, if i can manage to cut the cupboards.
Thanks
 
Not sure what size bit for drip jig, 12.7 seems the norm? it is b&q one.
The drip groove (on the underside) is normally very small, say 3.2mm core box cutter or even a small straight cutter - the drainer grooves are 12.7mm or so, as you say.

Will route grooves for brackets on square edge, 3 each side?
???

are moisture barriers worth it? Or gimmick... have washing machine and dishwasher underneath.
Definitely worth it

Also not sure what to seal butler sink to underside of worktop with (silicon?)
Clear silicone

as well as what to seal between joins (waterproof wood glue?)
Clear silicone, again, because end grain to long grain and you'll have movement for sure meaning that a glued joint will fail over time

My last problem, i think, is how to deal with the sink. I would love big chunky wood underneath supporting it on show, i know it is more work and expense but was always going to be an issue. Or could knock something up and close the doors
You can buy Belfast sink bases from kitchen manufacturers, but if re-using an old sink they won't always work, so Ive always made my own. The visible portion of worktop beneath the sink doesn't need to extend to the back, either - that bit can be supported on treated softwood if need be
 
Sorry, meant drainer groove. 12.7 cool.

Drip groove should be fine, i have some smaller 1/4 bits i will dig out. Im guessing the drip grooves will definatly need to be well oiled as will the cut sides. Is there a chance of clogging them up?
Im looking at pre oiled worktops, which i assume have had at least 3 coats? But not sure on that.

Grooves for brackets i am refering to pulling the joins of worktops together, 'dog and bone' you said? With clear silicon. You mention vertically, can a biscuit cut be done with router?
 
Grooves for brackets i am refering to pulling the joins of worktops together, 'dog and bone' you said? With clear silicon. You mention vertically, can a biscuit cut be done with router?
That's why I was mystified. They are properly referred to as worktop joiners, or colloquially referred to as "dog and bone" or "dog's bone" joiners because of the shape (a bit like a dog's bone?):


They are normally installed in recesses cut using the router, 1/2in cutter, 30mm guide bush and a jig - if you are buying a worktop jig then the "mushroom" cutouts on the jig are the templates for the recesses. The routing depth is generally around 11 or 12mm - just deep enough to flush the bolts. They require a 10mm or 11mm open-ended wrench to tighten them up

There are better bolts to do this job, such as the ZipBolt:


These require a PZD #2 screwdriver and are a lot easier and faster to use and can be balanced on the screwdriver for installation (unlike the traditional ones which are a two-handed job whilst lying on your back, beneath a worktop, with your arms at full stretch). So worthwhile for a tradesman IMHO and probably also for a less-experienced DIYER. Downside is that they cost more

Another alternative is the Unika Easi-Bolt:


Which hold themselves in the groove while you tighten them up - but they require an open ended wrench to tighten them

There are other variations on the market

The joiners look like this on the underside of the worktop when installed:

 
Well I think I am all set. I have ordered the Hitachi in the end as I shall defiantly use it lots in future. Also drainage jig, worktop jig and have loads of spare wood to practice. Also some router bits in shed that would do to practice with.
When I am confident I will buy the other little bits (moisture barrier, brackets, silicon etc...)
Oh, and some worktops and have a go. will strip tiles off this weekend and wait delivery on Monday to start to play.
Thanks all for your input, I shall let you know how I get on when I make some progress, which will probably be when I start to practice and cant get the hang of it!
:eek:
K
 
Hi again all, could do with some more advice. I have little room to store worktops for oiling before fitting, so I may have to order them already oiled But have brought osmo polx top wax. Would there be a problem covering the (danish oil matt) oil already applied. I am at a loss as to how to proceed at the moment...
Also are there any recommendations for reputable stores? Or ones to avoid.
 
Hi all, have oiled and cut worktop lengths, and marked underneath for wortop connectors.
What I can't figure out is when I cut biscuits for vertical alignment how do I physically push all 3 workTops together With biscuits in. As the're is main span in middle, 2.7m, and one eigher side perpendicular to it. And no room to manoeuvre eigher side?

Also when cutting sink how much overlap would be adequate. Most pictures show little but need to fit drip groove in?
Many thanks.
Stuck, with no sink, water or dishwasher.
 
I can't figure out is when I cut biscuits for vertical alignment how do I physically push all 3 workTops together With biscuits in.
The joints are pulled up using the dog-bone connectors (see above) and an open-ended wrench.

Also when cutting sink how much overlap would be adequate. Most pictures show little but need to fit drip groove in?
What size cutter are you using for the drip groove? If you are using a 4mm core box cuter you'd need something like a 12 to 15mm overhang. It depends on your own tastes
 
I have it sorted now thanks 👍
What I meant is that there was not enough room to fit all three worktops in with required space for biscuits before pushing together. Too Tight. I ended up doing one side with biscuits and dog n bone and other just joined with 'dog n bone'.
Joints are good, sanded em earlier nice n smooth, then wiped with wet cloth Which raised the grain, should I sand again with grain raised before oiling?
As for sink, I used 15mm overhang, with 3mm bit, I wish I would have used less. It made sink smaller and does not look as aesthetically pleasing as I would have liked.

It has been a challenge but I'm enjoying it, lots to do yet.
 

DIYnot Local

Staff member

If you need to find a tradesperson to get your job done, please try our local search below, or if you are doing it yourself you can find suppliers local to you.

Select the supplier or trade you require, enter your location to begin your search.


Are you a trade or supplier? You can create your listing free at DIYnot Local

 
Sponsored Links
Back
Top