Loft hatch cutting out

Joined
5 Dec 2012
Messages
927
Reaction score
13
Country
United Kingdom
Hi,

I have an old terraced house and the loft hatch is TINY! I am buying a new loft hatch from screw fix

Pic of current loft hatch is below
C5216A7E-5C8B-44EC-B22A-CA125F09351F.jpeg


I want to install the loft hatch the other way round so that the ladder will be on the landing for access

The joists go from L to R as you look at the picture

This means that the loft hatch opening will go ACROSS joists

How to I work out the timber arrangements for securing the hatch?

Do I put noggins in where needed? What happens where I am effectively cutting ACROSS the middle of the joist? How do I strengthen it?

Thanks
 
Last edited:
Sponsored Links
the amount off sistering [doubling up joists] will depend on the unsupported span
if its say 4ft as in small hallway then noggins will be fine otherwise as said sistering
 
Thanks for your replies
The current spacing between joists is narrow, will definitely need to cut a joist

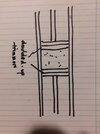
Is my understanding correct as per diagram below?
Top picture is current hatch setup, bottom picture is proposed

image.jpg

Are the noggins correct in terms of my understanding?

The old joists are huge about 8 x 3 (built in 1902). Do I need to get a similar size joists for the noggins or can I use 6 x 2 for noggins and just ensure they’re flush with the bottom of the joists so I can secure hatch?

Assuming noggins go in first before I start joist cutting?!

Cheers
 
Sponsored Links
we need to know the unsupported span [the distance between walls or supporting structures under the joists ]
you have the ceiling to support under the noggin and the floor covering above so full height to give maximum strength and finish the opening
the noggin goes full width, you cut the joist back otherwise you have a hinge [the weight pushes the joists apart rather than hang off them]
 
Last edited:
I'm not sure, (a carpenter will probably correct me), but I thought you cut the joist back further and put a 'noggin' across the full gap and then use a joist hanger off this to support the cut end of the joist? You can then put a noggin between the top and middle joist, then another between the middle and bottom.
Not explained very well but I think a carpenter/joiner will know what I mean and can explain it better.
 
Thanks for your reply.
I’ve just been up in the loft and as I looked down at the hatch immediately to the right there is a section which seems to support the joist. However, below this is a stud wall. It is not supported by brick.

The joists span the whole section of the roof area, which is effectively 8m as it’s a 2 up 2 down terraced house, however, approximately 1 and a half metres to the left of the current opening, as I look down at the hatch, there are two joists appear to be bolted together. I can’t however see, nor have I actually looked to see if they are resting on any brickwork, I’m assuming they are but should I go and doublecheck this?

On the below pic, directly to the right of the plastic light switch is where they rest on a stud wall

C5016074-2E00-4978-B502-B28B1D3546DB.jpeg
 
you cant rely on anything fixed on top as a couple off nails in a"X" [skew nailed]wont take much load
as i say you need to find the supported span
 
Only a DIYer :)

Before you start cutting into the ceiling, may be worth checking that the texture does not contain asbestos.

Your loft/insulation looks like mine did in our 1930s
A fair few weekends to clear it all out and get some decent insulation in
 
Thanks for your reply.
I’ve just been up in the loft and as I looked down at the hatch immediately to the right there is a section which seems to support the joist. However, below this is a stud wall. It is not supported by brick.

The noggins on your diagram, need to span the full width between the two joists you will not be cutting, and they need to be very well fixed at each end to both joists with long through nails, or even better long coach bolts. When I did mine, I also took the precaution of also adding steel corner brackets, to give even more support between
 
Ok, I’ve clambered back into the loft again with the tape measure, details below

As I look down at the loft hatch, stood in loft space (as per pic in above post)

1. There is a single skin brick wall (just under half way across loft space) where one end of the joist is resting on. The other end is resting on the outer wall brickwork of house, 5 metres away

Therefore the unsupported span is 5 metres. The joist is measure at 4” x 2”

2. As I look at loft hatch as per picture above, the single skin brick wall is 122cm (4foot) away from the beginning of the hatch opening. Therefore the new hatch opening (where joists will be cut) will start in the region of 122cm away from supporting wall.

my questions:

1. Before cutting joists, do I need to add additional noggins before installing the noggin that will span between the three joists for the hatch cutout? I have a vision that if it’s not supported with additional noggins prior to installing the larger noggin, then the joist will just drop as it’s only supported at one end effectively?

2. I am assuming I arrange the joists/noggins to match the ‘opening cutout’ dimensions or loft hatch?

3. Do I bring the bottom of the noggins to depth of the current plastered finish on the ceiling or do I bring the bottom of the noggin to the current joist level? Or so the hatches allow for an approx 12.5mm plasterboard finish. Or lack of?

Thanks again
 
The "noggins" (wrong term, it is actually a trimmer) should be at least a single piece of C16 (structurally graded) timber of the same dimensions as the original ceiling joists, but ideally doubled up. it needs to be connected to the existing joists using appropriately sized metal joist hangers with a twist nail fixed into every hole. You will get away with transferring the load from a single (cut) joist into the adjacent joists, and the doubling up is maybe me being a bit belt and braces, but hey, I'm an old school joiner and the area around a loft opening tends to be more heavily loaded by its' nature

20230108_202859.jpg
 
Last edited by a moderator:
Thanks @JobAndKnock so I can cut the middle joist temporarily before installing the ‘trimmer’.. the joist won’t fall down on me considering I’ve effectively cut a piece out the middle of it (in between supporting walls)?
 
Only a DIYer :)

Before you start cutting into the ceiling, may be worth checking that the texture does not contain asbestos.

Your loft/insulation looks like mine did in our 1930s
A fair few weekends to clear it all out and get some decent insulation in
Cheers,

Out of interest, did your new insulation make a big difference? I’ve only got 100mm up there at the moment! They will be my next job, to insulate to 275mm ish and board the loft
 
1. Before cutting joists, do I need to add additional noggins before installing the noggin that will span between the three joists for the hatch cutout? I have a vision that if it’s not supported with additional noggins prior to installing the larger noggin, then the joist will just drop as it’s only supported at one end effectively?
For starters NOT noggins - noggins go between studs and can't carry load. Assuming that you cannot prop from below, temporarily fix a couple of 4 x 2s across all the joists on both sides of the new opening with at least two or three 5.0 x 100mm (or better 6.0 x 100mm screws through the temp and into the tops of the joists. Make the cuts.

Manoeuvre the single joist hanger into position at the end of the cut joist. Place the double joist hangers where the trimmer will connect to the full joists. Cut and position your first 8 x 2 (dropped into the double joist hangers at each end) and temporarily nail it to the end of the cut joist and to the full joists at each end. Cut and fix the sister (doubling up) joist to the first joist with a couple of nails. Nail the joist hangers to the existing joists and the new trimmer. Connect the two pieces of the (sistered) trimmer together with an M10 or M12 x 125mm coach bolt every 500mm approx. Repeat for the other side

2. I am assuming I arrange the joists/noggins to match the ‘opening cutout’ dimensions or loft hatch?
Up to you, but certainly stronger that way

3. Do I bring the bottom of the noggins to depth of the current plastered finish on the ceiling or do I bring the bottom of the noggin to the current joist level? Or so the hatches allow for an approx 12.5mm plasterboard finish. Or lack of?
See comments above about why you don't use noggins. Bottoms of new timbers need to exactly.match bottoms of existing timbers. If nrw timbers are 10mm shy of the old timbets (say 190mm instead of 200mm) thst is not important
 

DIYnot Local

Staff member

If you need to find a tradesperson to get your job done, please try our local search below, or if you are doing it yourself you can find suppliers local to you.

Select the supplier or trade you require, enter your location to begin your search.


Are you a trade or supplier? You can create your listing free at DIYnot Local

 
Sponsored Links
Back
Top