A bit more information is required to answer that:
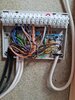
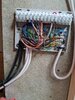
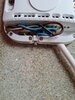
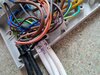
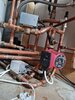
What Nest product do you have now? [eg 3rd Gen, Nest-e] A photo of the wires connected to the existing Heat link would be helpful.
What is the Nest controlling? A heat only boiler with a connected hot water cylinder [eg S-Plan, Y-Plan] or Combi Boiler without a hot water cylinder.
I'm not familiar with a Tado EK product. Do you have any info on it? I assume by your reference to "jumper position" you have a Tado receiver box / extension kit, but the answers to the previous questions are necessary to determine the jumper positions.