

I'm refurbishing a downstairs toilet and have just installed a Geberit WC frame to support a wall hanging toilet. I’ve built a stud frame around it and glued/screwed 12mm Hardiebacker board to the frame. As it is our intention to paint (and not tile) the wall, I would like it to be plastered.
I will be hiring a plasterer as I have no plastering skills myself, but would like to understand the required preparation that is likely to be needed, possibly with a view to doing this myself and if not, to ensure the plasterer does it correctly!
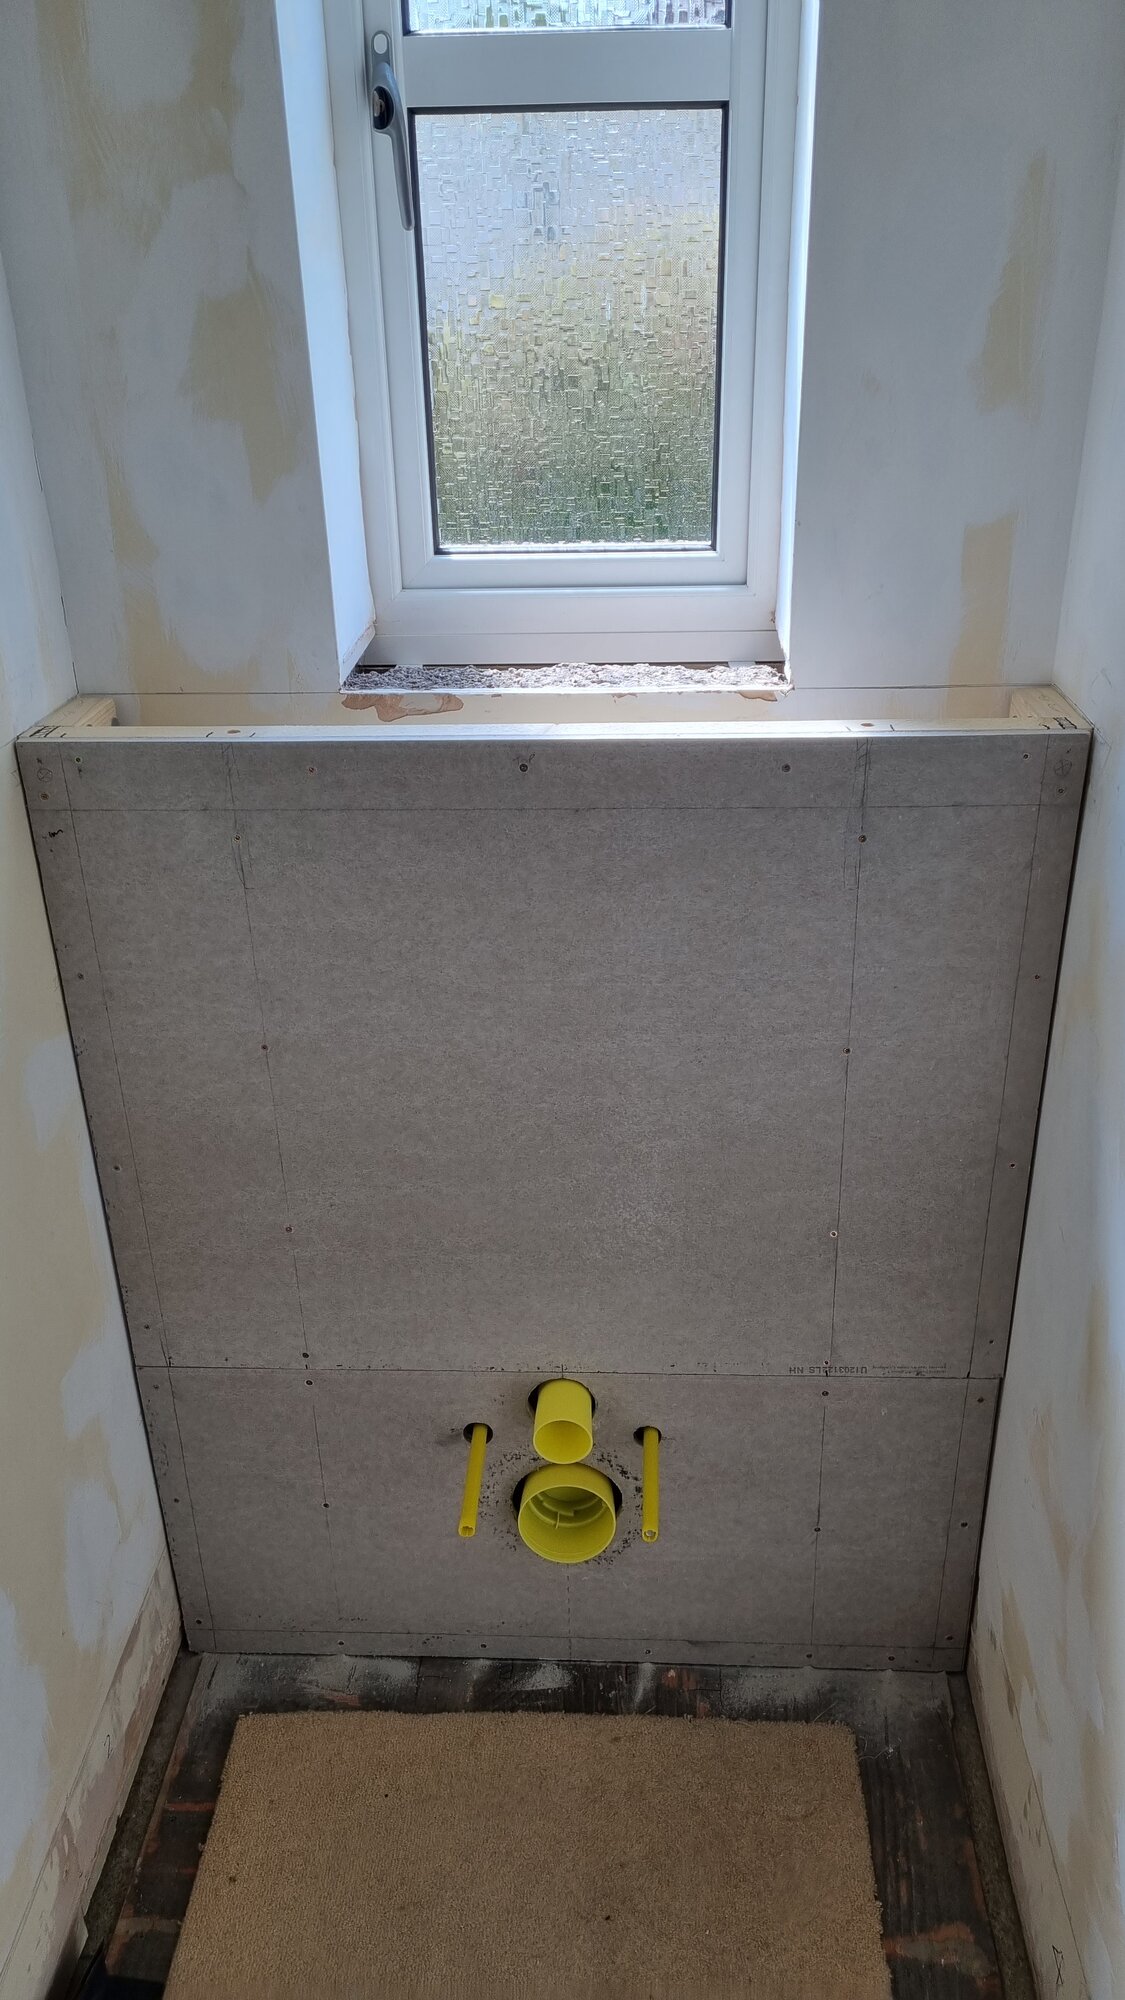
As you can see from the photo, it is a flat small area of 90cm wide and 110cm high. The top of the stud wall and windows recess will be fitted with a wooden shelf.
The first thing I assume will be required is an angle bead fitted to the top of the new stud wall to ensure a nice clean top edge to the plaster onto which the front edge of the shelf will sit? As there are two pieces of cement board, I assume some fibreglass jointing tape will need to be run over the joint between them.
According to Hardiebacker, the boards will need to be primed with PVA, although I suspect Blue Grit would give a better preparation for plastering?
Finally, I'm not sure what would need to be done for the two internal corners, where the cement board meets the existing plastered walls. There is a 3mm gap at the moment, as recommended by Hardiebacker, and this will need filling, possibly with a flexible sealant (silicon or decorators caulk?). Using flexible sealant seems pointless when the plaster won't be flexible!
If the whole toilet was being plastered, then these internal corners would have fibreglass jointing tape fitted, but this isn't really possible unless the plastering is taken around the corner and onto the existing plaster. So, what is the best way to handle these corners?
I would appreciate your feedback on the best preparation approach for this small job.
I will be hiring a plasterer as I have no plastering skills myself, but would like to understand the required preparation that is likely to be needed, possibly with a view to doing this myself and if not, to ensure the plasterer does it correctly!
As you can see from the photo, it is a flat small area of 90cm wide and 110cm high. The top of the stud wall and windows recess will be fitted with a wooden shelf.
The first thing I assume will be required is an angle bead fitted to the top of the new stud wall to ensure a nice clean top edge to the plaster onto which the front edge of the shelf will sit? As there are two pieces of cement board, I assume some fibreglass jointing tape will need to be run over the joint between them.
According to Hardiebacker, the boards will need to be primed with PVA, although I suspect Blue Grit would give a better preparation for plastering?
Finally, I'm not sure what would need to be done for the two internal corners, where the cement board meets the existing plastered walls. There is a 3mm gap at the moment, as recommended by Hardiebacker, and this will need filling, possibly with a flexible sealant (silicon or decorators caulk?). Using flexible sealant seems pointless when the plaster won't be flexible!
If the whole toilet was being plastered, then these internal corners would have fibreglass jointing tape fitted, but this isn't really possible unless the plastering is taken around the corner and onto the existing plaster. So, what is the best way to handle these corners?
I would appreciate your feedback on the best preparation approach for this small job.