Some work needed after removing tiles

Joined
28 Nov 2016
Messages
156
Reaction score
1
Country
United Kingdom
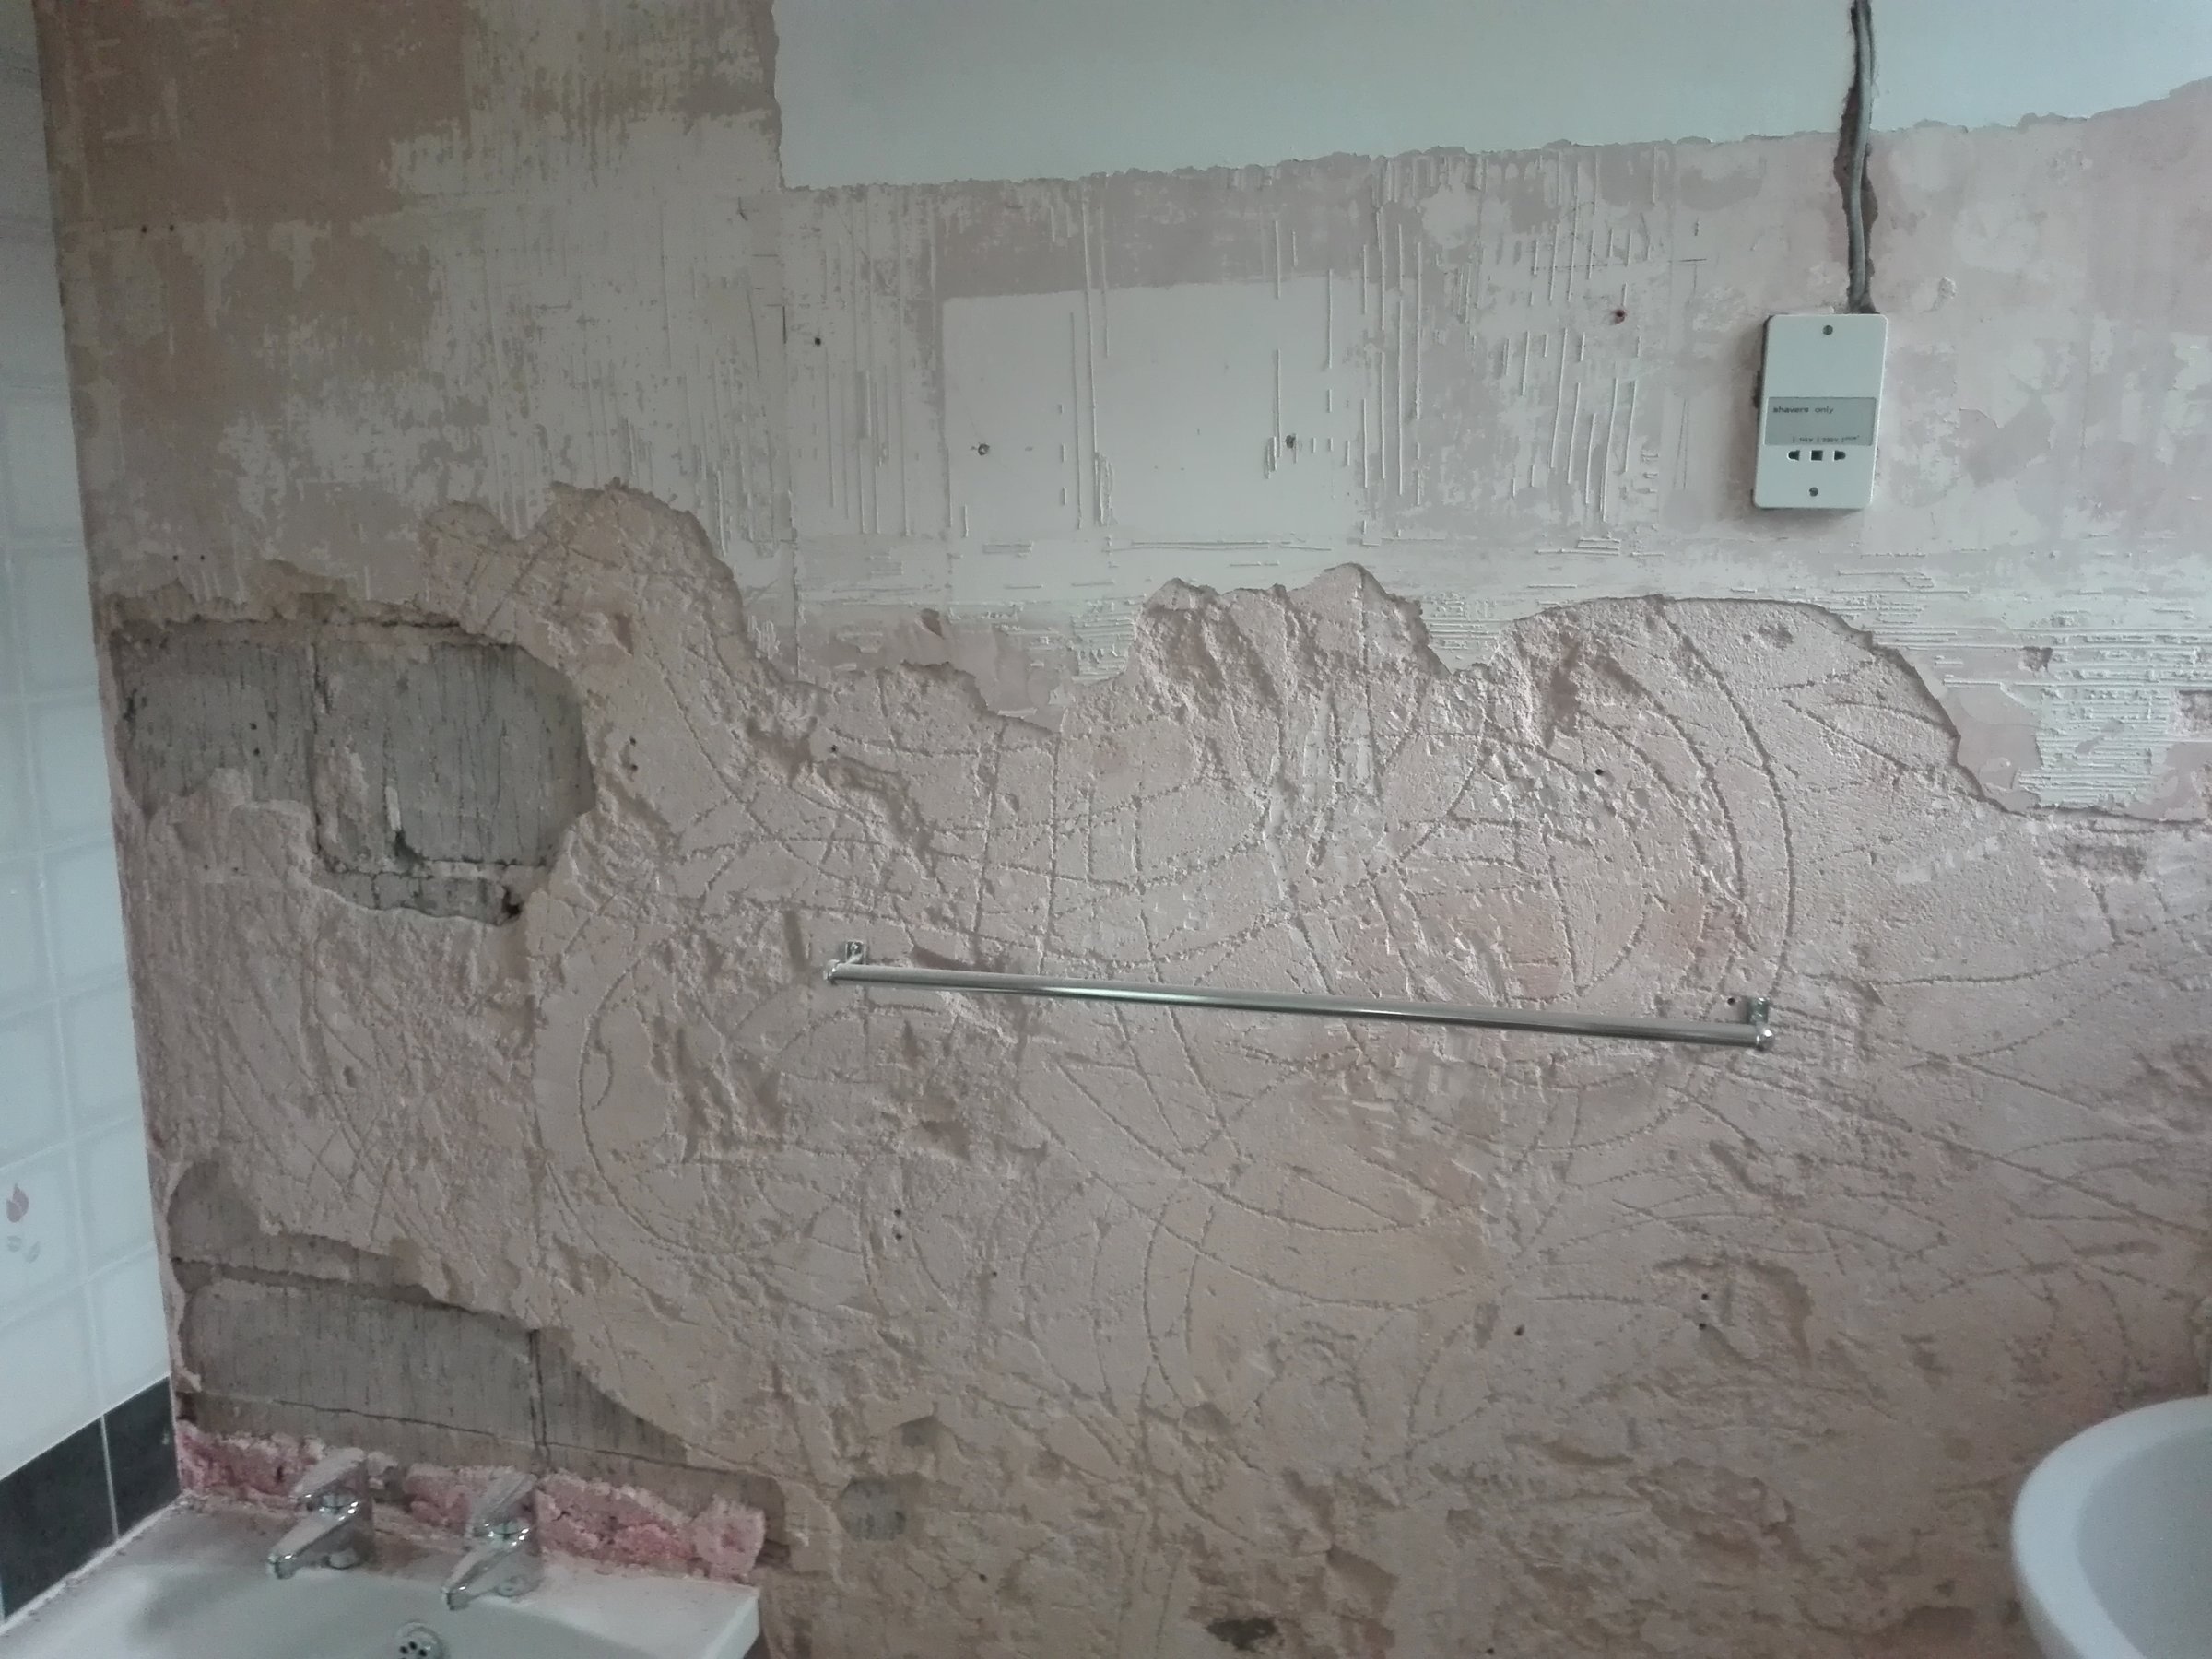
We are redoing the bathroom walls, and have removed the tiles. Some came off really easy (think this bit of wall was painted underneath) others came off ok but pulled the plaster skim off, others were a nightmare and pulled the render off too:
Yes, those black tiles really were stuck down with expanding foam... and others with silicone. Since i'm gong to tile the wall anyway (probably) i thought the best plan was to take the skim off the top half of the wall, then just tile straight onto the render, but the top half of the wall is solid, and the plaster doesnt want to come off easily! So... i thought i'd have a crack at skimming myself, since it wont be visible if i muck it up, but a few questions if i can...
1) I will need to fill the larger holes in the render (whats best for this - sand and cement or bonding? - walls are lightweight blocks)
2) Do i need to pva the render before plastering, or just moisten?
3) Can i skim the bottom half of the wall with one coat, then skim the whole wall with a nother coat, will it crack half way up the wall if i do?
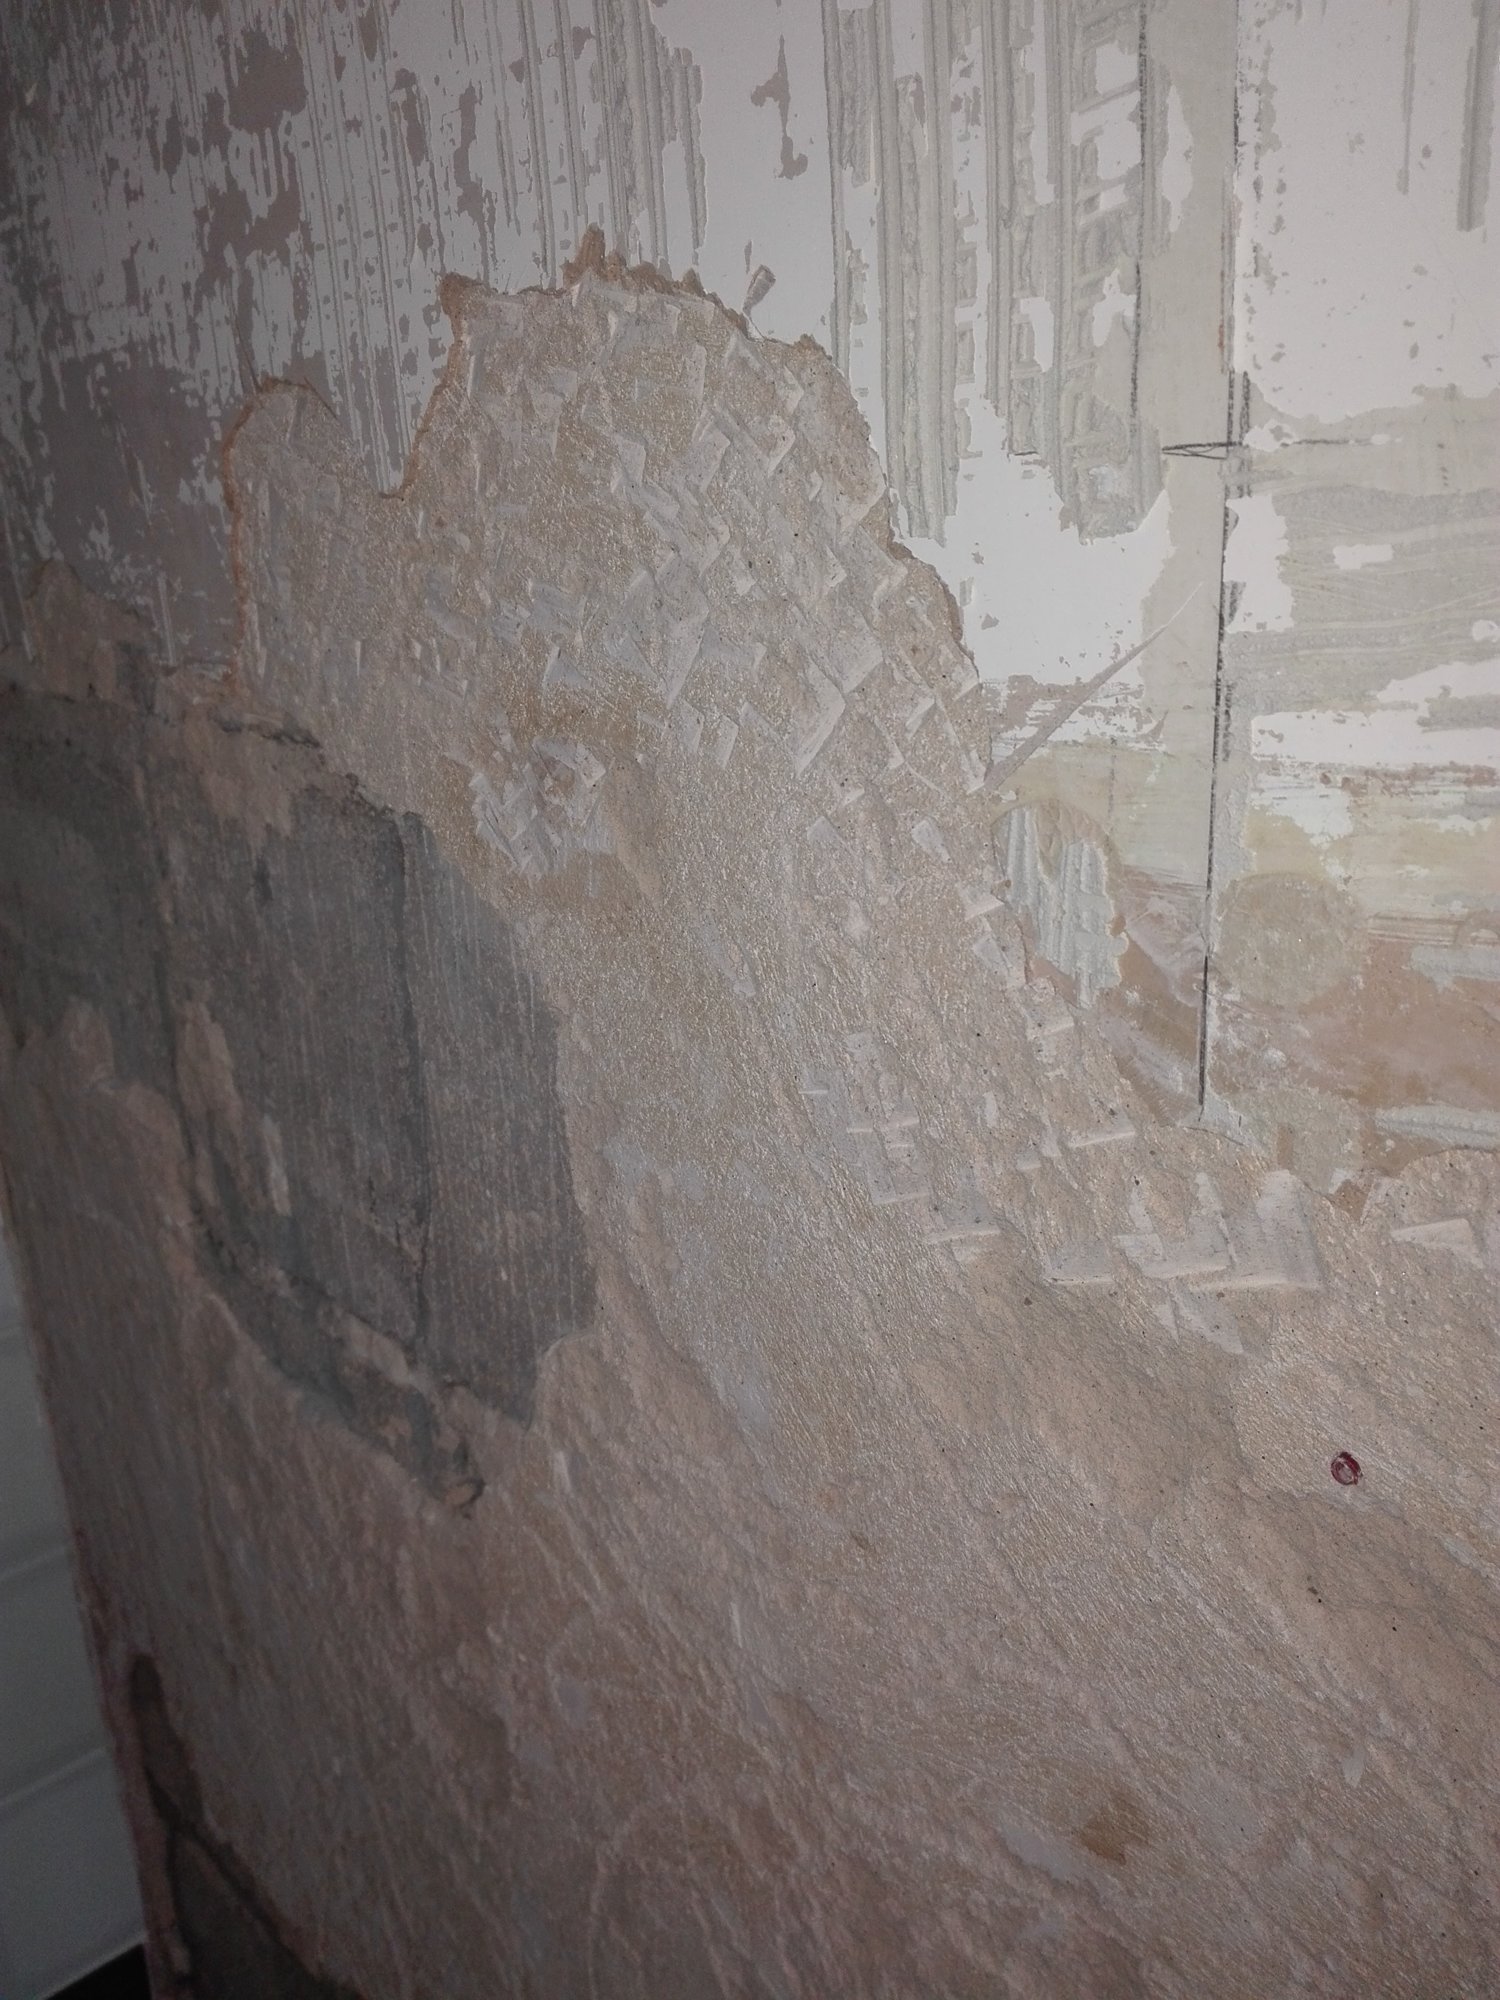
4) There are some deeper holes in the render, but not through to the blocks, will i need to top these up, or will the multifinish fill them ok? Hard to see but there is a pic:
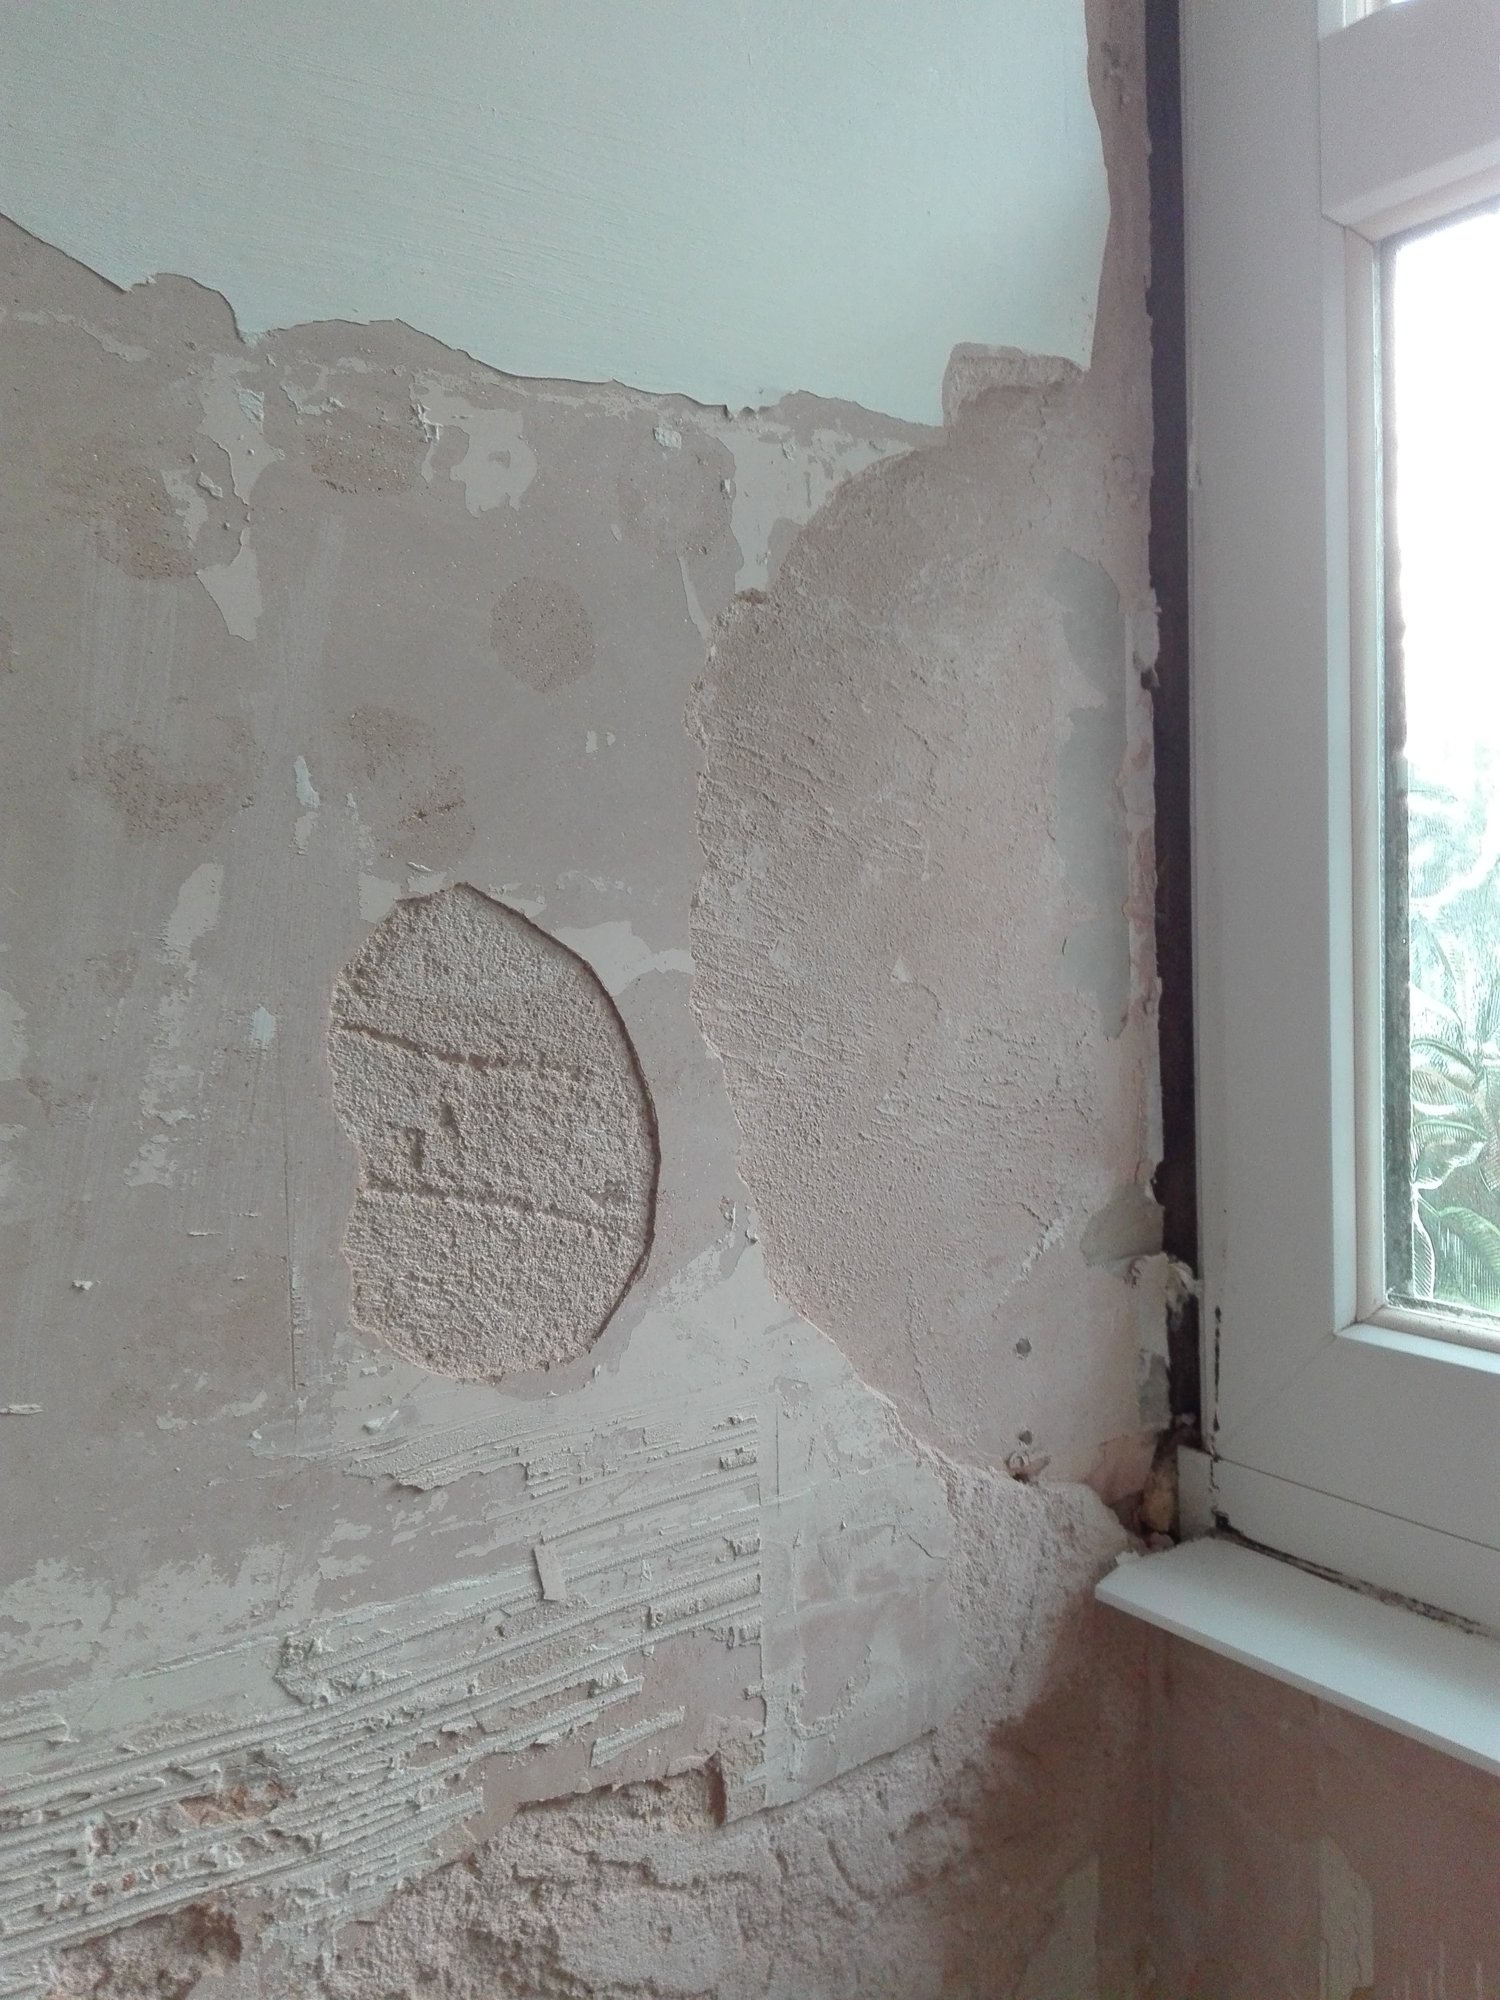
5) In the top right of the wall it is actually a dormer, so plasterboard not block, the render is missing here, what can i use to bring the level up (similar to q 1 i know), can i use cement render or not? picture below:
6) Is there anything i havent thought of?!

Thanks - p.s i can get more pictures of the holes if needed!
 
Sponsored Links
I would just prime the whole lot with SBR and then just go straight in with tile adhesive
 
Tyr Thistle one coat plaster. PVA everything first, even the edges on any adjoining walls, and then skim across. The one coat is a bonding and a plaster all in one, and will handle the depths you have there. Chappers suggestion is a good one, but you'll use more adhesive, which is more expensive that the one coat plaster.
 
Ok, thanks. Few more q's if i can?!

Is there a difference between SBR and PVA?
I am tempted to only tile halfwy up the walls - assuming i can get a decent finish on the top half (which would mean i couldnt just use tile adhesive...). Would the one coat literally be one coat, ie thick at the bottom, then thin at the top, or would i use one coat on the bottom, then skim whole wall with multi?
Does one coat give a decent enough finish for painting?

Thanks :)
 
Sponsored Links
It's supposed to be able to be good enough to paint on, but I haven't managed to get that good a finish with it yet, so you'd be better off bonding thae wall, and then using muli finish for that.

PVA is water based, and stops or slows the suction when you do your next coat, and acts as a bit of a glue in certain circumstances. SBR is used where you're going to tile, and you don't want the PVA to become live when you add something wet on top of it.

One coat can be 2" thick, but if the coats are thin and thick all over, then it'll go off at different rates, and be a bit trickier to level smoothly, so best to put on a leveling coat first, then a more even coat afterwards; but if you've got to do that, then you're back to using bonding for the thick/leveling coat, and then multi finish for the top coat.
 
Ok, think my best bet is to get some bonding then, level the bottom out first (i can also use this to fill the chase in yes - after removing the cable for the shaver point?), then multi over the whole lot.

Just to clarify, the order of jobs:
1) PVA bottom half of wall
2) Level off to the same thickness as the top half of wall with bonding
3) PVA the top half of wall and the recently applied bonding on the bottom half of the wall
4) Skim whole wall with multifinish (once or twice?)

Thanks, really appreciate the help
 
Actually, if I think about it... i wouldnt use bonding to bring the level on the bottom half to the same level as the plaster on the top half would i? I would just fill in the larger holes, then skim mulitifinish on it, then skim the whole wall?

If i do this, what would i do about the join in the middle, where the two skim coats meet, before putting a skim on the whole wall? Would the skim cover the join, or would the join crack through? Same thing about skimming the top, there are some hairling cracks, would these show through the skim coat?

Thanks
 
But you would use bonding to bring up the bottom level to the top half, then apply scrim tape to the join, (not absolutely necessary though) and then skim the whole wall with mutlifinish. You can apply scrim tape to the cracks if you want, but if you don't know what's causing the cracks, then they may well reappear elsewhere.
 
Ok, sorry, i thought i would only use binding to fill the deep holes... but your saing i would use bonding on the whole bottom half of the wall, which would bring it to the same level as the topcoat plaster on the top half of the wall-which would then give me one level on the whole wall just in two materials?

In this way if i decide to tile whole wall, i just use tile adhesive and I'm away! If i decide to plaster, then its just a normal two coat skim i presume?

Out of curiosity, why isnt it necessary to apply scrim tape to the join?

Thanks, bit new to all this, so sorry if the questions seem very obvious :)
 
If you had a sand and cement screed on the bottom half, then you've got 2 different types of surface, so you definitely need to scrim that joint, but bonding and plaster and more compatible, and scrim tapes not nomally used.

In this way if i decide to tile whole wall, i just use tile adhesive and I'm away! If i decide to plaster, then its just a normal two coat skim i presume?

Not sure exactly what you mean by that. But if you've bonded and thenskimmed the whole wall, and decide to tile it all, then yes, tile the whole lot. but after you've bonded the lower half, you always put on 2 coats of plaster in one go. The first one goes on, starts to get firm, and then you put the second coat on, and that's the one that gets flattened. Check out a few videos on youtube if you're unsure.
 
Last edited by a moderator:
Yeah, thats what i meant, just not good at explaining myself! I will be bonding the bottom half, then skim over the whole wall. On an aside, would it actually be worth me taking the skim coat off from the top half, back to the render coat underneath?

Thanks again, most helpful :) I'll get a picture when i'm done!
 
Adding a skim coat to the top half, will only add a few millimtres to it, so I'd save the hassle of taking it off.
 

DIYnot Local

Staff member

If you need to find a tradesperson to get your job done, please try our local search below, or if you are doing it yourself you can find suppliers local to you.

Select the supplier or trade you require, enter your location to begin your search.


Are you a trade or supplier? You can create your listing free at DIYnot Local

 
Sponsored Links
Back
Top