Split tread on stairs

Joined
25 Jan 2006
Messages
492
Reaction score
1
Location
Manchester
Country
United Kingdom
Hi all,

The missus and kids are away for a week and I've 'been tasked' with completing a couple of DIY tasks...one of which is to replace the carpet (although I won't be fitting it this time).
I've pulled the existing carpet up (no underlay, probably accounts for why the carpet is in such a state) and screwed down a few squeaky floorboards whilst at it.
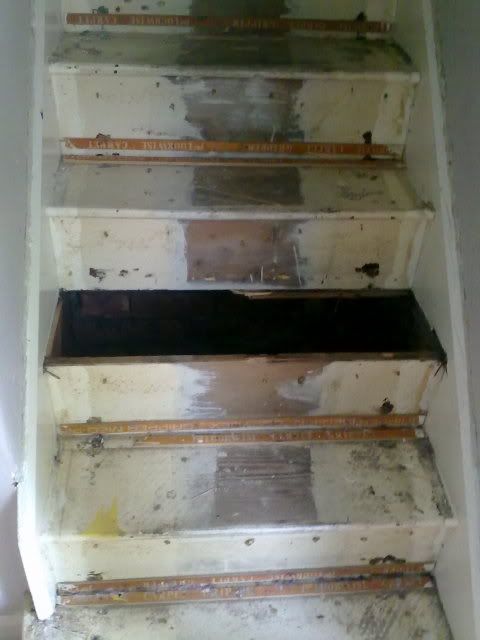
However, on the third step up on the stairs the tread has split (not entirely but approximately 1/2 across). Before the carpet was lifted you could tell something was amiss here as the tread sunk a little when weight was placed upon it.

I've carried out a little research (many searches returning me to this site) but don't seem to have found a solution:
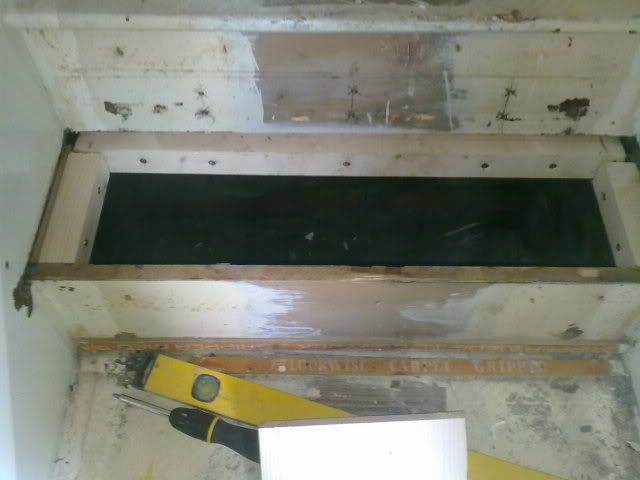
My main problem is that I have a couple of days before the carpet is hopefully fitted and I'm away this weekend before my (heavily pregnant) missus returns home - during this time I also have to paint the hall walls and gloss all the wood. I initially thought I could merely lift (knock) out the tread and replace with likewise...however it looks like the tread slots into the skirting (is underneath)...and knowing the skirting in this house, that in turn probably enters the brickwork. In other words, not an option (given the fact that my missus could give birth at any moment and the last thing she wants is a dirty staircase to content with!).
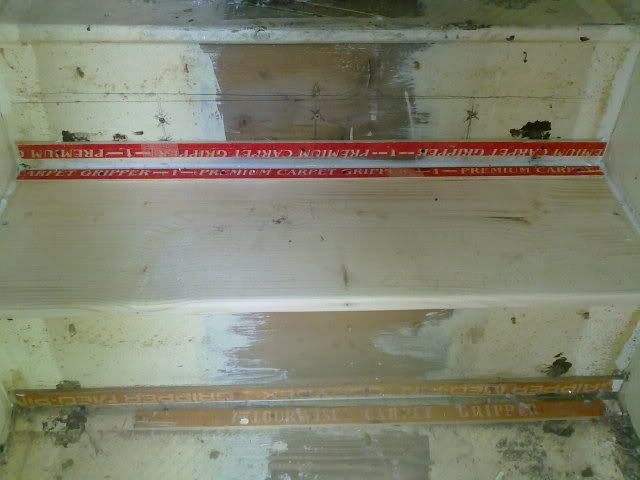
Then I thought I could add some plywood over the top - but again I read on here about the brain 'guessing' the height as you ascend/descent said stairs...
I also cannot enter from below as there is a wall there...

Any idea's folks? If the only option is to pull up the skirting (completely unfeasible now) then I'd perhaps think of adding some extra underlay and make do with the sag...

Cheers - hope that all makes sense, it's late and I've had a bit of crash course in stairs and carpets this evening.
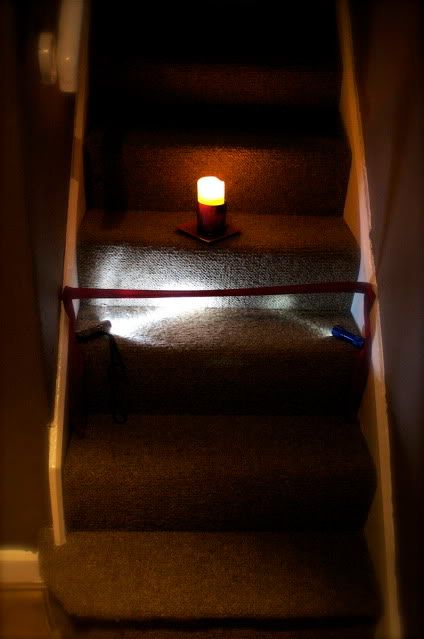
Pic below:

20072010261.jpg
 
Sponsored Links
The stair tread will be fitted into the strings and the only successful way to remove and replace is to do it from the back of the staircase. just a suggestion to get over your problem would be to get a piece of 2mm steel sheet cut to size and drill and countersink several fixing holes around the plate the fix using suitably sized countersunk screws.
 
The stair tread will be fitted into the strings and the only successful way to remove and replace is to do it from the back of the staircase. just a suggestion to get over your problem would be to get a piece of 2mm steel sheet cut to size and drill and countersink several fixing holes around the plate the fix using suitably sized countersunk screws.

Unfortunately, there is not a way to access underneath the stairs, at this section at least. A large section of the stairs is, via a ceiling, accessible through a pantry next to the kitchen but the lower end of the stairs (exactly where this particular problem exists) is blocked off by a small wall at the back of the pantry.
Having never heard of the term 'stringer' before today, I assume this is the 'skirting board' that follows the stairs?

I asked a neighbour earlier this morning - he has suggested the following:

* Chisel out the broken tread and any remaining piece in the 'stringer'.
* Fix a piece of wood behind the riser (the riser above the faulty tread) then fix this with screws. This piece of wood will drop a couple of inches below the riser - on the bottom of this attach a baton - the gap will be enough to slide a new tread inside - also fix baton's to below the stringer on each end (there currently doesn't seem to be anything holding the tread on the left and right side of the tread).

I must admit the piece of 2mm steel idea sounds a little easier however - although worried this might heighten the stair by just that little too much??
Also as I mentioned above, the sides of the tread do not seem to be supported by anything below the stringer (if you push the wood down as on the pic showing the crack, there is no support underneath).

Panic stations now...I can feel the wrath of the missus from several hundred miles away...
 
If you can put up with a little extra height on the step maybe you could us a piece of good quality 3/8th ply.

Remove the gripper rods.

Cut the ply to fit exactly making sure the edge is shaped to match the rest of the step. (Get the grain to run opposite to the steps grain.)

Clean off the original step with a sander.

Apply a good quantity of strong glue to the step.

Screw down the ply and let the glue dry.

Replace gripper rods and carpet.
 
Sponsored Links
If you can put up with a little extra height on the step maybe you could us a piece of good quality 3/8th ply.

Remove the gripper rods.

Cut the ply to fit exactly making sure the edge is shaped to match the rest of the step. (Get the grain to run opposite to the steps grain.)

Clean off the original step with a sander.

Apply a good quantity of strong glue to the step.

Screw down the ply and let the glue dry.

Replace gripper rods and carpet.

Honestly, if these above solutions are generally acceptable then I'd find this a lot easier (and quicker) to sort out. Of course using my neighbours method I could also (through research) saw the tread in half (lifting the tread in the middle then sawing towards the back end, then pry out each half from the sides. This would give me a cleaner slot for the new tread.

I'm a little worried about the extra height tis all - here's a comment from this board some time ago (link below also):

unfortunatly its a wee bit more difficult than mattys sugestion because all stairs must be equal in tread and riser now you think its going to be coverd so no one will notice!!

the point is it will be a trip hazard because your brain sences the first and second tread and workes to that span so odd steps are a trip hazard
now iff its the bottom 2 your ok because you brain will over clear the step rather than kick the nose

is underneath off your steps open!!

what wood and what thickness are your treads!!

//www.diynot.com/forums/viewtopic.php?p=977863#977863

Would 2mm of steel or 3/8th of ply really fudge the brain (I have to be extra careful due to pregnant lady and young kids!!)
 
you realy need to get underneath to do a propper job as that is not an option
i would knock in a couple off chisles to open the crack i am talking gentle tapping so you dont break any bonds unnesesery underneath
clean out the crack rub the edges with sandpaper if possible
2 battons 44mx44mm cut the length off the tread
fill the split with quality wood glue work in into the smaller gaps especialy
take out the chisles screw the battons along each side off the crack making shure they are at least 3mm further appart than the width off crack

countersink several holes along the front batton making sure the hole is greater than the thread tighten all the screws tap the nose off the tread incase this helps the gap close
leave for 24 hrs to dry
you can use 4" clamps or greater if you have them instead off screwing the battons together

Again - sounds much better than knocking the whole thing out and a little easier Big All.
Just so I've got this right in my 'cheese box' I'd do the following:

* Tap in a chisels into the crack in order to prise it open a little.
* Screw the 44mm x 44mm batons into the either side of the crack running the length of the tread.
* Countersink (not sure I have a countersink drill bit :( ) holes on the front/vertical of the front baton so as to clamp the two batons together (I don't have any clamps unfortunately).
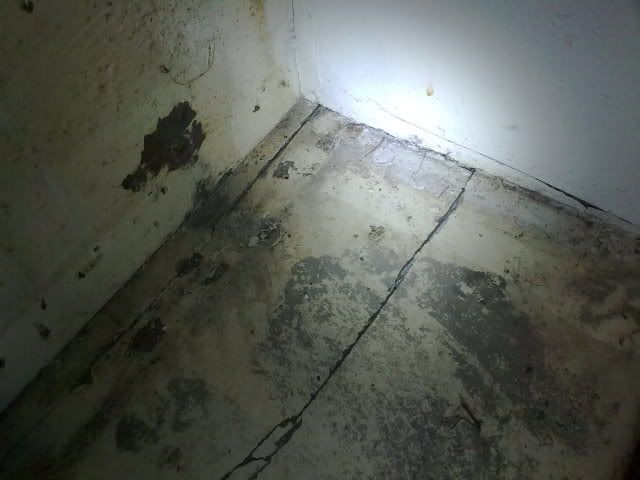
I have some wood glue knocking around (is the general stuff ok or should I be going for industrial strength??).

Fantastic.

One more thing - I spoke to the guy in the carpet shop earlier (ordered carpet, fitters coming around on Friday - hence the rush to get the step done). He (and I'll run this by everyone!) suggested using corner/L brackets (around 4). Screw one side into the riser above, chisel out grooves for the bottom of the brackets (so they sit flush in the tread and don't raise the carpet) and screw the bottoms in, bridging the crack and running just a little short of the tread.

Perhaps I could do both - glue first then (only if necessary) then secure with the corner/L brackets?

...perhaps I should think about glass stairs one day...

Many thanks.
 
...thought I'd better add the following just in case if changes the solutions added here.
Have just taken off the gripper on the affected tread and can see another split - so essentially the tread has this 'flap/tongue' for want of any better descriptions. This may explain why it feels like there is nothing supporting it underneath, because the back of the tread may be secure approx 2cm in from the riser there is a split (which runs 3/4 length of the tread) followed by another 3-4 inches further towards the nose.

Glue then secure with flushed L brackets...or take the whole blinking tread out and add secure new tread (much bigger job than I'd hoped).

New pic - the previous pic had the gripper covering the second split:

21072010264.jpg


Many thanks.[/img]
 
not good lol
countersunk can be done with a 10mm drill bit the v shape stops the risk off the head splitting the wood

steel brackets may work but iff you deduct 3mm from the likley 19mm thickness left after the years off wear you will be left with around 16mm not a lot to bite into ;)

another way to tackle the splits is to use 40mmx8mm dowels drill 8mm holes at around 20 degrees starting 20mm from the split
you would need to drill 90 degrees for around 5mm deep then lower the angle to 22 degrees and drill 50 mm in
 
not good lol
countersunk can be done with a 10mm drill bit the v shape stops the risk off the head splitting the wood

steel brackets may work but iff you deduct 3mm from the likley 19mm thickness left after the years off wear you will be left with around 16mm not a lot to bite into ;)

another way to tackle the splits is to use 40mmx8mm dowels drill 8mm holes at around 20 degrees starting 20mm from the split
you would need to drill 90 degrees for around 5mm deep then lower the angle to 22 degrees and drill 45mm in

I'm afraid you've gone a little carpentry technical on one's behind there Big All! Apologies but I'm struggling to work out what you mean there :(
I know of dowels (I get bags of them in the odd wardrobe/bunk bed I have to put together! But then your methodology lost me a little...if you get chance to simplify it [even more] lay mans terms I'd be most grateful!

What about this: drill a hole around 3/4 way across the tread (at a 45 degree angle) - insert jig and cut out the offending cracked piece. Place batons (4?) underneath (screwing on the edge next to the riser above and beyond the second crack) then glue back in and secure with screws and also glue 44mm x 44mm batons above (and secure one to the riser also) as your original response?

I have found a similar piece of nosed pine (22mm - think this is about right) I can pick up on the morrow if the worse came to the worse...this would mean taking out wholly the existing damaged tread however...

One stair is going to break me this week I fear!
 
you realy dont want to have a join mid span as you will get creaking even if you tie it in around all edges :cry:
 
Well, in the end (and not quite getting my head around the various fixes posted above...it was the dowels and angles which did me in!) I ripped out the broken step/tread (which really was in a state), fixed some bracketing onto the riser above and stringers to the side (which the old tread slotted in to) and fixed a new step in place (had to sand the bull nose due to lack of plane and suitably shaped step).
Anyway, it was put in place and seems the firmest of all the treads on this wooden hill...

22072010265.jpg


22072010275.jpg


22072010277.jpg


CRW_9773CRW.jpg
 
excelent job well done
youve done it exactly right you have tied all the surfaces together so no creaking :D :D

yes some off my description take a bit off understanding lol :D :D
 
excelent job well done
youve done it exactly right you have tied all the surfaces together so no creaking :D :D

yes some off my description take a bit off understanding lol :D :D

Thanks Big All. I actually purchased the 44x44mm batons for the clamping job you suggested. I then thought they might be a little too big used as a frame for the new tread...but yes, zero creaking - it's the star pupil on that wooden hill :)

I think if several had gone (or, for example, we bought a new place and wanted to do it up from scratch) then I'd possibly think about pulling out the stringers and skirting (which goes directly into the brickwork...these houses were built to last!). In fact I may do that some time next year - always wanted a nice staircase, part stained wood part carpetted...then again those glass stairs look quite foxy too.

Thanks again.
 

DIYnot Local

Staff member

If you need to find a tradesperson to get your job done, please try our local search below, or if you are doing it yourself you can find suppliers local to you.

Select the supplier or trade you require, enter your location to begin your search.


Are you a trade or supplier? You can create your listing free at DIYnot Local

 
Sponsored Links
Back
Top