

Hello
I need help, some would say in many areas but today it is just with the premier 24.
3 days ago our house alarm decided to throw it dummy out of the pram and start smoking.
I was advised to purchase a Texecom Premier 24 and told I would easily be able to use my existing PIR's (of which I have") .
.
It took me a couple of hours to hunt down the installation manual (it did not come with the kit) and I have to say I am none the wiser.
The existing PIR's have 6 wires
Green & White = Tamper
Yellow & Blue = Alarm
Red & Black = 12v
Uploaded a picture into my album for reference
Question is, how do I connect these the the premier 24 so they will work?
If someone could please help I would be very grateful.
Cheers
JC
I need help, some would say in many areas but today it is just with the premier 24.
3 days ago our house alarm decided to throw it dummy out of the pram and start smoking.
I was advised to purchase a Texecom Premier 24 and told I would easily be able to use my existing PIR's (of which I have
.It took me a couple of hours to hunt down the installation manual (it did not come with the kit) and I have to say I am none the wiser.
The existing PIR's have 6 wires
Green & White = Tamper
Yellow & Blue = Alarm
Red & Black = 12v
Uploaded a picture into my album for reference
Question is, how do I connect these the the premier 24 so they will work?
If someone could please help I would be very grateful.
Cheers
JC
")
")
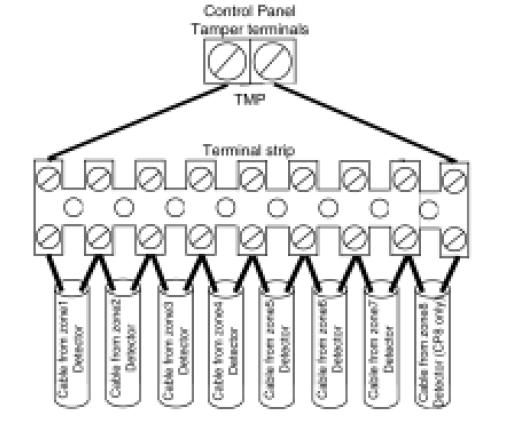
 , forgot the premier 24 had individual zone tamper

