- Joined
- 24 Nov 2018
- Messages
- 2
- Reaction score
- 0
- Country

Sorted! Thanks very much for the advice... I did have to check the connections at least 8 times before switching on to make sure though!

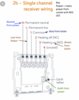
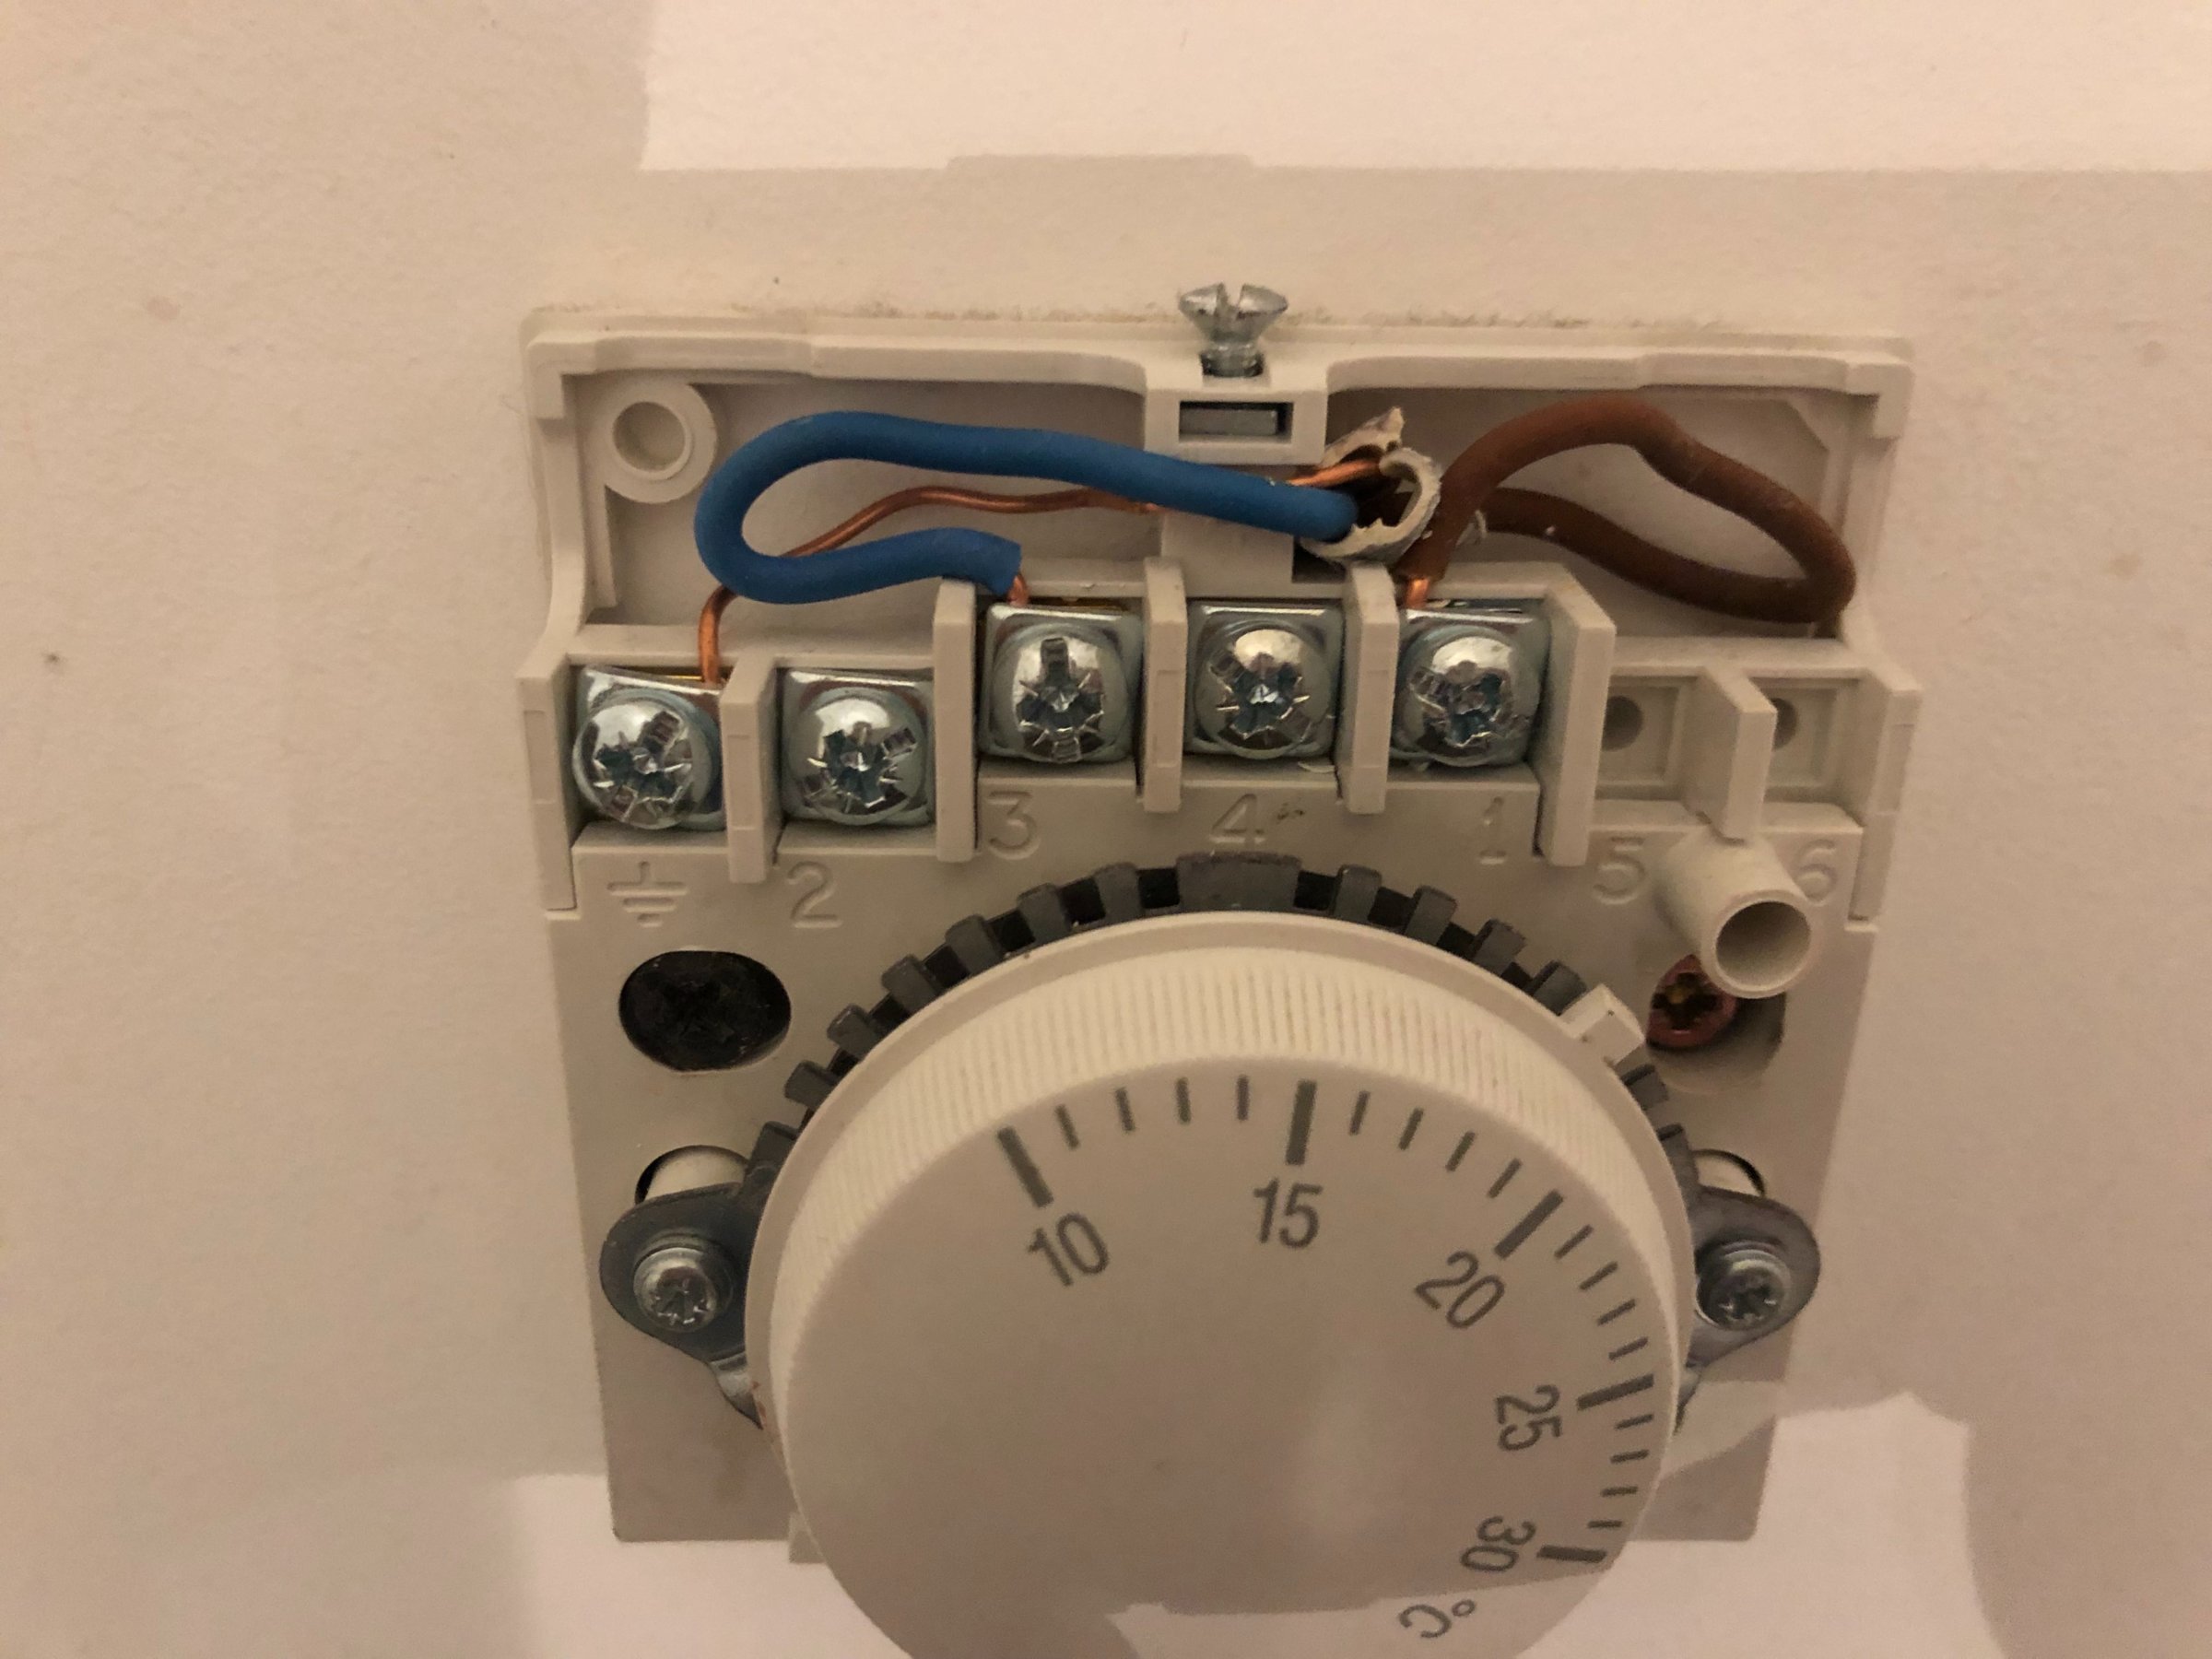
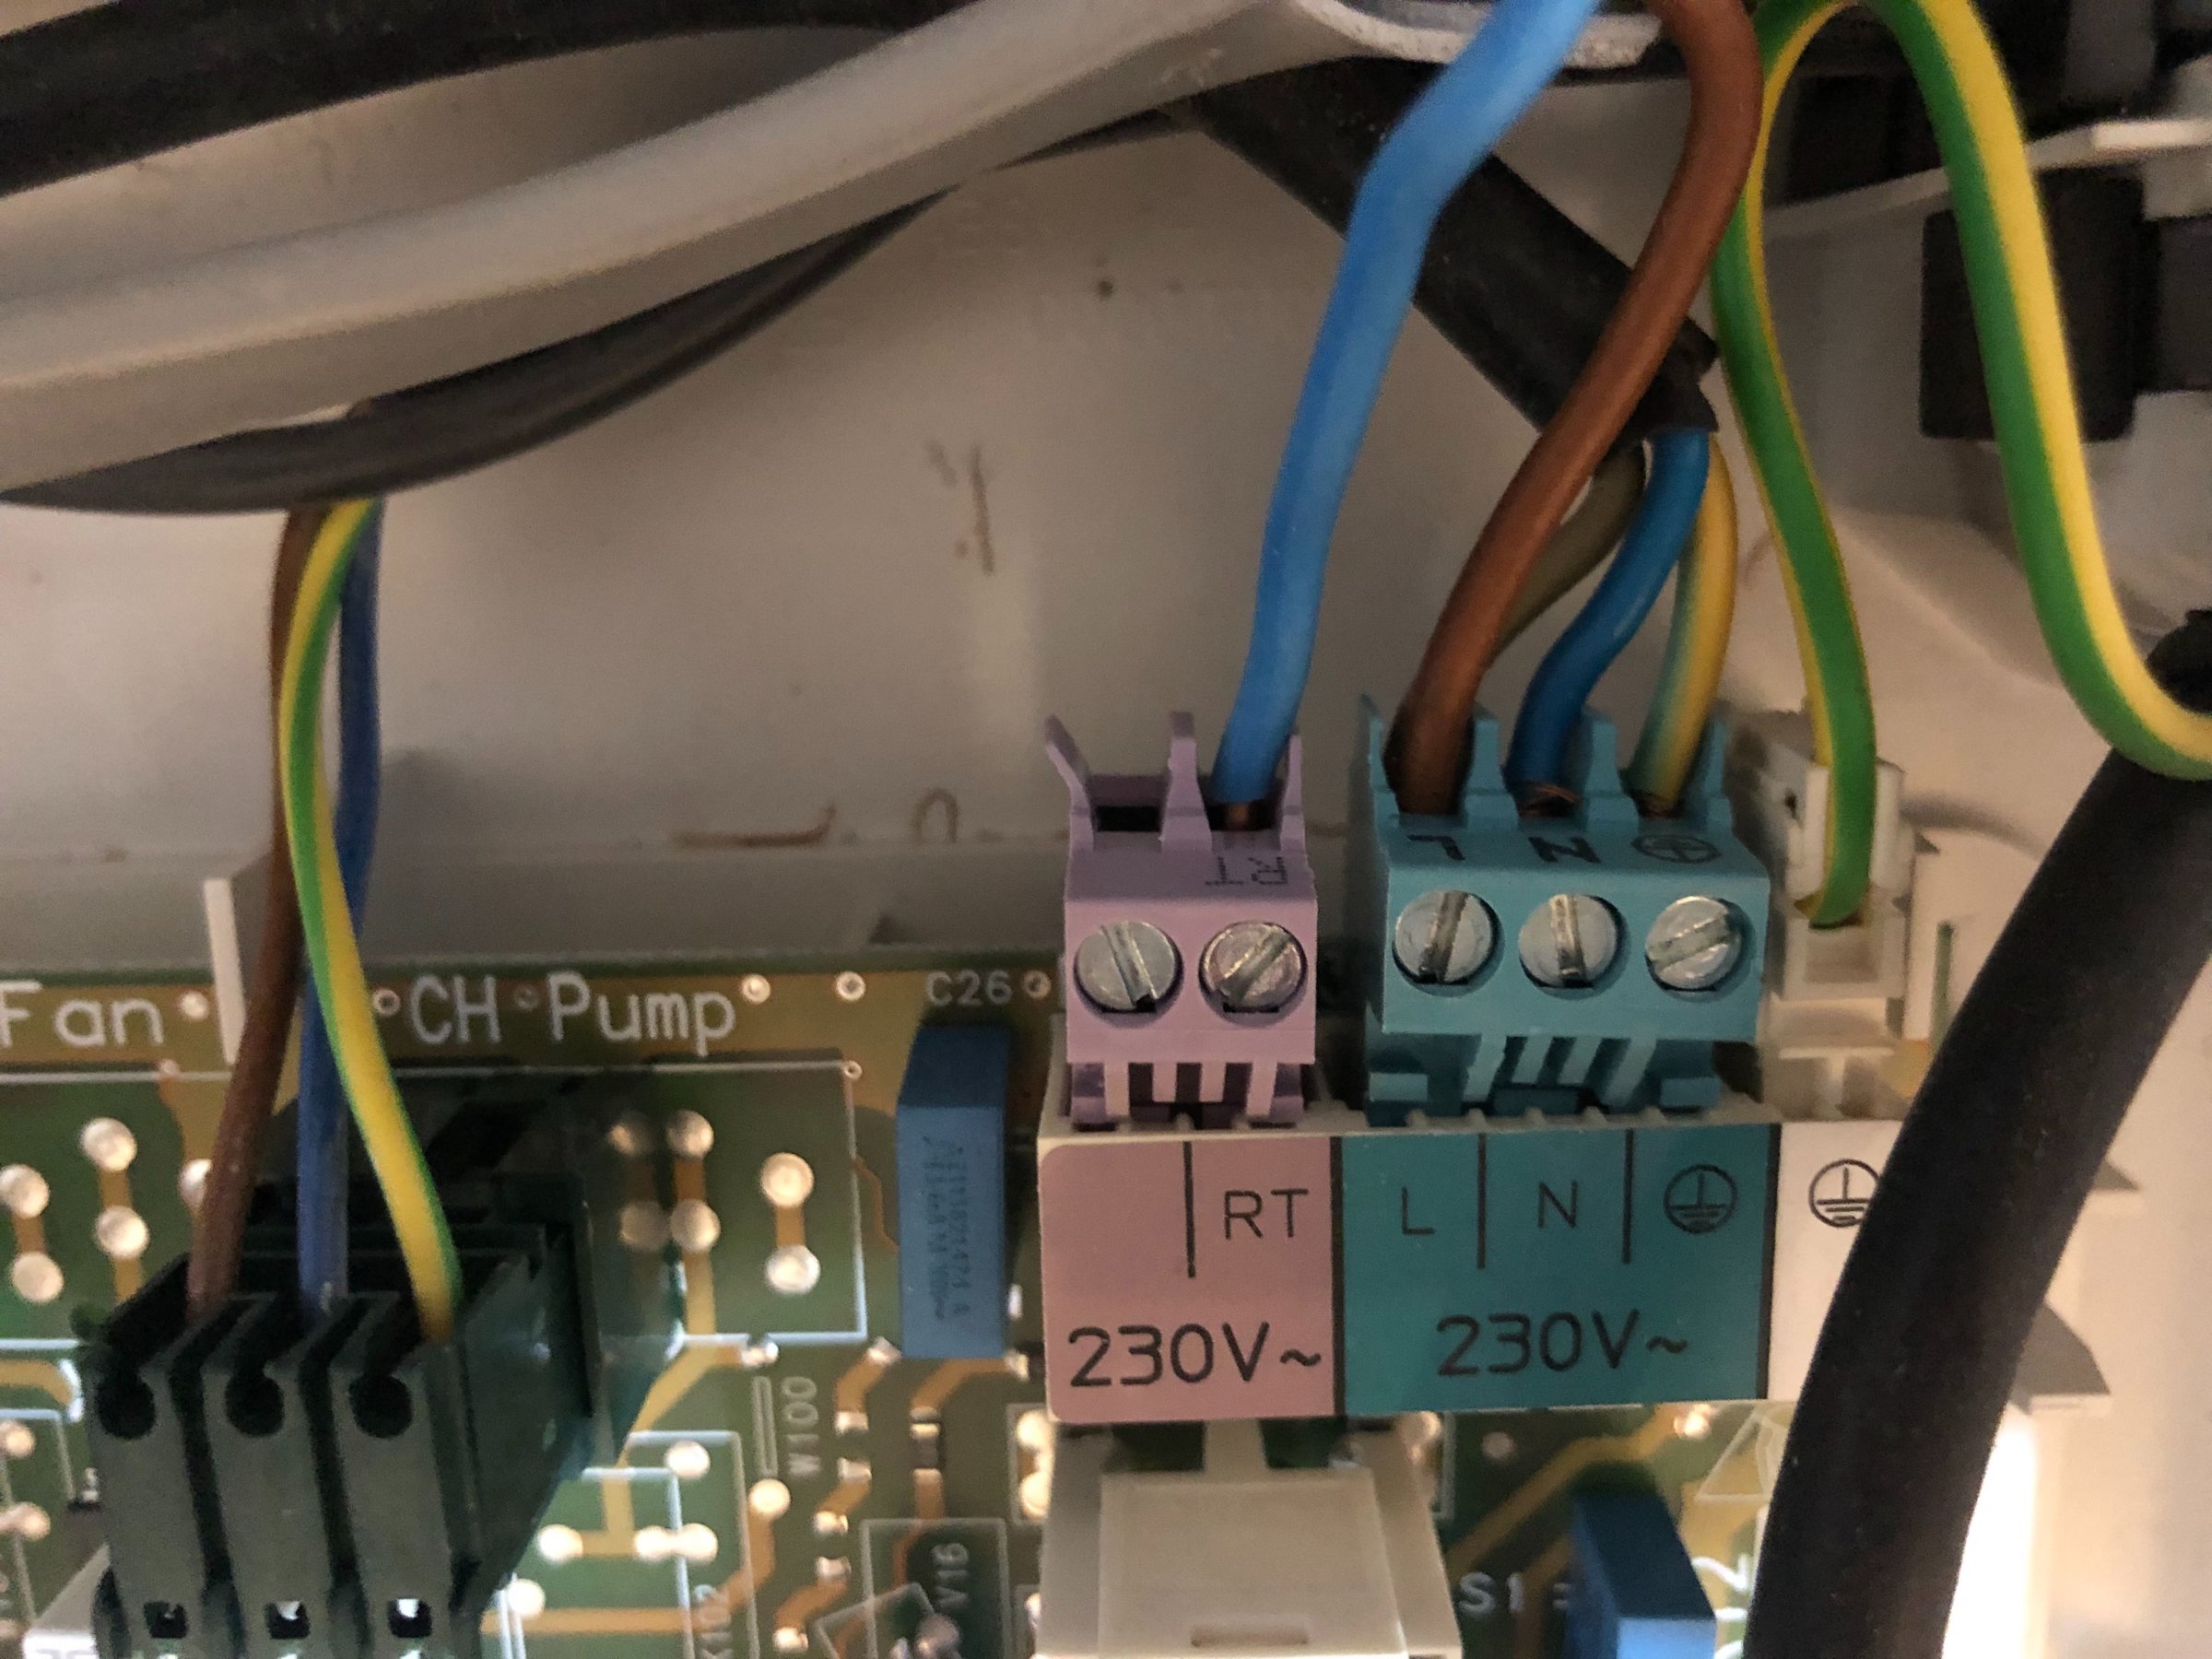
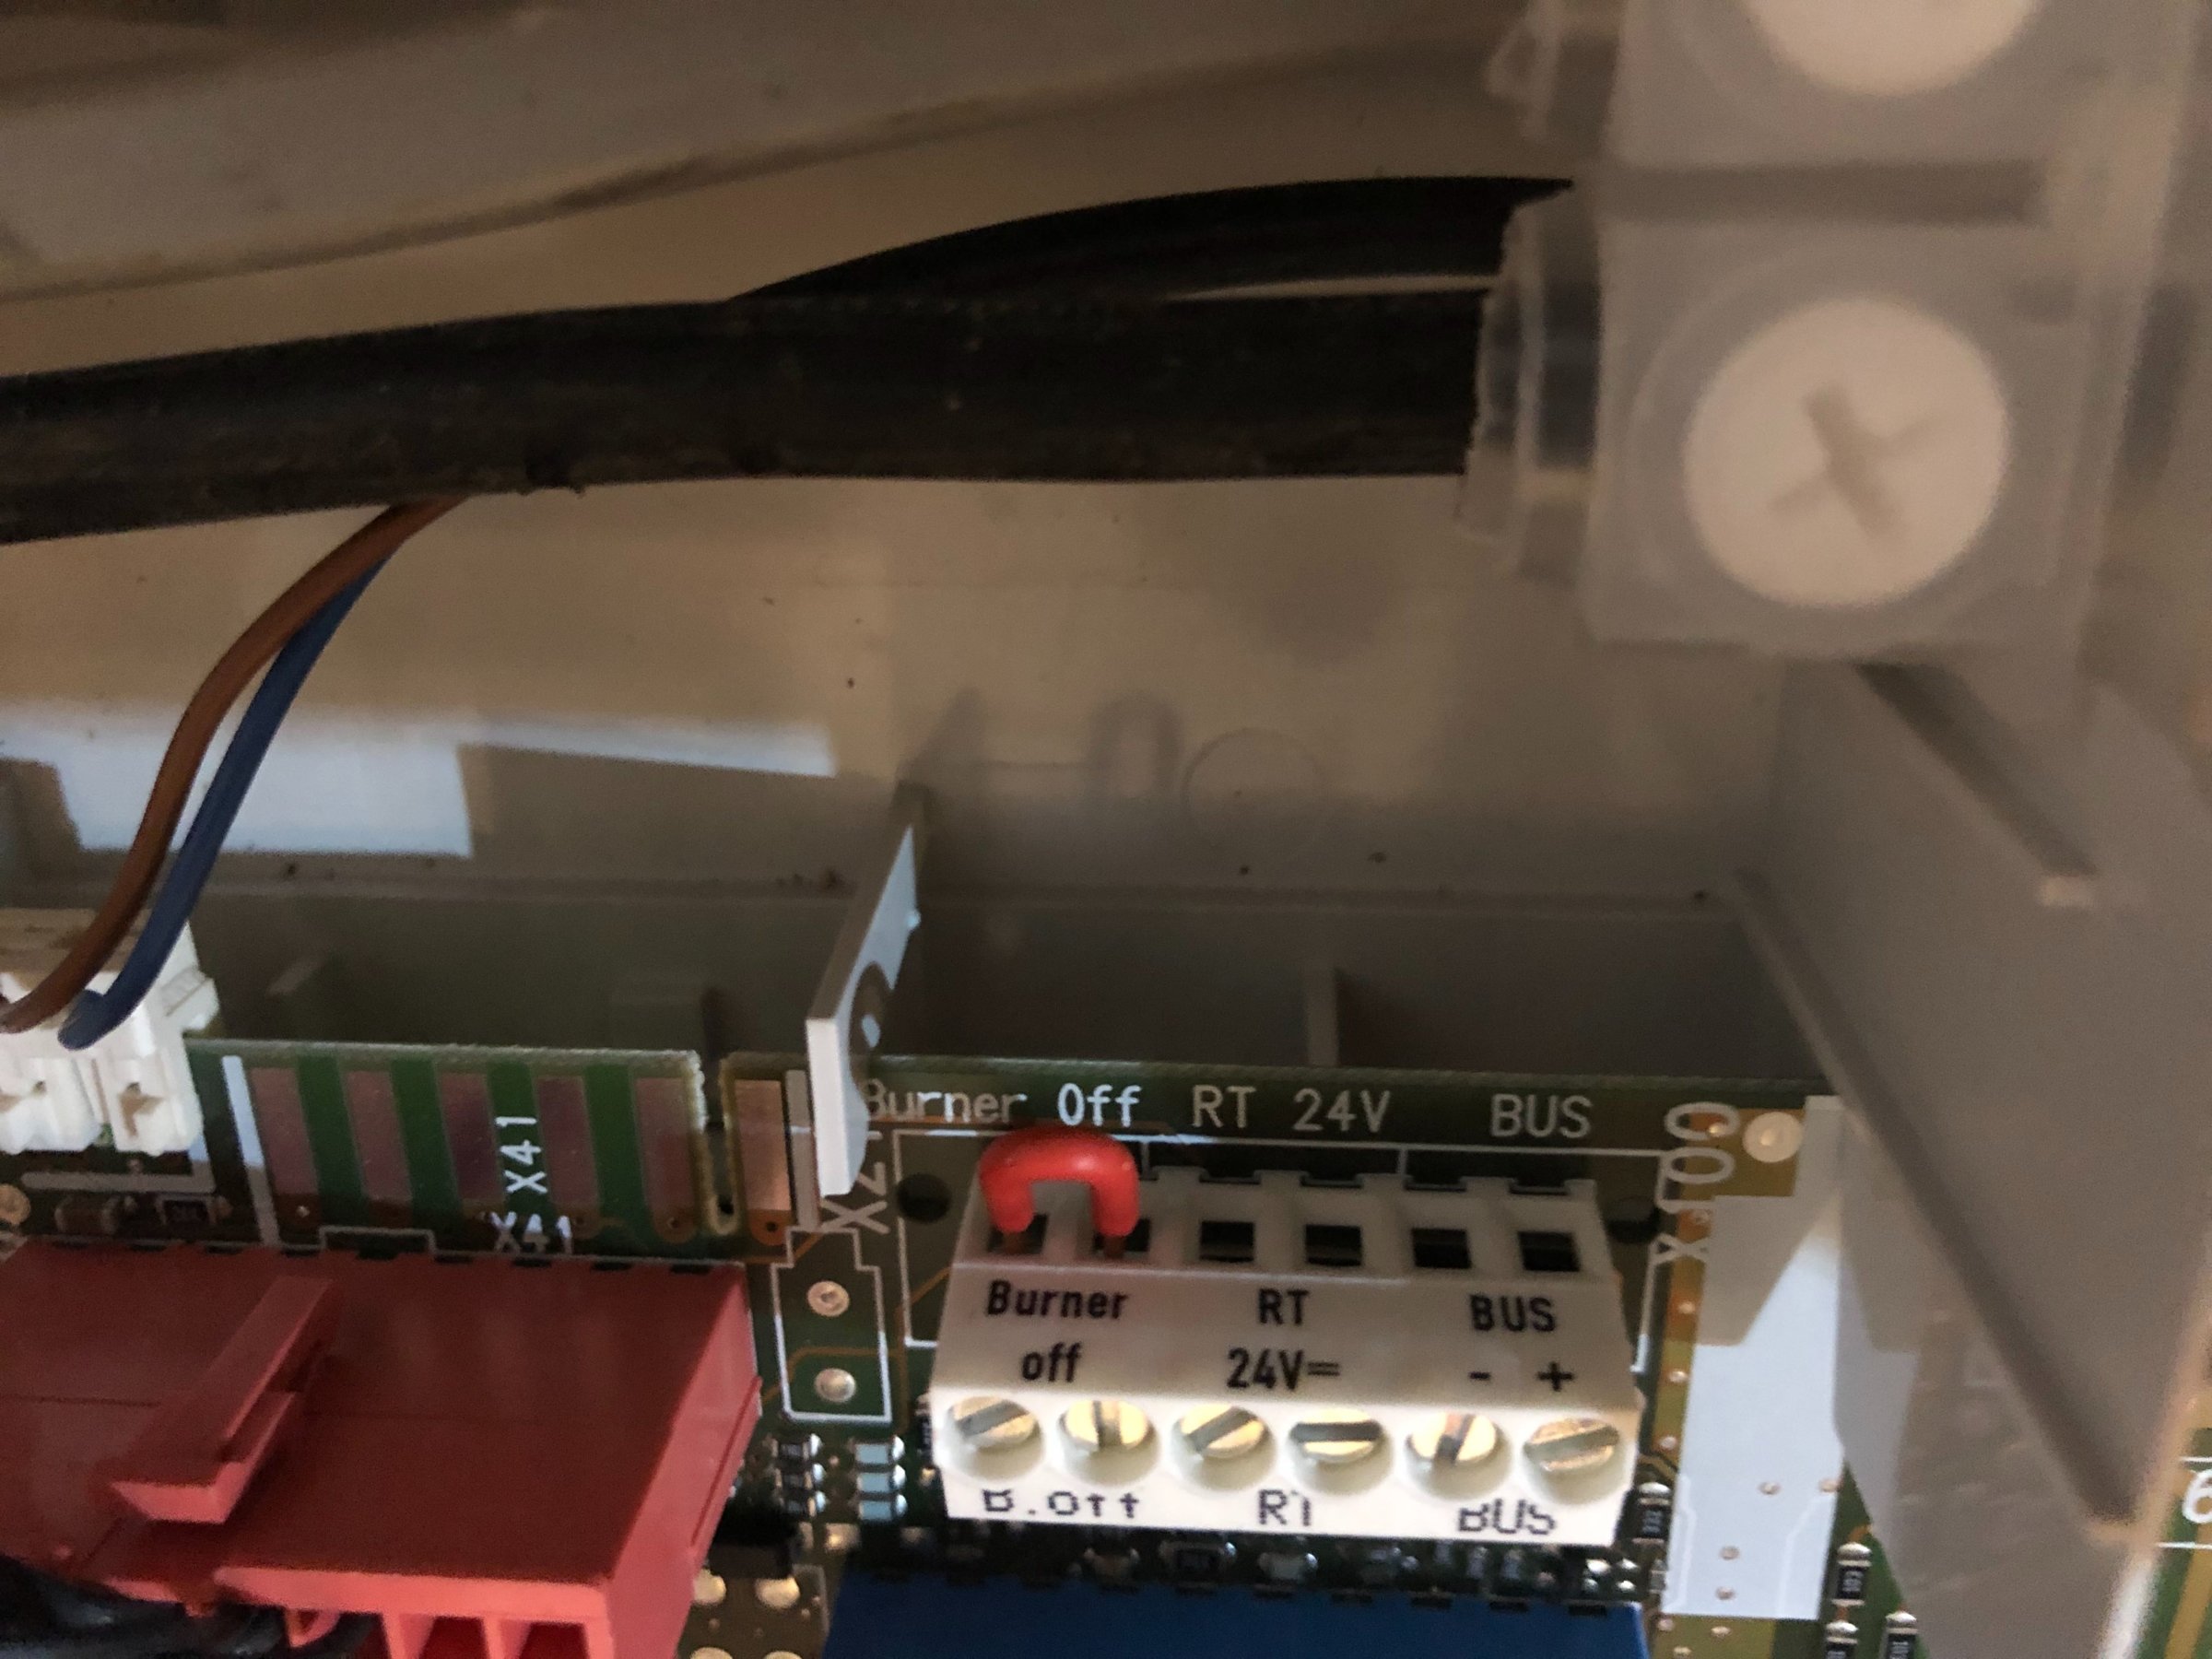
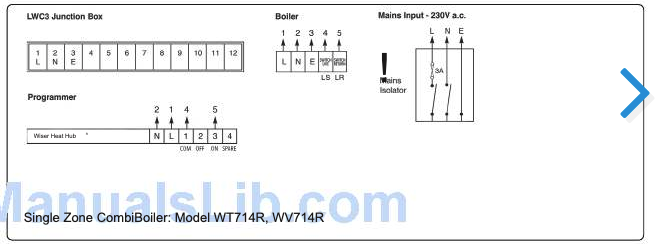
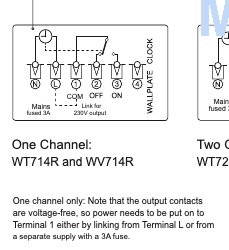
THIS WORKED PERFECTLY. Many thanks.If it is like the diagram I have posted, then wire the Hive N & L to the boilers N & L and Hive terminals 1 & 3 would go to the boiler terminals marked 24V DC room thermostat (RT 24) after the ubiquitous link is removed.
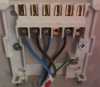
If you are in any doubt post a photo of your boiler's wiring terminals later and someone will be able to confirm.
Thanks for the update. All sorted was the common that wasn't connected. All sorted and working. Thanks once againHave you checked to make sure that you have the correct 'single channel version' of the Hive?
Do the wires at the Hive 1 and 3 go to the RT (room thermostat) terminals at the other end? It doesn't matter which way around.
View attachment 161056
Does the boiler have any in built time control? If so, it should be set to be permanently 'on' 24/7 otherwise it will interfere with the operation of the Hive.
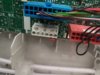
Is the Hive receiver powering up OK, showing that it is receiving 230V?
What happens when the manual button on the front of the receiver is pressed. Does the Central heating light come on?
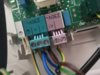
I'm not sure why you refer to it as a "Hive 3rd Gen" 3rd Gen is a term usually associated with the Nest Thermostat. However the backplate you show is Hive and not Nest.
Have you checked to make sure that you have the correct 'single channel version' of the Hive?
Do the wires at the Hive 1 and 3 go to the RT (room thermostat) terminals at the other end? It doesn't matter which way around.

If it is like the diagram I have posted, then wire the Hive N & L to the boilers N & L and Hive terminals 1 & 3 would go to the boiler terminals marked 24V DC room thermostat (RT 24) after the ubiquitous link is removed.
If you are in any doubt post a photo of your boiler's wiring terminals later and someone will be able to confirm.
If you need to find a tradesperson to get your job done, please try our local search below, or if you are doing it yourself you can find suppliers local to you.
Select the supplier or trade you require, enter your location to begin your search.
Are you a trade or supplier? You can create your listing free at DIYnot Local