You are using an out of date browser. It may not display this or other websites correctly.
You should upgrade or use an alternative browser.
You should upgrade or use an alternative browser.
Widening space for washing machine?
- Thread starter Keitai
- Start date
If both machines are to remain in situ , is the present one a Tumble drier ? I think the only answer is to cut away panel and shelves of small unit and fit in a Wine Rack to hide up the damage .
D
Deleted member 174758
And the door to the cupboard will have to go, too, as it is in all probability a vinyl wrapped doorYes, but probably very difficult to achieve the high level of finish that currently exists...
In order to resize the cabinet it will need to be pulled out, dismantled and many parts very carefully resized before reassembling and reinstalling (have you ever cut MFC?). It's the sort of job I'd do with a plunge saw and rails to minimise chipping out of the laminates - so not really something you can readily do with a cordless rip saw. @Bosswhite's suggestion of replacing the unit with a 150mm wine rack would be easier, but would then leave you with about a big gap which might look a bit odd
- Joined
- 17 Aug 2010
- Messages
- 4,742
- Reaction score
- 1,863
- Country

And when all that is done will the floor covering need replaced ?- it just takes a small gap to ruin the appearance. It is a job I would not tackle in someone else's house.And the door to the cupboard will have to go, too, as it is in all probability a vinyl wrapped door
In order to resize the cabinet it will need to be pulled out, dismantled and many parts very carefully resized before reassembling and reinstalling (have you ever cut MFC?). It's the sort of job I'd do with a plunge saw and rails to minimise chipping out of the laminates - so not really something you can readily do with a cordless rip saw. @Bosswhite's suggestion of replacing the unit with a 150mm wine rack would be easier, but would then leave you with about a big gap which might look a bit odd
and yes I have cut MFC, had reasonable results with a negative rake blade - but even then I wouldn't trust it, sods law would make one chip in the most visible place possible - and what do you mean by a plunge saw and rails?
Whats supporting the worktop on the LH side? Can it be removed and replaced by a batten?
D
Deleted member 174758
Well, true enough - but to my eye it looks as though the narrow unit has been installed on top of the laminate (it doesn't appear to have a plinth and the laminate appears to run right beneath the unit)And when all that is done will the floor covering need replaced ?
The question was actually aimed more at @Keitai (the OP) and yes, I was trying to hint at the difficulties you get with sawing the stuff without any chipping. Of course you can always orient any cuts so that any chip out would be in non-visible areas to hide any damage (e.g. undersides of shelves, top face of top on base units, etc)... I have cut MFC, had reasonable results with a negative rake blade - but even then I wouldn't trust it
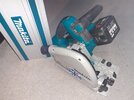
This sort of thing (my 4-1/2 year old Makita DSP600, hence it being dusty in places, with a 1m guide rail behind it):and what do you mean by a plunge saw and rails?

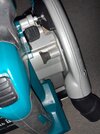
The Makita was the first saw on the market to incorporate a scoring facility whereby you line up the raiI edge to the cut line, depress the scoring button:

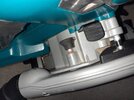
plunge and cut (the plunge depth is limited to between 1 and 2mm - making a clean scoring cut through the upper laminate), release the saw from plunge position, pull the button back out:

then plunge and make a second cut at full depth for the material. Festool, Mafell and Virutex subsequently copied this mechanism on their saws, but Makita had it first on their SP6000
Personally I have no qualms about "butchering" a client's MFC kitchen units if needs be
On saws which lack this you can reproduce the scoring effect by setting the cut depth to 1mm and making a backwards cut from the far end of the material, then making a normal forwards cut from the front to the back however, this really requires a decently accurate guide rail (or track) and a pair of cramps (to hold the track) to pull it off consistently
Last edited by a moderator:
Have you seen Keitai's extensive tool kit?

I'm not sure it stretches to plunge saws and the like.

I'm not sure it stretches to plunge saws and the like.
Are you absolutely sure it doesn't fit, most freestanding appliances are 596-597mm, maybe with bit of grunting it will go in.
D
Deleted member 174758
And perhaps a smidgeon of butter?...maybe with bit of grunting it will go in.
Central dividing board out, long support batten underneath at the back, and if necessary, left hand side support panel out with support underneath left hand edge of worktop.
Will probably reduce load bearing capacity of worktop but guaranteed to fit machine in.
Will probably reduce load bearing capacity of worktop but guaranteed to fit machine in.
Unless you have bought a cheap after market non Makita blade, then the function is defunct .plunge and cut (the plunge depth is limited to between 1 and 2mm - making a clean scoring cut through the upper laminate), release the saw from plunge position, pull the button back out:
Just remove panel to left of dryer and washing machine will fit.You may have to remove door under sink to allow fitting as the handle may clash.They reinstate.
D
Deleted member 174758
That's because you've bought a 160mm diameter blade - Makitas use 165mmUnless you have bought a cheap after market non Makita blade, then the function is defunct .
DIYnot Local
Staff member
If you need to find a tradesperson to get your job done, please try our local search below, or if you are doing it yourself you can find suppliers local to you.
Select the supplier or trade you require, enter your location to begin your search.
Please select a service and enter a location to continue...
Are you a trade or supplier? You can create your listing free at DIYnot Local
Similar threads
- Replies
- 6
- Views
- 2K
- Replies
- 5
- Views
- 3K
- Replies
- 2
- Views
- 2K
- Replies
- 3
- Views
- 8K
