

Some background information - Location is Miami, Florida and house is 8" concrete block exterior walls.
I have taken apart a window that I hired someone to install - a terrible job which I regret so I am reinstalling it myself.
It is an aluminum window with a top and bottom pane. Down here due to hurricane code we have a metal brace across the middle anchored into the concrete with four 1/4" Tapcon screws on each end.
Following the instructions I have installed the window buck all the way around very close to the window frame dimensions - square, plumb and level.
Since these windows do not have nailing fins they need to be screwed into the concrete blocks through the buck. I lifted the window into the rough opening and it barely fits through with a tiny bit of a nudge.
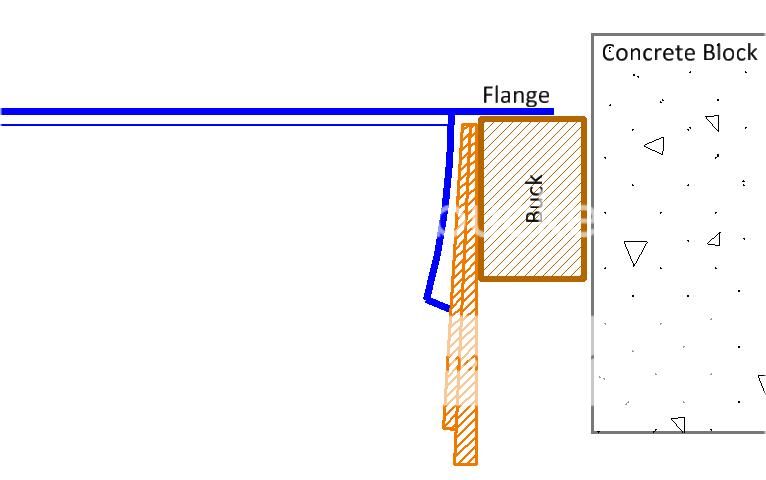
The edge of the window frame is more like a "channel", with an wider outside flange, and a narrower inside lip, as shown in the picture below.

Because of this "lip" which is about 1/4" wide, once I sit the window into the opening, it still has a 1/4" space all around between the inside edge (point D) of the window and the buck.
The installation instructions call for shimming between the edge and the buck before applying the Tapcon screws or the metal edge will be pulled into the buck.
Only problem is how do I shim it with the lip in the way? If I add another 1/4" all the way around the buck yes I will have the exact size I need, but I can no longer push the window in with the lip in the way.
If I try to insert shim under the screw hole, there is no gap to put the shim in unless I pry and mutilate the lip like this.

I have taken apart a window that I hired someone to install - a terrible job which I regret so I am reinstalling it myself.
It is an aluminum window with a top and bottom pane. Down here due to hurricane code we have a metal brace across the middle anchored into the concrete with four 1/4" Tapcon screws on each end.
Following the instructions I have installed the window buck all the way around very close to the window frame dimensions - square, plumb and level.
Since these windows do not have nailing fins they need to be screwed into the concrete blocks through the buck. I lifted the window into the rough opening and it barely fits through with a tiny bit of a nudge.
The edge of the window frame is more like a "channel", with an wider outside flange, and a narrower inside lip, as shown in the picture below.
Because of this "lip" which is about 1/4" wide, once I sit the window into the opening, it still has a 1/4" space all around between the inside edge (point D) of the window and the buck.
The installation instructions call for shimming between the edge and the buck before applying the Tapcon screws or the metal edge will be pulled into the buck.
Only problem is how do I shim it with the lip in the way? If I add another 1/4" all the way around the buck yes I will have the exact size I need, but I can no longer push the window in with the lip in the way.
If I try to insert shim under the screw hole, there is no gap to put the shim in unless I pry and mutilate the lip like this.
")