What's going on with these steels / cut roof

Joined
11 Apr 2006
Messages
2,157
Reaction score
201
Location
Berkshire
Country
United Kingdom
I passed by this site on the weekend and have some questions about the order that they seem to be doing things in:

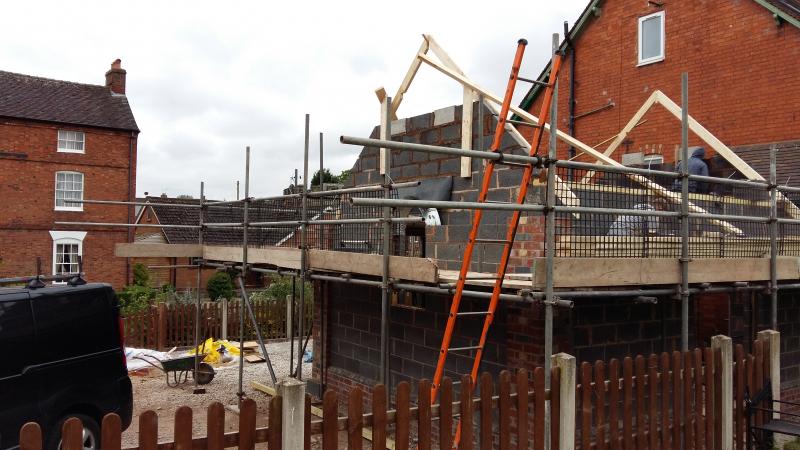
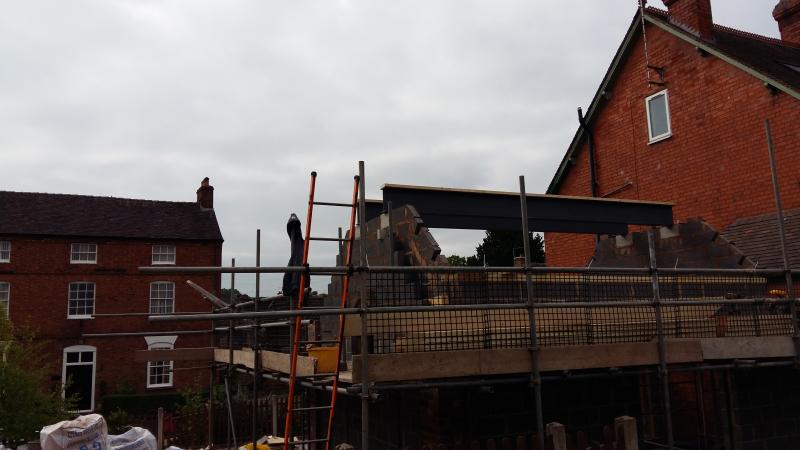
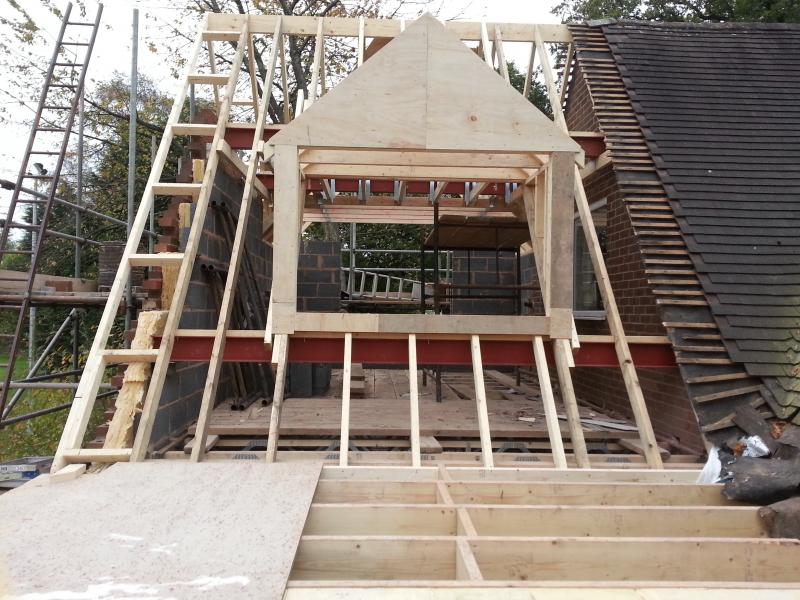
From what I can see, the steel frame has been supported on two steel columns and then they're building the gable walls up to meet them - is this normal? Why would you do this?

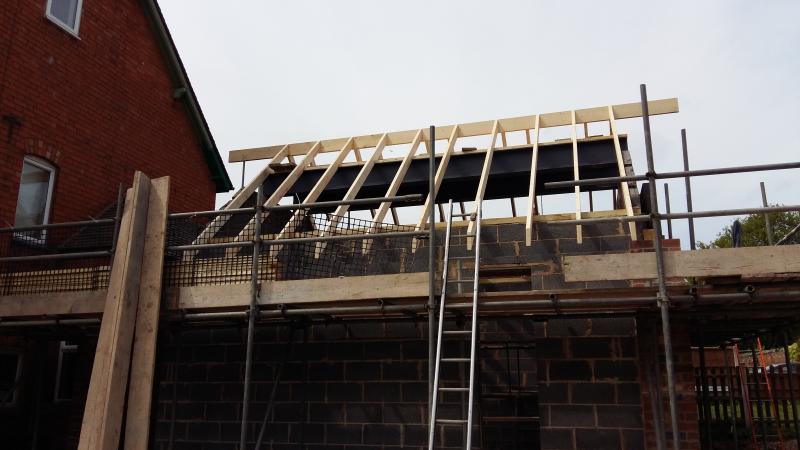
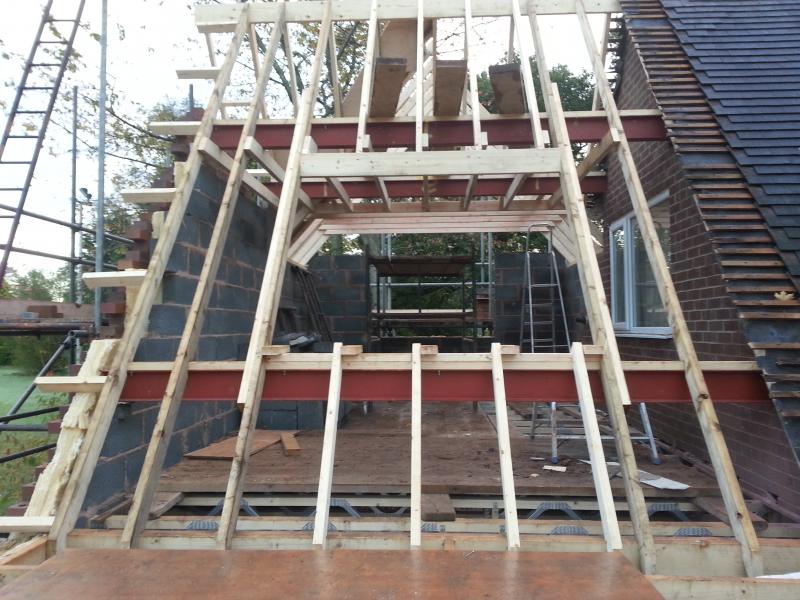
Does the answer relate to the way the gable ladder is constructed, in that in order to have a common rafter as a reference point to build up to, they needed the steels in, so the steels had to be temporarily suspended until the gables were in? I can see that that's a pretty efficient way of being able to scribe/cut your thermalites as you go, but is this the norm?

Cheers

Gary

 
I can't see a steel frame.

I can see steel ridge beams, which needed the blockwork to be built first to support them so that the roof could go on. The brickwork can be built later to follow the rafter line.
 
I'm not sure what you mean but we often build a roof with the purlins fitted to the rafters then build up the gable blockwork to meet the purlin.
On the job pictured below, we had to crane in the purlins first, obviously without the rafters obstructing the beam swing. However I set up the pad stones by offering up a pair of rafters complete with purlin birds mouths, as a guide. The clever bit was keeping the pad stones a wee it lower than they needed to be so that we had packing room to jack the beam into the birds mouths once all the rafters were in place.
 
It's the steel ridge beam that I meant. On the right hand gable the block work isn't built yet.
On the gable facing the front of the photo it's difficult to see exalty what's going on but again, the steel lintel has 200mm of clear air beneath it.
 
(Ps the photo is a thumb nail. There's a much better photo if you click it)
 
I've just noticed another vertical column holding the ridge beams up. It's just inside the window of the gable facing the camera... You can just see half of it.
 
That's what I'm thinking. That the house was built up to wall plate level, then the ridge beams have been hovered in place with the props that you see, then the roof is built, then the blockwork is built to support the steels, then the props removed. Isn't that strange?
 
More likely that the structure was built up to plates - floor joists put in - steels rested on the floor joists - roof structure partially built - steels offered up to ridge beam and propped.

Not strange at all. As I said earlier, it fairly common to build a roof carcass then offer the steels into place - i.e. slot them into the b/m crooks, then prop the steels whilst you build up under them.
 
What's the rationale for doing it, compare with building the blockwork for your three (say) gables, putting your steels in, then building the roof from there? Doesn't that mean there's less guessing involved?

What you've done in your build below seems more a more sensible approach to me - building the blockwork to take the steels, but short of the final roof line until you get the carcass to a point where you can see where the roof line is:

 
What's the rationale for doing it, compare with building the blockwork for your three (say) gables, putting your steels in, then building the roof from there? Doesn't that mean there's less guessing involved?

A lot depends upon access and the size (portability) of the steels. You would always pattern a pair of rafters first (complete with purlin b/m's) , offer these into place, then build your gable to suit the proposed position of the purlin.

Often (with timber purlins which are lighter) we build the roof structure, offer the purlin up to the rafters and fix it into the b/m's, then build the masonry up to the underside of the purlin. Once the masonry has hardened we then pack the purlin so as to take up the weight and sag.

With a steel fella you have to be a bit more savvy. You would set it in place but leave the padstones say 15mm low so that you can pack it into place once the rafters are in position. This is to allow for dodgy shaped rafters which may bow up or down or bow laterally. Once your purlin is in place you can use its straightness to true up your roof and line the purlins through along their length. We use our straightest rafter as a starter and then measure all the others off this
 
When you've got the crane and chippies booked for Monday, but the brickies didn't finish because they got rained off the week before, then you have to improvise.

That's building, and that's where experience comes into it.
 

If you need to find a tradesperson to get your job done, please try our local search below, or if you are doing it yourself you can find suppliers local to you.

Select the supplier or trade you require, enter your location to begin your search.


Are you a trade or supplier? You can create your listing free at DIYnot Local

 
Back
Top