Tado CH and HW install issue - no CH control

Joined
26 Feb 2022
Messages
5
Reaction score
1
Country
United Kingdom
Hello,

I've installed a Tado V3+ Heating & Hot Water Wireless Smart Thermostat Starter Kit for my partner and struggling to get it to work.

It's on a Y/S Plan setup. The old programmer was a Drayton Tempus 6, with a Honeywell RTS1 Thermostat. There's an Ideal FF-350 classic boiler providing CH and Hot Water to a Megoflo tank which has an electric immersion heater.


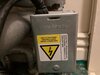
I've bridged the thermostat and fitted the new Tado controller/extension. I'm certain that the bridging is correct and pretty certain that the controller wiring is also correct:


However, I'm experiencing problems in getting the system to work correctly. The boiler is constantly cycling on and off every two minutes irrelevant to what is set on the app. Not sure if the Hot water control is working to schedule or constantly on when the CH is on, but we are getting hot water. The only way to stop the heating is to switch off the boiler.

Anyone got any advice on how to resolve this??
 
it is an S plan, are the motorised valves opening when selected to ?
 
By doing what and where?

Using the WAGO clips provided to bridge/isolate the existing connections for the old Honeywell Thermostat. When selecting different settings on the app, it is changing the lights and triggering the relays in the extension box, so very confident that the Thermostat is side is sorted.

it is an S plan, are the motorised valves opening when selected to ?

I'm guessing the valve is the box in the attached photo? How can I tell if the valves are activating, just by listening to it?
 

Attachments

  • WhatsApp Image 2022-02-26 at 12.00.19 PM (1).jpeg
    WhatsApp Image 2022-02-26 at 12.00.19 PM (1).jpeg
    63.5 KB · Views: 245
I'm guessing the valve is the box in the attached photo? How can I tell if the valves are activating, just by listening to it?
Yes, and an easy way is move the lever on the side when a demand has been set, resistive - not working, no resistance - likely working.

Which wires did you join at the thermostat end?
 
Yes, and an easy way is move the lever on the side when a demand has been set, resistive - not working, no resistance - likely working.

Which wires did you join at the thermostat end?

I joined the yellow and the red. I isolated the earths and the neutral.

I'll check the valve when I go round in a couple of days. If the valve is not activating what would be the solution (I believe that the valve was replaced last year so it isn't old and was working fine before I fitted the Tado).

I read a post on the Tado forum which is similar to my situation and they were advised to try moving the CH NO wire to the Parking P1 - would that be likely to have any effect? I was thinking of trying the CH NO to CH NC - not sure if that would do anything either.
 
No, parking terminals are just that, for parking unwanted terminals. Normally closed, is rarely used. It’s either a wiring fault or zone valve fault.
 
as it is an s plan would be unusual for both valves to fault at the same time, more likely you have wired something wrong, I would be checking the neutrals to the zone valve motors
 
Last edited:
Looking at my photo of the extension wiring it does look like one of the neutrals could be seated better, but pretty sure it's making contact. I'll sort that first and then look at the valves.
I have a wired Tado thermostat on the combi at my house and it works great. I could have saved myself a whole lot of bother on this new install by buying a wired Tado thermostat and setting the old programmer to CH always on. Nevermind!

Thanks for your help so far, I'll let you know how I get on.
 
I joined the yellow and the red.
If those are separated, does the heating work at all?

While connecting those wires should bypass the thermostat and allow the programmer/timer/TADO to control the heating, that is only true if the system was wired properly to start with.
Not impossible that some buffoon wired it so that the thermostat is the only control device and the old programmer did nothing.
Plenty of existing heating systems out there which have never worked properly from the day they were installed.

Another possibility is that due to incorrect wiring accompanied by blowing of fuse(s), the relay in the Tado has been fused into the closed position and is now destroyed.

moving the CH NO wire to the Parking P1 - would that be likely to have any effect?
It certainly would - the heating would never work.

CH NO to CH NC
That will activate the heating when it's not required, and when heat is needed it will be switched off.

The Tado and other 'smart' devices are just a set of switches, as in on and off. That is all, there are no magic signals, communications or anything else.
Just the same as the old programmer, mechanical timer or any other on/off switch. It's just shoving 230V AC onto a wire when heat is required.
 
You must use the tado app with the extract configuration you have replaced. Otherwise the controller is not set appropriately regardless of wiring.

The smart thermostats also by default do not control HW from the extension, you will need to re-program the thermostat or email support for them to do so. (Its in the "hidden" installer menu on the thermostat). These settings then take a few minutes to propagate to the devices.

Generally if you send them an email with the device serial numbers and the system layout you want, they will do it within a 48 hours.

Hmm, didn't even know about that menu and looking at this, it appears quite involved:

https://www.avforums.com/attachments/tado_installation-1-pdf.942301/

I notice that the jumpers on the old Drayton programmer are set to gravity fed and that the Tado installer menu has specific settings for gravity fed. Could this be the issue? On the 'standard' installer guide which I've been using, there are options for S/Y Plan (green lights on controller) and Gravity fed (blue lights on controller). For a start it was a lot of trial and error to get it to switch between these configurations. But also it didn't seem to work under blue (gravity fed) so I then tried green (S/Y Plan) as I knew the system was one of these and Tado said this was the default. I had also read a post somewhere that some of these old Drayton programmers were set to gravity fed even when they were not, as some kind of workaround.

This might sound like I've made a stupid decision of not sticking with gravity fed mode when the Drayton unit was set to this, but I tried everything in gravity fed mode and it seemed no better than S/Y Plan mode. I'll send an e-mail to Tado tomorrow and see what they come back with.
 
From memory, when you use the tado app to do a home "install" the app asks you for what you are replacing so it can do this programming for you. You can also do it manually with the installer menu, its a little bit of a faff.

I don't think the extension unit even bothers with HW control until you pair a tado thermostat to act as the "controller" for the hot water. e.g. you cant just have the extension do the hot water as far as I am aware, tado must have at least one thermostat being able to have the manual hot water control on the screen, which then enables it in the app properly aswell and then the extension will use its relay to actually control the hot water - but I dont think this is the issue here.

The document you linked isn't the best explanation: https://www.tado.com/all-en/professional-manuals are the pro installer explinations. Relay setting R02 is for when hot water relay is always closed when heating is requested. e.g. gravity mode. R03 is dual relay for separate heating and pump control where HW control is not possible. R01 is Standard single and dual relays where channel 1 relay usually does a zone and second relay does hot water.

As you can imagine this is problematic for people that want 2 wireless zone controllers and hot water control. Not possible on tado (at least one of the zones would need to use a thermostats relay since the extension unit only has 2 relays.).

At least the new extension has status LEDs, the old one is a single light that "breaths" to tell you whats going on and isnt very useful.
 
Last edited:
the jumpers on the old Drayton programmer are set to gravity fed
That was wrong.

A gravity system is for a boiler which relies on the temperature difference of the water for circulation.
Usually a cast iron floor standing affair with a hot water cylinder in a room directly above. With the boiler on, the hot water cylinder is heated. Radiators are operated by a separate pump which is switched on to circulate water to them. You can have hot water only, or hot water and radiators. Attempting to use radiators only on those does nothing as you just get the pump running and circulating cold water, the boiler doesn't heat anything unless HW is also selected.
 
As @flameport says gravity also called thermo syphon and it is how the DHW is heated, often called a C Plan, however there were three stages of C Plan, first was no control other than time for DHW, then a tank thermostat was added so in summer the boiler only fired up when required, and finally a motorised valve was added, so you could control DHW temperature in winter as well.

With every system you can have extras, I have a gravity system with two pumps and two motorised valves non which have anything to do with domestic hot water.

Looking at the picture of your programmer I thought there was a wire to the N/C DHW terminal which points to Y Plan, but seems the motorised valves are two port which points to S Plan. However with the Megaflow tank it could be the central heating is run from the heat store, although unlikely as normally the Megaflow is doubled up for that.

With a programmer and a thermostat the programmer turns on the boiler (DHW) or the thermostat (CH) and the thermostat stops the back feed between boiler and pump, when combined there are two methods, one is internal programming of the combined unit, this is done with Hive, so two outputs one to pump and one to boiler, the other is to use common terminal as output, as done with Nest C-Plan_basic_Nest.jpg either way some rewiring is required.

It seems likely however that you have a simple S Plan.

With the S Plan the boiler can't circulate any water until a valve is opened, so in theory to ensure valve is open before boiler is fired up, we have a micro switch in the valve to turn on boiler, so valve must open before boiler fires, in practice the micro switches can stick closed circuit so can keep boiler running with no valves open, this happened with father-in-law and it took out the pump as a result. With Y and C plan DHW can always be heated with thermo syphon so even if valve does not open there is some where for the heat to go.

The advantage of C Plan is the water can always heat the DHW so no need for the pump to be controlled by the boiler to continue pumping after boiler has switched off to cool it down, so C Plan is still used with oil boilers to allow them to cool after being switched off.

As already said the bleed levers on the motorised valves go slack when activated so you should be able to work out if the valve is operated
upload_2022-2-27_9-30-51.png
likely the old thermostat will be wired to the wiring centre, and you will need to bridge it out in wiring centre, I think you have a S plan, and reference to Y and C plans are a red herring.
 

If you need to find a tradesperson to get your job done, please try our local search below, or if you are doing it yourself you can find suppliers local to you.

Select the supplier or trade you require, enter your location to begin your search.


Are you a trade or supplier? You can create your listing free at DIYnot Local

 
Back
Top