- Joined
- 15 Jun 2019
- Messages
- 9
- Reaction score
- 0
- Country

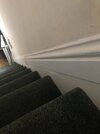
I recently had a carpenter do all new skirting. When i said i wanted the stair skirting replaced he said it was part of the stairs, but would add the new decorative skirting on top and renovate the old skirting so they blended in.
He hasn't done the renovation - just added the new skirting on top.
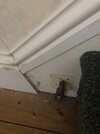
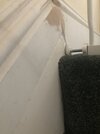
As you can see from the photos there's a recess at the bottom, but its flush at the top.
I can think of two options: fill the recess in with wood filler where needed and sand smooth, or rout out an even recess From top to bottom and cut out a new stair shaped skirt in mdf to put into the recess.
Anyone know which would be the better option? Or is there an option iv not thought of?
I feel like filler would not leave a perfect finish, but also routing out would be a lot of work.
Ignore the pipe - thats going.
He hasn't done the renovation - just added the new skirting on top.
As you can see from the photos there's a recess at the bottom, but its flush at the top.
I can think of two options: fill the recess in with wood filler where needed and sand smooth, or rout out an even recess From top to bottom and cut out a new stair shaped skirt in mdf to put into the recess.
Anyone know which would be the better option? Or is there an option iv not thought of?
I feel like filler would not leave a perfect finish, but also routing out would be a lot of work.
Ignore the pipe - thats going.