
Cutting porcelain slabs.

Joined
11 Sep 2007
Messages
43
Reaction score
0
Location
Yorkshire
Country
United Kingdom
Hi all.
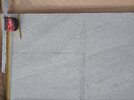
Not sure if this is the right forum but I've been trying to cut a corner out of a 20mm porcelain slab.
They are 900 x 600 and I've had 2 attempts to cut a corner out and both cracked. I'm leaving behind around 200mm on one edge and that is where they cracked along. I did everything right I think. I did a cut along the pencil mark then went over it with little weight on the grinder, just letting it's own weight do the cut. I also alternated doing each edge a bit at a time. But as I went below half way both my attempts cracked and broke off.
Will it help if I drill a small hole in the corner? Or should I do the longer cut all the way through first, or the shorter cut all the way through first? Or carry on a bit at a time on each cut? I'd rather not break anymore so any advice most welcome.
 

Attachments

  • IMG_20260724_175414.jpg
    IMG_20260724_175414.jpg
    731.8 KB · Views: 13
I know a tiler and he uses a wet cutter with rail disc cutter.
Hire one for the week
 
What are you resting the tile on as you cut it? What size angle grinder are you using.

I am wondering if you are leaving the end of the tile unsupported. You could use a sheet of ply to support the tile whilst you cut it. Once the diamond blades hits the ply it might smoke slightly but it won't damage the blade.
 
What are you resting the tile on as you cut it? What size angle grinder are you using.

I am wondering if you are leaving the end of the tile unsupported. You could use a sheet of ply to support the tile whilst you cut it. Once the diamond blades hits the ply it might smoke slightly but it won't damage the blade.
I've got it on a plastic workbench that is bigger than the tile so it fully supports it.

I started by cutting into the ends of each cut which I've read helps to relieve the stress of cutting. Then cutting a few millimetres at a time each pass on each side of the corner. I did the first scoring dry so I could see my pencil lines then sprayed water as I did each pass. I was only part way through each time and it cracked.

I've now read i should put a hole in the corner and fully do the cut that isnt cracking first, before doing any of the other cut. I'll try that tomorrow.

Is it better to rest the tile when cutting on something like compacted sand, or a more solid surface like the plastic bench I'm using?

I'm using a 115mm angle grinder with a newish blade that is described as being suitable for porcelain. It cuts very easily on straight cuts with no noticeable chipping. The blade didn't bind when the crack happened. It was cutting great and very neat when it suddenly went.

I've already cut out an almost identical sized corner on another slab and had no bother. Maybe I got lucky with that one.

Just watched this video and I'm wondering if it's worth doing the triangle cut and cutting from the back as well as the front.

 
Last edited:
I've got it on a plastic workbench that is bigger than the tile so it fully supports it.

I started by cutting into the ends of each cut which I've read helps to relieve the stress of cutting. Then cutting a few millimetres at a time each pass on each side of the corner. I did the first scoring dry so I could see my pencil lines then sprayed water as I did each pass. I was only part way through each time and it cracked.

I've now read i should put a hole in the corner and fully do the cut that isnt cracking first, before doing any of the other cut. I'll try that tomorrow.

Is it better to rest the tile when cutting on something like compacted sand, or a more solid surface like the plastic bench I'm using?

I'm using a 115mm angle grinder with a newish blade that is described as being suitable for porcelain. It cuts very easily on straight cuts with no noticeable chipping. The blade didn't bind when the crack happened. It was cutting great and very neat when it suddenly went.

I've already cut out an almost identical sized corner on another slab and had no bother. Maybe I got lucky with that one.

Just watched this video and I'm wondering if it's worth doing the triangle cut and cutting from the back as well as the front.


I have never cut 20mm porcelain but I have angle grinded hundreds of porcelain tiles.

I still think that 18mm ply might help. Perhaps the plastic worktop is flexing. Perhaps it if flexing as you push down with the angle grinder. How did you cut the tiles without cutting in to the plastic worktop?
 
I have never cut 20mm porcelain but I have angle grinded hundreds of porcelain tiles.

I still think that 18mm ply might help. Perhaps the plastic worktop is flexing. Perhaps it if flexing as you push down with the angle grinder. How did you cut the tiles without cutting in to the plastic worktop?
I had the cardboard that the tile was in underneath it. Doing straight cuts it was easy to feel the blade go through so cutting into the bench wasn't an issue.
Actually I've just thought the cuts that cracked I didn't have anything underneath.
I've got some pieces of MDF that are biggest than the tiles I'll try a piece of that under.
I'm wondering if clamping it to the MDF sheet would help? A rubber footed clamp each side of the line it cracked along. Might stop any vibration even though I couldn't feel any when they cracked.
 
That may well help. If I were to clamp it, I would clamp the other end of the tile to stop it moving (the MDF is flat so the cut end of the tile shouldn't- in theory, lift). I wouldn't want to introduce other forces (I hope that makes sense).

Please let us know how you get on. It may help other people in the future.

Best of luck
 

If you need to find a tradesperson to get your job done, please try our local search below, or if you are doing it yourself you can find suppliers local to you.

Select the supplier or trade you require, enter your location to begin your search.


Are you a trade or supplier? You can create your listing free at DIYnot Local

 
Back
Top