edit: pics updated..
hi, ...had some work done by a spark,
on the right side of chimney, he added a double socket to the existing dbl socket and also a wall light, I want to do the same( another double & wall light) to the left side of the chimney where there is also an existing dsocket
he seems to have used a different wiring method from what iv seen online...adding spurs etc, so I would like to make sure its safe before copying his work
right chimney(spark)
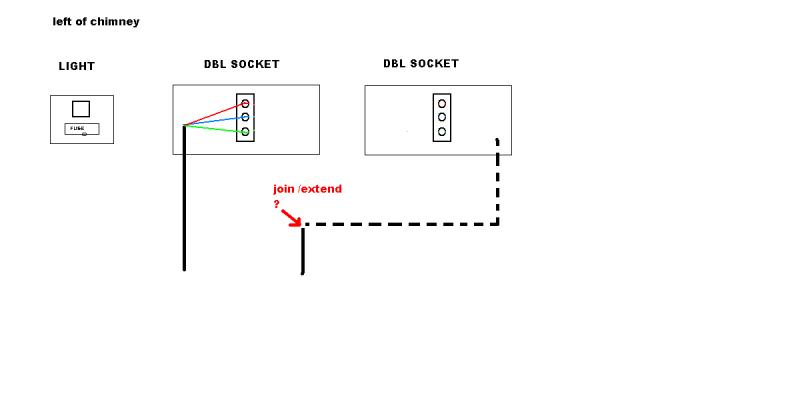
left chimney(to do)
also, & if It's safe to copy his work, the mains wire isn't long enough to stretch to a second box like in the top pic ...what would be the right way to do this
ps the brick in the wall is solid ..there are already cavity's for 2 doubles and a light switch...if more chiseling can be avoided the better
thanks,
hi, ...had some work done by a spark,
on the right side of chimney, he added a double socket to the existing dbl socket and also a wall light, I want to do the same( another double & wall light) to the left side of the chimney where there is also an existing dsocket
he seems to have used a different wiring method from what iv seen online...adding spurs etc, so I would like to make sure its safe before copying his work
right chimney(spark)

left chimney(to do)

also, & if It's safe to copy his work, the mains wire isn't long enough to stretch to a second box like in the top pic ...what would be the right way to do this
ps the brick in the wall is solid ..there are already cavity's for 2 doubles and a light switch...if more chiseling can be avoided the better
thanks,